7. Trident
This chapter introduces Trident, a “Trusted Information Exchange Toolkit” that facilitates the formation of trust groups, communication between members of trust groups, among other things. This chapter will walk through the installation and configuration of Trident and its prerequisites. How to use Trident and its various features will be covered in a different section.
7.1. Installing Trident manually
This section walks through the steps to use the tcli command line
interface to manually configure a Trident deployment with an initial trust
group, trust group administrator accounts and default mailing lists. These
would be the steps necessary to bootstrap a Trident system for use by a trusted
information sharing organization before starting to add regular trust group
members and moving into the standard vetting process for growing the trust
group.
Before logging in, you can get help on the top level command
options using tcli help:
$ tcli help
-=- Trident Help -=-

Welcome to the Trident menu system which is CLI command based.
If a given command is not in help menu the selected user does not have permissions for it.

Each section, items marked [SUB], has its own 'help' command.

The following commands are available on the root level:
 user                 [SUB]                User commands
 system               [SUB]                System commands
Logging in is done using the system subcommand block. To get help on that
subcommand block, add the subsection to the command:
$ tcli system help
Help for system
 login                <username> <password> <twofactor> Login
 logout                                    Logout
 whoami                                    Who Am I?
 get                  [SUB]                Get values from the system
The standard Trident administrator account is trident. Log in to it
with the secret password configured at the time the Trident packages
were installed and the initial tsetup command was used to
bootstrap the database.
$ tcli system login trident THE_ACTUAL_SECRET_PASSWORD
Login successful
Now that you are logged in, further subcommand blocks become
available. Use help (or just add the subcommand without
any options, in some cases) to see what new options are
available:
$ tcli system help
Help for system
 login                <username> <password> <twofactor> Login
 logout                                    Logout
 whoami                                    Who Am I?
 swapadmin                                 Swap from regular to sysadmin user
 get                  [SUB]                Get values from the system
To perform system administration actions, you must use swapadmin to
change the logged in user to be an administrator:
$ tcli system swapadmin
Now a SysAdmin user
Again, this opens up further options and/or subcommands. Look to see what those are:
$ tcli system help
Help for system
 report                                    Report system statistics
 login                <username> <password> <twofactor> Login
 logout                                    Logout
 whoami                                    Who Am I?
 swapadmin                                 Swap from regular to sysadmin user
 set                  [SUB]                Configure the system
 get                  [SUB]                Get values from the system
To get the current setting of system attributes, use tcli system get followed
by the attribute you want to get. Again, you can either add help to see the
list, or just use the command tcli system get to see the attributes:
$ tcli system get help
Help for system get
 name                                      System Name - Name of the System
 welcome_text                              Welcome Text - Welcome message shown on login page
 adminname                                 Name of the Admistrator(s) - Name of the Administrator, shown at bottom of the page
 adminemail                                Administrator email address - Email address of the Administrator, linked at the bottom of the page
 copyyears                                 Copyright Years - Years that copyright ownership is claimed
 email_domain                              Email Domain - The domain where emails are sourced from
 url_public                                Public URL - The full URL where Trident is exposed to the public, used for redirects and OAuth2 (Example: https://trident.example.net)
 people_domain                             People Domain - Domain used for people's email addresses and identifiers (Example: people.trident.example.net)
 cli_enabled                               CLI Enabled - Enable the Web CLI (/cli/)
 api_enabled                               API Enabled - Enable the API URL (/api/) thus allowing external tools to access the details provided they have authenticated
 oauth_enabled                             OAuth/OpenID Enabled - Enable OAuth 2.0 and OpenID Connect support (/oauth2/ + /.wellknown/webfinger)
 no_index                                  No Web Indexing - Disallow Web crawlers/robots from indexing and following links
 email_sig                                 Email Signature - Signature appended to mailinglist messages
 require2fa                                Require 2FA - Require Two Factor Authentication (2FA) for every Login
 pw_enforce                                Enforce Rules - When enabled the rules below are enforced on new passwords
 pw_length                                 Minimal Password Length (suggested: 12)
 pw_letters                                Minimum amount of Letters
 pw_uppers                                 Minimum amount of Uppercase characters
 pw_lowers                                 Minimum amount of Lowercase characters
 pw_numbers                                Minimum amount of Numbers
 pw_specials                               Minimum amount of Special characters
 sysadmin_restrict                         IP Restrict SysAdmin - When provided the given CIDR prefixes, space separated, are the only ones that allow the SysAdmin bit to be enabled. The SysAdmin b
it is dropped for SysAdmins coming from different prefixes. Note that 127.0.0.1 and ::1 are always included in the set, thus CLI access remains working.
 header_image                              Header Image - Image shown on the Welcome page
 logo_image                                Logo Image - Logo shown in the menu bar
 unknown_image                             Unknown Person Image - Logo shown for users who do not have an image set
 showversion                               Show Trident Version in UI - Show the Trident version in the UI, default enabled so that users can report issues to the Trident Project
 adminemailpublic                          Show Sysadmin E-mail to non-members - Show sysadmin e-mail in the public footer

$ tcli system get
Help for system get
 name                                      System Name - Name of the System
 welcome_text                              Welcome Text - Welcome message shown on login page
 adminname                                 Name of the Admistrator(s) - Name of the Administrator, shown at bottom of the page
 adminemail                                Administrator email address - Email address of the Administrator, linked at the bottom of the page
 . . .
 showversion                               Show Trident Version in UI - Show the Trident version in the UI, default enabled so that users can report issues to the Trident Project
 adminemailpublic                          Show Sysadmin E-mail to non-members - Show sysadmin e-mail in the public footer
On first installation, the database exists for Trident configuration, but many attributes are not yet configured. For example, if you try to see the administrator’s name and email address (which are shown in the main page of the web UI), do:
$ tcli system get adminname
unknown
$ tcli system get adminemail
unknown
There is a setting for the email domain, but it is just an example that will not actually work:
$ tcli system get email_domain
trident.example.net
You will need to set it to something that matches the SMTP Mail Transfer Agent (MTA), which is Postfix in this case:
$ tcli system set email_domain prisem.washington.edu
Updated email_domain
If you will be giving members a unique email address that is related
to the trust group, rather than their personal or work email address,
set the people_domain (which also initially comes with an
example default):
$ tcli system get people_domain
people.trident.example.net
$ tcli system set people_domain people.prisem.washington.edu
Updated people_domain
As with the email addresses, the public URL is configured with a non-working example:
$ tcli system get url_public
https://trident.example.net
Set it to match the routable public URL that people will use to get to the Trident portal from the Internet:
$ tcli system set url_public https://zion.prisem.washington.edu
Updated url_public
You may toggle whether the web UI shows the address of the administrator
to anyone who is not logged in (i.e., the general public) or does not.
The default setting is yes:
$ tcli system get adminemailpublic
yes
There is no initial welcome text shown on the web UI. Set it as appropriate:
$ tcli system get welcome_text
Not Configured
$ tcli system set welcome_text "DIMS"
Updated welcome_text
Set the descriptive name of the administrator and the email address used to communicate with them:
$ tcli system set adminname "DIMS Administrator"
Updated adminname
$ tcli system set adminemail trident@prisem.washington.edu
Updated adminemail
You must set the name of the deployed portal that will be presented in the web UI:
$ tcli system get name
Not Configured
$ tcli system set name "DIMS Trident"
Updated name
A trailer is placed on all outgoing email messages. This allows including reminders about information sharing policies or other disclaimers. By default, it reads as follows:
$ tcli system get email_sig
All message content remains the property of the author
and must not be forwarded or redistributed without explicit permission.
The main web page includes a “header” graphic image that spans the
browser window, allowing you to brand the portal. The file must be
loaded under the web_root directory for the Trident web app
to access it. By default, it is located in a subdirectory named
gfx/ with the name gm.jpg:
$ tcli system get header_image
/gfx/gm.jpg
$ sudo find / -type d -name gfx
/usr/share/trident/webroot/gfx
There is also a logo that is displayed by the web app:
$ tcli system get logo_image
/gfx/logo.png
You can either replace these files with content of your chosing, or you can add new files with different names and change the configuration settings. The directory with these files may contain other files, so check first:
$ ls /usr/share/trident/webroot/gfx
gm.jpg  info.png  invalid.png  logo.png  logo.svg  red_asterisk.png  search.png  unknown_person.jpg  valid.png  warning.png  xkcd_password_strength.png
If you wish to use your organization’s logo, you must first copy the file onto the system.
$ wget https://www.example.com/images/logo_24.png
--2017-01-13 12:41:27--  https://www.example.com/images/logo_24.png
Resolving www.example.com (www.example.com)... 93.184.216.34
Connecting to www.example.com (www.example.com)|93.184.216.34|:443... connected.
HTTP request sent, awaiting response... 200 OK
Length: 6220 (6.1K) [image/png]
Saving to: ‘logo_24.png’

logo_24.png                                       100%[============================================================================================================>]   6.07K  --.-KB/s   in 0s

2017-01-13 12:41:28 (125 MB/s) - ‘logo_24.png’ saved [6220/6220]
For this example, we will over-write the original logo with this new file:
$ sudo mv logo_24.png /usr/share/trident/webroot/gfx/logo.png
For the next example, we will add a new file for the header image, and change the variable to point to it:
$ sudo mv vagrant/our_org_header.png /usr/share/trident/webroot/gfx/
$ tcli system set header_image our_org_header.png
Updated header_image
$ ls -l /usr/share/trident/webroot/gfx/
total 580
-rwxr-xr-x 1 root    root     83078 Sep 12 07:37 gm.jpg
-rwxr-xr-x 1 root    root       580 Sep 12 07:37 info.png
-rwxr-xr-x 1 root    root       424 Sep 12 07:37 invalid.png
-rw-r--r-- 1 ansible ansible   6220 Dec  9  2015 logo.png
-rwxr-xr-x 1 root    root      2541 Sep 12 07:37 logo.svg
-rwxr-xr-x 1 root    root       223 Sep 12 07:37 red_asterisk.png
-rwxr-xr-x 1 root    root      3287 Sep 12 07:37 search.png
-rwxr-xr-x 1 root    root      2994 Sep 12 07:37 unknown_person.jpg
-rw-r--r-- 1 root    root     59250 Jan 13 12:53 usss-1.jpg
-rw-rw-r-- 1 ansible dims    309901 Jan 13 12:50 our_org_header.png
-rwxr-xr-x 1 root    root       389 Sep 12 07:37 valid.png
-rwxr-xr-x 1 root    root       616 Sep 12 07:37 warning.png
-rwxr-xr-x 1 root    root     93029 Sep 12 07:37 xkcd_password_strength.png
$ sudo chown root:root /usr/share/trident/webroot/gfx/*
$ sudo chmod 755 /usr/share/trident/webroot/gfx/*
$ ls -l /usr/share/trident/webroot/gfx/
total 580
-rwxr-xr-x 1 root root  83078 Sep 12 07:37 gm.jpg
-rwxr-xr-x 1 root root    580 Sep 12 07:37 info.png
-rwxr-xr-x 1 root root    424 Sep 12 07:37 invalid.png
-rwxr-xr-x 1 root root   6220 Dec  9  2015 logo.png
-rwxr-xr-x 1 root root   2541 Sep 12 07:37 logo.svg
-rwxr-xr-x 1 root root    223 Sep 12 07:37 red_asterisk.png
-rwxr-xr-x 1 root root   3287 Sep 12 07:37 search.png
-rwxr-xr-x 1 root root   2994 Sep 12 07:37 unknown_person.jpg
-rwxr-xr-x 1 root root 309901 Jan 13 12:50 our_org_header.png
-rwxr-xr-x 1 root root    389 Sep 12 07:37 valid.png
-rwxr-xr-x 1 root root    616 Sep 12 07:37 warning.png
-rwxr-xr-x 1 root root  93029 Sep 12 07:37 xkcd_password_strength.png
$ tcli system get header_image
/gfx/gm.jpg
$ tcli system set header_image /gfx/gm.jpg
Updated header_image
7.2. Installing Trident with Ansible
7.2.1. Prerequisites
The following items are necessary before installing Trident via Ansible:
- Access to and knowledge of how to use Ansible roles foundational to provisioning DIMS systems. More information about these roles can be found at tbd:tbd.
- Host(s) provisioned by Ansible roles foundational to DIMS systems. If using multiple hosts for a Trident instance, they must all be provisioned with these roles.
- Access to and knowledge of how to use Ansible roles specific to standing up a working Trident instance. More information about these roles can be found below, and information about how to provision a host with them can be found at tbd:tbd.
- Latest Trident package OR
- Access to the github.com Trident repo
7.2.2. Trident Artifact Build Process
Note
You must have access to the Trident github repo in order to build Debian packages. You must be able to clone the repo.
The following section outlines the steps needed to obtain/update the Trident source code and build a Debian package from it so that artifact is available for use by the Ansible role.
Prerequisite environment, per Trident documentation on their
DEV-1.3branch:- Debian Jessie
Prerequisite packages, per Trident documentation on their
DEV-1.3branch:- build-essential
- git
- pbuilder
Additional packages required, not listed in Trident’s documentation:
- dh-systemd
- golang-go
Also, not listed in Trident’s “build” requirements list, you must have Go installed. In Trident’s “runtime” requirements list, it says version 1.5.1+, so I have downloaded and installed version 1.5.1.
$ cd /usr/local
$ wget https://storage.googleapis.com/golang/go1.5.1.linux-amd64.tar.gz
$ sudo tar -xzf go1.5.5.linux-amd64.tar.gz
$ export PATH=$PATH:/usr/local/go/bin
If you have a copy of the Trident source code, determine which version it is by running
$ /usr/sbin/tridentd --version
Compare this with the latest version of Trident source code on GitHub. This is a little tricky because there is a mismatch of version numbers between the
debian/changelogfile in the repo and the tags and branch names.As of 13 Jul 2016, the official latest version is 1.2.0.
Go to the Trident repo on the master branch and go to the
debian/changelogfile. Here you will see the latest version.Update or retrieve source code from GitHub. This may be a
git cloneor agit pulldepending on how you are utilizing the Trident source (whether you need it once or if you are forking the repo).In root directory of Trident git source, build the package:
$ dpkg-buildpackage -b -uc -us
This will build the binaries one level up from the trident root dir.
Note
The
dpkg-buildpackagecommand will prompt you for your github username and password.Note
The
dpkg-buildpackagecommand runs a script calleddoc/deps.shwhich has a plethora for “cannot find package X” errors. This is a known issue, see https://github.com/bapril/trident/issues/371. It still seems to build a usable artifact...Place debian package wherever your Ansible role retrieves the package from for installation.
7.2.3. Provisioning Process
The following section outlines the steps needed to provision a host to stand up a working Trident instance.
- Ensure all variables for your deployment are set to the correct values. In particular, ensure any Trident-Postgres-Nginx-Postfix networking variables are set correctly.
- Apply the
postgresAnsible role. - Apply the
nginxAnsible role. - Apply the
postfixAnsible role. - Apply the
tridentAnsible role.
Once all the roles have been applied, on the nginx host, you should be able to browse to the proxy address and see the Trident homepage. Instructions about how to actually use Trident and set up trust groups, etc. can be found at tbd:tbd.
7.3. Trident Prerequisites
The following are prerequisites that must be installed and configured before installing and configuring Trident:
- PostgreSQL 9.1+ database
- Postfix
- Nginx
7.3.1. PostgreSQL Database
The Trident documentation gives instructions on how to set up both a local postgres server and Trident database, as well as a remote server and database. In this section, we will cover and expand the instructions for installing and configuring a remote postgres server and Trident database. See Trident’s documentation page for a local installation and configuration.
For remote postgres servers, the Trident documentation recommends temporarily
installing Trident on the remote target on which the postgres server will reside,
use Trident’s tsetup command to create and setup the Trident database, then
remove the Trident package.
Note
The “In a nutshell” steps in the “Remote Database” section of the Trident documentation seem to conflict with each other and the steps outlined in the “Local Database” section, which the location should really be the only thing that differentiates the two, I believe.
The following is my best interpretation, though it is just that, my interpretation. Notes and todo blocks follow at steps where I’m interpreting.
Essentially, the following steps would need to occur on the remote target:
Install PostgreSQL 9.1+
Create the system
tridentuserTemporarily install the Trident package(s).
Note
Here is a confusing bit from the “nutshell” steps in the “Remote Database” section of the Trident documentation. The first two steps are to “Create the
tridentuser” and “Create thetridentdatabase``, and the last step is “Runtsetupfrom the remote server as normal”. However,tsetupdoes those two things (user and database creation).The third step says “Provide permissions for the user to access the database”. I’m not sure which user this means–the PostgreSQL
tridentuser, I’m assuming. I’m also assuming that sincetsetupcreates atridentuser for PostgreSQL, it will also give it the appropriate permissions. (I’m assuming this because the “Local Database” section said nothing about giving anyone appropriate permissions.)Perhaps I’m confused, and this step means give the system
tridentuser appropriate permissions, but...I don’t think the system user would be accessing the database.Either way, for now, until this is clarified, I’m “skipping” this step because it seems to be taken care of by another “step”.
Properly configure the Trident daemon at
/etc/trident/trident.confThe following is a template of
trident.conf:####################################################### # Trident Configuration ####################################################### # Except for comment lines (anything starting with '#') # this file is in the JSON format, thus mind the commas # and quotes otherwise Trident can't properly use it. # # This file should only be readable by the Trident user ####################################################### { # Where the dbschemas, webroot and templates are located "file_root": "/usr/share/trident/", # Where variable files are stored "var_root": "/var/lib/trident/", # Crypto Keys for JWT (in directory relative to config dir) "jwt_key_prv": "jwt.prv", "jwt_key_pub": "jwt.pub", ######################################### # PostgreSQL Database details ######################################### # PSQL local unix socket # Uses PSQL peer authentication # This works out of the box on Debian ######################################### "db_host": "/var/run/postgresql/", #"db_port": "5432", #"db_name": "trident", #"db_user": "trident", #"db_pass": "trident", "db_port": "{{ tridentDBPort }}", "db_name": "{{ tridentDBName }}", "db_user": "{{ tridentDBUser }}", "db_pass": "{{ tridentDBPass }}", # The Nodename is used to identify this instance # in a cluster of hosts. The name must be unique. # # The name is also used as a hostname for SMTP EHLO/HELO # messages and thus must be a FQDN. # # empty => system configured (typically /etc/hostname) "nodename": "{{ tridentFQDN }}", # On which HTTP port to run our Trident Daemon "http_port": "{{ tridentHTTPPort }}" }
Properly configure the postgres
pg_hba.conffile (location variable)The following is a template of
pg_hba.conf:# PostgreSQL Client Authentication Configuration File # =================================================== # # Refer to the "Client Authentication" section in the PostgreSQL # documentation for a complete description of this file. A short # synopsis follows. # # This file controls: which hosts are allowed to connect, how clients # are authenticated, which PostgreSQL user names they can use, which # databases they can access. Records take one of these forms: # # local DATABASE USER METHOD [OPTIONS] # host DATABASE USER ADDRESS METHOD [OPTIONS] # hostssl DATABASE USER ADDRESS METHOD [OPTIONS] # hostnossl DATABASE USER ADDRESS METHOD [OPTIONS] # # (The uppercase items must be replaced by actual values.) # # The first field is the connection type: "local" is a Unix-domain # socket, "host" is either a plain or SSL-encrypted TCP/IP socket, # "hostssl" is an SSL-encrypted TCP/IP socket, and "hostnossl" is a # plain TCP/IP socket. # # DATABASE can be "all", "sameuser", "samerole", "replication", a # database name, or a comma-separated list thereof. The "all" # keyword does not match "replication". Access to replication # must be enabled in a separate record (see example below). # # USER can be "all", a user name, a group name prefixed with "+", or a # comma-separated list thereof. In both the DATABASE and USER fields # you can also write a file name prefixed with "@" to include names # from a separate file. # # ADDRESS specifies the set of hosts the record matches. It can be a # host name, or it is made up of an IP address and a CIDR mask that is # an integer (between 0 and 32 (IPv4) or 128 (IPv6) inclusive) that # specifies the number of significant bits in the mask. A host name # that starts with a dot (.) matches a suffix of the actual host name. # Alternatively, you can write an IP address and netmask in separate # columns to specify the set of hosts. Instead of a CIDR-address, you # can write "samehost" to match any of the server's own IP addresses, # or "samenet" to match any address in any subnet that the server is # directly connected to. # # METHOD can be "trust", "reject", "md5", "password", "gss", "sspi", # "krb5", "ident", "peer", "pam", "ldap", "radius" or "cert". Note that # "password" sends passwords in clear text; "md5" is preferred since # it sends encrypted passwords. # # OPTIONS are a set of options for the authentication in the format # NAME=VALUE. The available options depend on the different # authentication methods -- refer to the "Client Authentication" # section in the documentation for a list of which options are # available for which authentication methods. # # Database and user names containing spaces, commas, quotes and other # special characters must be quoted. Quoting one of the keywords # "all", "sameuser", "samerole" or "replication" makes the name lose # its special character, and just match a database or username with # that name. # # This file is read on server startup and when the postmaster receives # a SIGHUP signal. If you edit the file on a running system, you have # to SIGHUP the postmaster for the changes to take effect. You can # use "pg_ctl reload" to do that. # Put your actual configuration here # ---------------------------------- # # If you want to allow non-local connections, you need to add more # "host" records. In that case you will also need to make PostgreSQL # listen on a non-local interface via the listen_addresses # configuration parameter, or via the -i or -h command line switches. # CAUTION: Configuring the system for local "trust" authentication # allows any local user to connect as any PostgreSQL user, including # the database superuser. If you do not trust all your local users, # use another authentication method. # TYPE DATABASE USER ADDRESS METHOD # "local" is for Unix domain socket connections only local all all trust # IPv4 local connections: host all all 127.0.0.1/32 trust # IPv6 local connections: host all all ::1/128 trust # Allow replication connections from localhost, by a user with the # replication privilege. #local replication postgres trust #host replication postgres 127.0.0.1/32 trust #host replication postgres ::1/128 trust # Allow connections to trident db from remote user via md5 host {{ tridentDBName }} {{ tridentDBUser }} 0.0.0.0/0 md5
Ensure reachability of the database port defined in
/etc/trident/trident.confCreate the Trident database using the following command:
su - postgres -c "/usr/sbin/tsetup setup_dbRemove the Trident packages
7.3.2. Nginx Webserver
Install Nginx
Properly configure
/etc/nginx/conf.d/trident.confThe following is a template of the nginx
trident.conffor a production system:# The Trident Daemon Upstream include /etc/trident/nginx/trident-upstream.inc; # Redirect all HTTP (80) traffic to HTTPS (443) # Trident should only be exposed over HTTPS server { listen {{ nginxTridentHTTPPort }} default_server; listen [::]:{{ nginxTridentHTTPPort }} default_server; server_name _default_; rewrite ^ https://$host$request_uri permanent; } # The HTTPS server that exposed Trident server { listen {{ nginxTridentHTTPSPort }} ssl; listen [::]:{{ nginxTridentHTTPSPort }} ssl; server_name {{ tridentFQDN }}; # May need to variablize these... ssl_certificate trident.crt; ssl_certificate_key trident.key; ssl_prefer_server_ciphers on; # And other SSL options, recommended: # - ssl_dhparam # - ssl_protocols # - ssl_ciphers # See https://cipherli.st/ for details # STS header add_header Strict-Transport-Security "max-age=31536001"; # HTTP Key Pinning add_header Public-Key-Pins "Public-Key-Pins: max-age=5184000; pin-sha256=\"...\"" access_log /var/log/nginx/trident-access.log; # Include the config for making Trident work include /etc/trident/nginx/trident-server.inc; }The following is a template of the nginx
trident.conffor a development system:# The Trident Daemon Upstream include /etc/trident/nginx/trident-upstream.inc; # The HTTP server that exposed Trident - development only server { listen {{ nginxTridentHTTPPort }} default_server; listen [::]:{{ nginxTridentHTTPPort }} default_server; server_name _default_; access_log /var/log/nginx/trident-access.log; # Include the config for making Trident work include /etc/trident/nginx/trident-server.inc; }Note
With this config, Nginx will only listen for the Trident daemon on an HTTP port (no HTTPS).
Properly configure Trident Daemon Upstream at
/etc/trident/nginx/trident-upstream.incThe following is a template of
trident-upstream.inc:upstream trident-daemon { server {{ tridentDBIP }}:{{ tridentDBPort }}; }Properly configure the Trident server at
/etc/trident/nginx/trident-server.incThe following is an example of
trident-server.inc:# Our webroot (contains static, non-sensitive files, source if public ;) root /usr/share/trident/webroot/; ###################################################### # Static files ###################################################### location /css/ { } location /favicon.ico { } location /gfx/ { } location /js/ { } ###################################################### # Forward all requests to the Trident Daemon ###################################################### location / { client_max_body_size 0; proxy_set_header Host $host; proxy_http_version 1.1; proxy_pass http://trident-daemon; }
7.3.3. Postfix
Install Postfix
Know the answers to the following:
- What type of mail configuration
- The Fully Qualified Domain Name (FQDN) of your server
Properly configure Postfix’s main config file at
/etc/postfix/main.cfThe following is a template of
main.cf:# See /usr/share/postfix/main.cf.dist for a commented, more complete version # Debian specific: Specifying a file name will cause the first # line of that file to be used as the name. The Debian default # is /etc/mailname. #myorigin = /etc/mailname smtpd_banner = $myhostname ESMTP $mail_name (Ubuntu) biff = no # appending .domain is the MUA's job. append_dot_mydomain = no # Uncomment the next line to generate "delayed mail" warnings #delay_warning_time = 4h readme_directory = no # TLS parameters smtpd_tls_cert_file=/etc/ssl/certs/ssl-cert-snakeoil.pem smtpd_tls_key_file=/etc/ssl/private/ssl-cert-snakeoil.key smtpd_use_tls=yes smtpd_tls_session_cache_database = btree:${data_directory}/smtpd_scache smtp_tls_session_cache_database = btree:${data_directory}/smtp_scache # See /usr/share/doc/postfix/TLS_README.gz in the postfix-doc package for # information on enabling SSL in the smtp client. smtpd_relay_restrictions = permit_mynetworks permit_sasl_authenticated defer_unauth_destination #myhostname = dimsdev2.prisem.washington.edu myhostname = {{ postfixHostname }} alias_maps = hash:/etc/aliases alias_database = hash:/etc/aliases myorigin = /etc/mailname #mydestination = dimsdev2.prisem.washington.edu, localhost.prisem.washington.edu, , localhost mydestination = {{ postfixDestinations }} relayhost = mynetworks = 127.0.0.0/8 [::ffff:127.0.0.0]/104 [::1]/128 mailbox_size_limit = 0 recipient_delimiter = + inet_interfaces = all inet_protocols = allProperly configure
/etc/aliasesThe following is a template of
aliases:# See man 5 aliases for format postmaster: root {{ tridentHandlerName }}: "|/usr/sbin/trident-wrapper"Might have to configure Postfix’s master config file at
/etc/postfix/master.cfThe following is an example of
master.cf:# # Postfix master process configuration file. For details on the format # of the file, see the master(5) manual page (command: "man 5 master" or # on-line: http://www.postfix.org/master.5.html). # # Do not forget to execute "postfix reload" after editing this file. # # ========================================================================== # service type private unpriv chroot wakeup maxproc command + args # (yes) (yes) (yes) (never) (100) # ========================================================================== smtp inet n - - - - smtpd #smtp inet n - - - 1 postscreen #smtpd pass - - - - - smtpd #dnsblog unix - - - - 0 dnsblog #tlsproxy unix - - - - 0 tlsproxy #submission inet n - - - - smtpd # -o syslog_name=postfix/submission # -o smtpd_tls_security_level=encrypt # -o smtpd_sasl_auth_enable=yes # -o smtpd_reject_unlisted_recipient=no # -o smtpd_client_restrictions=$mua_client_restrictions # -o smtpd_helo_restrictions=$mua_helo_restrictions # -o smtpd_sender_restrictions=$mua_sender_restrictions # -o smtpd_recipient_restrictions= # -o smtpd_relay_restrictions=permit_sasl_authenticated,reject # -o milter_macro_daemon_name=ORIGINATING #smtps inet n - - - - smtpd # -o syslog_name=postfix/smtps # -o smtpd_tls_wrappermode=yes # -o smtpd_sasl_auth_enable=yes # -o smtpd_reject_unlisted_recipient=no # -o smtpd_client_restrictions=$mua_client_restrictions # -o smtpd_helo_restrictions=$mua_helo_restrictions # -o smtpd_sender_restrictions=$mua_sender_restrictions # -o smtpd_recipient_restrictions= # -o smtpd_relay_restrictions=permit_sasl_authenticated,reject # -o milter_macro_daemon_name=ORIGINATING #628 inet n - - - - qmqpd pickup unix n - - 60 1 pickup cleanup unix n - - - 0 cleanup qmgr unix n - n 300 1 qmgr #qmgr unix n - n 300 1 oqmgr tlsmgr unix - - - 1000? 1 tlsmgr rewrite unix - - - - - trivial-rewrite bounce unix - - - - 0 bounce defer unix - - - - 0 bounce trace unix - - - - 0 bounce verify unix - - - - 1 verify flush unix n - - 1000? 0 flush proxymap unix - - n - - proxymap proxywrite unix - - n - 1 proxymap smtp unix - - - - - smtp relay unix - - - - - smtp # -o smtp_helo_timeout=5 -o smtp_connect_timeout=5 showq unix n - - - - showq error unix - - - - - error retry unix - - - - - error discard unix - - - - - discard local unix - n n - - local virtual unix - n n - - virtual lmtp unix - - - - - lmtp anvil unix - - - - 1 anvil scache unix - - - - 1 scache # # ==================================================================== # Interfaces to non-Postfix software. Be sure to examine the manual # pages of the non-Postfix software to find out what options it wants. # # Many of the following services use the Postfix pipe(8) delivery # agent. See the pipe(8) man page for information about ${recipient} # and other message envelope options. # ==================================================================== # # maildrop. See the Postfix MAILDROP_README file for details. # Also specify in main.cf: maildrop_destination_recipient_limit=1 # maildrop unix - n n - - pipe flags=DRhu user=vmail argv=/usr/bin/maildrop -d ${recipient} # # ==================================================================== # # Recent Cyrus versions can use the existing "lmtp" master.cf entry. # # Specify in cyrus.conf: # lmtp cmd="lmtpd -a" listen="localhost:lmtp" proto=tcp4 # # Specify in main.cf one or more of the following: # mailbox_transport = lmtp:inet:localhost # virtual_transport = lmtp:inet:localhost # # ==================================================================== # # Cyrus 2.1.5 (Amos Gouaux) # Also specify in main.cf: cyrus_destination_recipient_limit=1 # #cyrus unix - n n - - pipe # user=cyrus argv=/cyrus/bin/deliver -e -r ${sender} -m ${extension} ${user} # # ==================================================================== # Old example of delivery via Cyrus. # #old-cyrus unix - n n - - pipe # flags=R user=cyrus argv=/cyrus/bin/deliver -e -m ${extension} ${user} # # ==================================================================== # # See the Postfix UUCP_README file for configuration details. # uucp unix - n n - - pipe flags=Fqhu user=uucp argv=uux -r -n -z -a$sender - $nexthop!rmail ($recipient) # # Other external delivery methods. # ifmail unix - n n - - pipe flags=F user=ftn argv=/usr/lib/ifmail/ifmail -r $nexthop ($recipient) bsmtp unix - n n - - pipe flags=Fq. user=bsmtp argv=/usr/lib/bsmtp/bsmtp -t$nexthop -f$sender $recipient scalemail-backend unix - n n - 2 pipe flags=R user=scalemail argv=/usr/lib/scalemail/bin/scalemail-store ${nexthop} ${user} ${extension} mailman unix - n n - - pipe flags=FR user=list argv=/usr/lib/mailman/bin/postfix-to-mailman.py ${nexthop} ${user}Might have to configure additional email addresses at
/etc/postfix/virtualThe following is a template of
virtual:mail-handler@example.net {{ tridentHandlerName }} @example.net {{ tridentHandlerName }}
Note
The Trident documentation gave the information used to configure
the /etc/aliases file and the /etc/postfix/virtual file,
but then just said “Of course do configure the rest of Postfix
properly.” I don’t really know what that means, so that’s why
I included the master.cf file, since that was included in the
/etc/postfix dir. There are a couple other files there,
/etc/postfix/dynamicmaps.cf and /etc/postfix/postfix-files,
along with a sasl/ dir and a couple scripts.
7.4. Install Trident
Now we can install the Trident server and the Trident CLI.
Retrieve the Trident debian packages from
source.prisem.washington.edu$ wget http://source.prisem.washington.edu:8442/trident-server_1.0.3_amd64.deb $ wget http://source.prisem.washington.edu:8442/trident-cli_1.0.3_amd64.deb
Note
The version may change...the above commands need to be kept in sync.
Properly configure the Trident daemon at
/etc/trident/trident.confThis template can be seen in the PostgreSQL Database section.
Properly configure Trident daemon defaults at
/etc/default/tridentThe following is an example of
/etc/default/trident:# This is a configuration file for /etc/init.d/trident; it allows you to # perform common modifications to the behavior of the Trident daemon # startup without editing the init script (and thus getting prompted # by dpkg on upgrades). # Start Trident at startup ? (ignored by systemd) TRIDENT_ENABLED=No # The username as who to run Trident DAEMON_USER=trident # Extra options to pass to the Trident daemon DAEMON_OPTS="-username trident -insecurecookies -disabletwofactor -debug -config /etc/trident"
7.5. Running Trident
There are several ways of running the Trident daemon, but we have divided them into a “secure, non-debug” way and a “non-secure, debug” way.
Insecure, debug:
DAEMON_USER=trident /usr/sbin/tridentd \
   -insecurecookies \
   -disabletwofactor \
   -debug \
   -config /etc/trident/ \
   -daemonize \
   -syslog \
   -verbosedb
Secure, non-debug:
DAEMON_USER=trident /usr/sbin/tridentd \
   -config /etc/trident/ \
   -daemonize \
Note
- The above code is from a start script used by the Dockerfile created by Linda Parsons ($GIT/dims-dockerfiles/dockerfiles/trident/conf/start.sh). I just grabbed it to show how to run the daemon. We should probably always have syslog enabled...
- There’s a note in that start script that says using the
daemonizeflag doesn’t appear to be daemonizing the Trident daemon. Should keep that in mind.
7.6. Using tcli on the command line
The following output shows some of the commands available to tcli command line users, and how to log in as a sysadmin user to gain access to more commands.
[dimsenv] ansible@yellow:~ () $ tcli help
-=- Trident Help -=-

Welcome to the Trident menu system which is CLI command based.
If a given command is not in help menu the selected user does not have permissions for it.

Each section, items marked [SUB], has its own 'help' command.

The following commands are available on the root level:
 user                 [SUB]                User commands
 system               [SUB]                System commands
[dimsenv] ansible@yellow:~ () $ tcli user help
Help for user
 password             [SUB]                Password commands
[dimsenv] ansible@yellow:~ () $ tcli system help
Help for system
 login                <username> <password> <twofactor> Login
 logout                                    Logout
 whoami                                    Who Am I?
 get                  [SUB]                Get values from the system
[dimsenv] ansible@yellow:~ () $ tcli system login trident trident123
Login successful
[dimsenv] ansible@yellow:~ () $ tcli system whoami
Username: trident
Fullname:
[dimsenv] ansible@yellow:~ () $ tcli system swapadmin
Now a SysAdmin user
[dimsenv] ansible@yellow:~ () $ tcli system help
Help for system
 report                                    Report system statistics
 login                <username> <password> <twofactor> Login
 logout                                    Logout
 whoami                                    Who Am I?
 swapadmin                                 Swap from regular to sysadmin user
 set                  [SUB]                Configure the system
 get                  [SUB]                Get values from the system
[dimsenv] ansible@yellow:~ () $ tcli user help
Help for user
 new                  <username> <email>   Create a new user
 nominate             <username> <email> <bio_info> <affiliation> <descr> Nominate New User
 set                  [SUB]                Set properties of a user
 get                  [SUB]                Get properties of a user
 list                 <match>              List all users
 merge                <into> <from>        Merge a user
 delete               <username>           Delete a new user
 2fa                  [SUB]                2FA Token Management
 email                [SUB]                Email commands
 password             [SUB]                Password commands
 detail               [SUB]                Manage Contact Details
 language             [SUB]                Manage Language Skills
[dimsenv] ansible@yellow:~ () $
There are certain things with which a DIMS system is automatically configured. These attributes are set via tasks in the Trident Ansible role:
---

# file: v2/roles/trident/tasks/main.yml

<snip>

- name: Ensure trident administator is logged in
  shell: "tcli system login {{ trident.initial_sysadmin.name }} {{ trident.initial_sysadmin.password }}"
  register: tcli_login
  no_log: true
  when: ansible_lsb.codename == "jessie"
  become: yes
  tags: [ trident ]

- name: Require successful login to trident
  fail: "Failed to log in via trident: {{ tcli_login.stdout }}"
  when: ansible_lsb.codename == "jessie" and tcli_login.stdout != "Login successful"
  tags: [ trident ]

- name: Ensure system configurtion is present
  shell: "{{ item }}"
  with_items:
   - "tcli system swapadmin"
   - "tcli system set name '{{ trident.name }}'"
   - "tcli system set welcome_text '{{ trident.welcome_text }}'"
   - "tcli system set url_public {{ trident.url_public }}"
   - "tcli system set adminname '{{ trident.adminname }}'"
   - "tcli system set adminemail '{{ trident.adminemail }}'"
   - "tcli system set email_domain '{{ trident.email_domain }}'"
   - "tcli system set people_domain '{{ trident.people_domain }}'"
   - "tcli system set logo_image {{ trident.logo_image }}"
   - "tcli system set header_image {{ trident.header_image }}"
  when: ansible_lsb.codename == "jessie" and tcli_login.stdout == "Login successful"
  become: yes
  tags: [ trident ]

<snip>

#EOF
Once the role is run against the host machine which is to run the Trident application, not only is Trident running, and you have access to the web application, but the web app shows that the customization has taken place.
Additionally, we bootstrap global initial admin accounts and a initial trust group with its mailing lists:
---

# file: v2/roles/trident/tasks/main.yml

<snip>

- name: Ensure trident administator is logged in
  shell: "tcli system login {{ trident.initial_sysadmin.name }} {{ trident.initial_sysadmin.password }}"
  register: tcli_login
  no_log: true
  when: ansible_lsb.codename == "jessie"
  become: yes
  tags: [ trident ]

- name: Require successful login to trident
  fail: "Failed to log in via trident: {{ tcli_login.stdout }}"
  when: ansible_lsb.codename == "jessie" and tcli_login.stdout != "Login successful"
  tags: [ trident ]

<snip>

- name: Ensure initial sysadmin user example email is not present
  shell: "tcli user email remove trident@trident.example.net"
  when: ansible_lsb.codename == "jessie" and tcli_login.stdout == "Login successful"
  become: yes
  tags: [ trident ]

- name: Ensure initial sysadmin user email is present
  shell: "tcli user email add {{ trident.initial_sysadmin.name }} {{ trident.initial_sysadmin.email }}"
  when: ansible_lsb.codename == "jessie" and tcli_login.stdout == "Login successful"
  become: yes
  tags: [ trident ]

- name: Force initial sysadmin email address to be confirmed
  shell: "tcli user email confirm_force {{ trident.initial_sysadmin.name }} {{ trident.initial_sysadmin.email }}"
  when: ansible_lsb.codename == "jessie" and tcli_login.stdout == "Login successful"
  become: yes
  tags: [ trident ]

- name: Ensure initial TG is present
  shell: "tcli tg add {{ trident.initial_tg.ident }}"
  when: ansible_lsb.codename == "jessie" and tcli_login.stdout == "Login successful"
  become: yes
  tags: [ trident ]

- name: Ensure initial TG description is present
  shell: "tcli tg set descr {{ trident.initial_tg.descr }}"
  when: ansible_lsb.codename == "jessie" and tcli_login.stdout == "Login successful"
  become: yes
  tags: [ trident ]

- name: Ensure initial ML is present
  shell: "tcli ml new {{ trident.initial_tg.ident }} {{ trident.initial_ml }}"
  when: ansible_lsb.codename == "jessie" and tcli_login.stdout == "Login successful"
  become: yes
  tags: [ trident ]

- name: Ensure global admin accounts are present
  shell: "tcli user new {{ item.key }} {{ item.value.email }}"
  with_dict: "{{ trident_admins }}"
  when: ansible_lsb.codename == "jessie" and tcli_login.stdout == "Login successful"
  become: yes
  tags: [ trident ]

- name: Ensure global admin accounts have passwords
  shell: "tcli user password set portal {{ item.key }} {{ tridentSysAdminPass }}"
  with_dict: "{{ trident_admins }}"
  when: ansible_lsb.codename == "jessie" and tcli_login.stdout == "Login successful"
  become: yes
  tags: [ trident ]

- name: Force global admin emails to be confirmed
  shell: "tcli user email confirm_force {{ item.key }} {{ item.value.email }}"
  with_dict: "{{ trident_admins }}"
  when: ansible_lsb.codename == "jessie" and tcli_login.stdout == "Login successful"
  become: yes
  tags: [ trident ]

- name: Ensure global admin users have global sysadmin rights
  shell: "tcli user set sysadmin {{ item.key }} true"
  with_dict: "{{ trident_admins }}"
  when: ansible_lsb.codename == "jessie" and tcli_login.stdout == "Login successful"
  become: yes
  tags: [ trident ]

- name: Nominate global admin users to initial TG
  shell: "tcli tg member nominate {{ trident.initial_tg.ident }} {{ item.key }}"
  with_dict: "{{ trident_admins }}"
  when: ansible_lsb.codename == "jessie" and tcli_login.stdout == "Login successful"
  become: yes
  tags: [ trident ]

- name: Approve global admin users to initial TG
  shell: "tcli tg member approve {{ trident.initial_tg.ident }} {{ item.key }}"
  with_dict: "{{ trident_admins }}"
  when: ansible_lsb.codename == "jessie" and tcli_login.stdout == "Login successful"
  become: yes
  tags: [ trident ]

- name: Ensure global admin users have initial TG sysadmin rights
  shell: "tcli tg member promote {{ trident.initial_tg.ident }} {{ item.key }}"
  with_dict: "{{ trident_admins }}"
  when: ansible_lsb.codename == "jessie" and tcli_login.stdout == "Login successful"
  become: yes
  tags: [ trident ]

<snip>

#EOF
At the end of the role, there are now admin accounts that can be immediately used to set up other trust groups and other mailing lists, as well begin and continue the process of curating memberships of these trust groups.
To set these things up yourself, follow these commands:
Now you should have a pretty good understanding of how tcli works. Always remember to login and then “swapadmin” when you need to change and customize things.
7.7. Configuring Trident via web app
Once Trident is running and DNS is working properly, to get to the web GUI, you will navigate to trident.$category.$deployment in your web browser, given what development category and DIMS deployment you are in.
This will open the following home page:
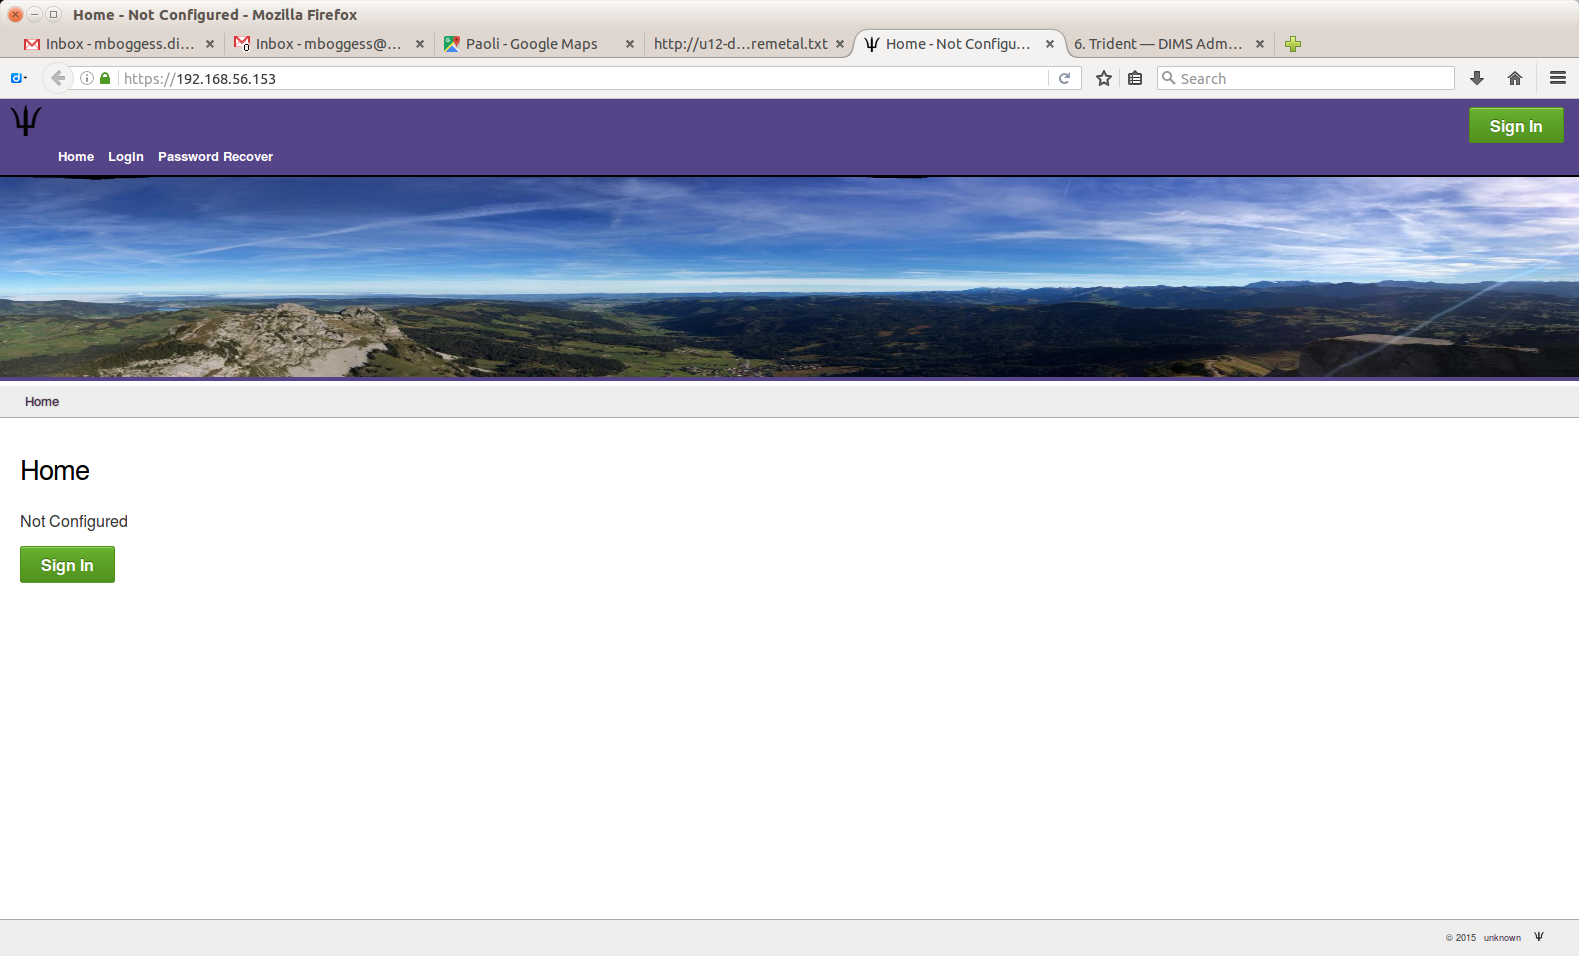
Trident home page
To login, click the sign-in button, which will take you to the following page where you can enter your login information:
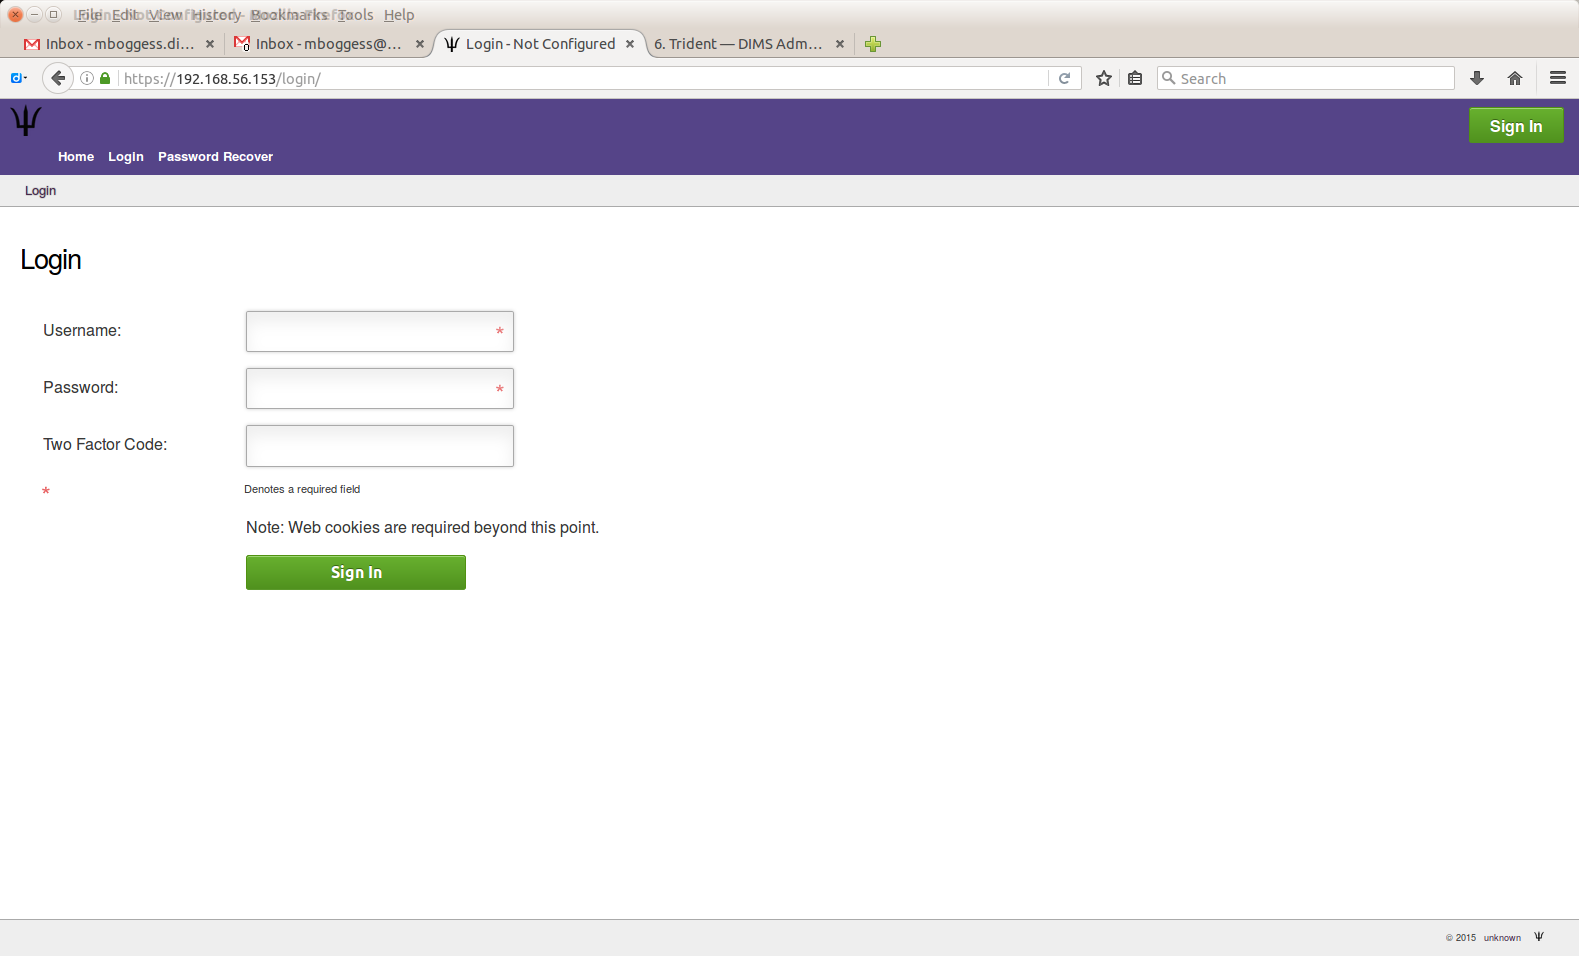
Trident login page
The next page that opens will be a more or less blank page until you set up some trust groups:
Trident initial login page
In the top right corner will be your profile image (though it will just say “Profile Image” until you upload one), as well as the Trident system name (unconfigured at the beginning), your username, your “UserMode” or status, and the logout link. The “UserMode” is either “Regular” or “Sysadmin”. You must have system administration access in order to anything besides edit your own profile and look at trust group information of trust groups you are in.
To switch to a “Sysadmin” UserMode, click the “Regular” UserMode link in the top right corner. This will swap you to “Sysadmin” status and the page will slightly change. This is shown below:

Change to sysadmin
Changing to “sysadmin” allows you to add and configure trust groups, to have acces to the Trident command line interface, tcli (or “tickly”), and to view and monitor reports, logs, and settings for this particular Trident system.
7.7.1. User configurations
This section walks through the configuration of a user who has sysadmin privileges. There are a couple differences between what a “regular” user can configure and what a “sysadmin” user can configure. The “password reset” section is not available to users without sysadmin privileges. Additionally, there are a couple profile items hidden from regular users.
To begin, click the “User” tab at the top of the page. This will take you to a table of contents page with links to various things you can edit or look at for your user. These are also itemized in the second row at the top of the page.
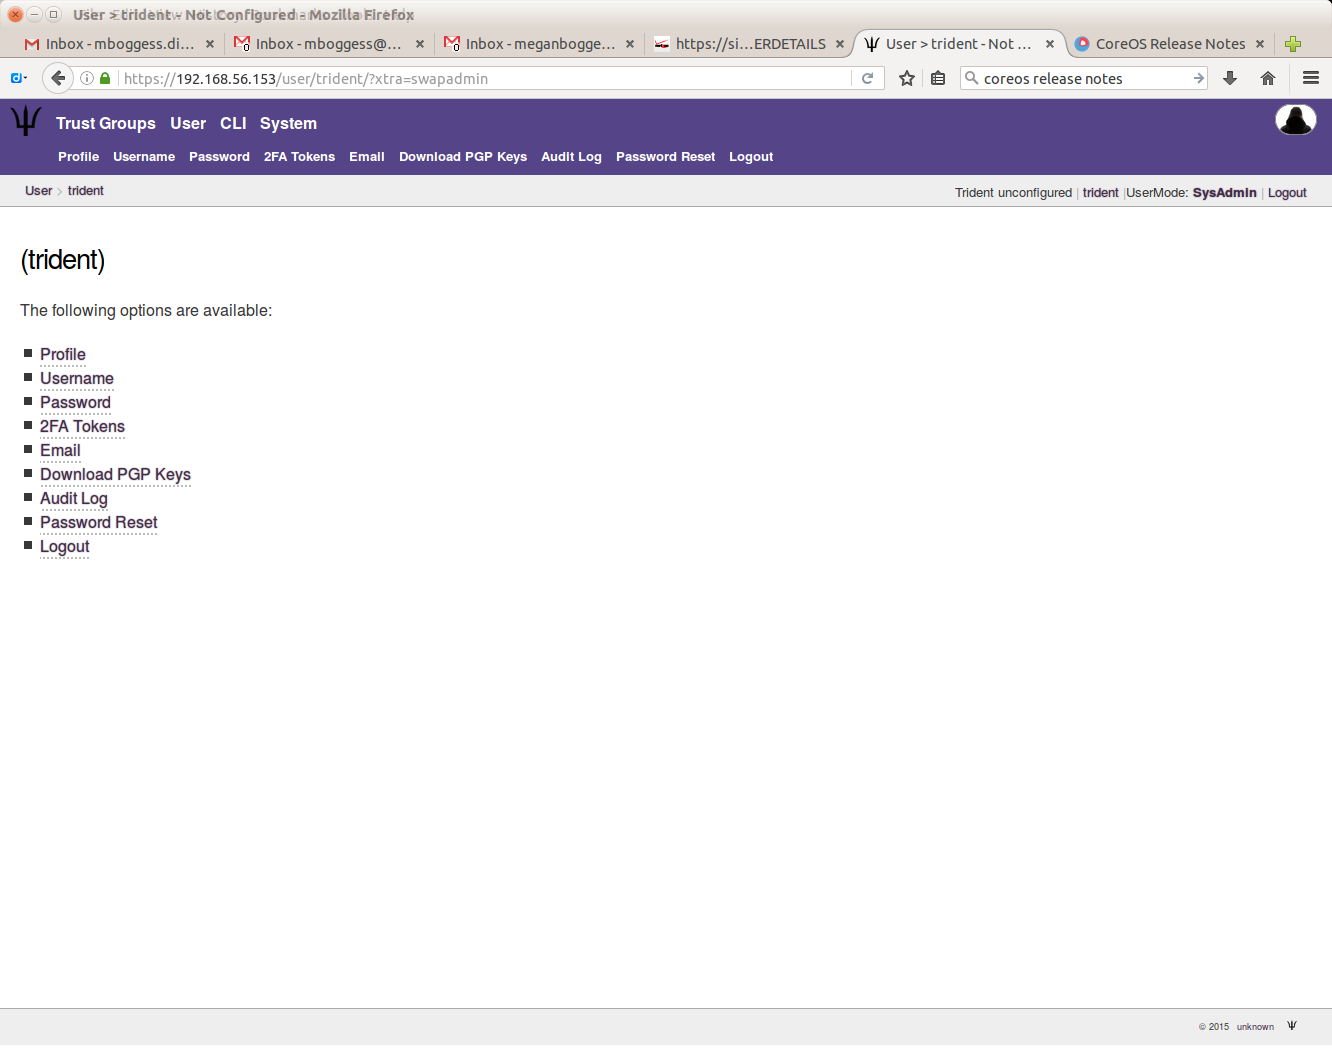
Options for editing a user
To edit the user’s profile, click the “Profile” link, either in the table of contents list or in the second row at the top of the page. This will take you to a page where you can edit profile information for the user.
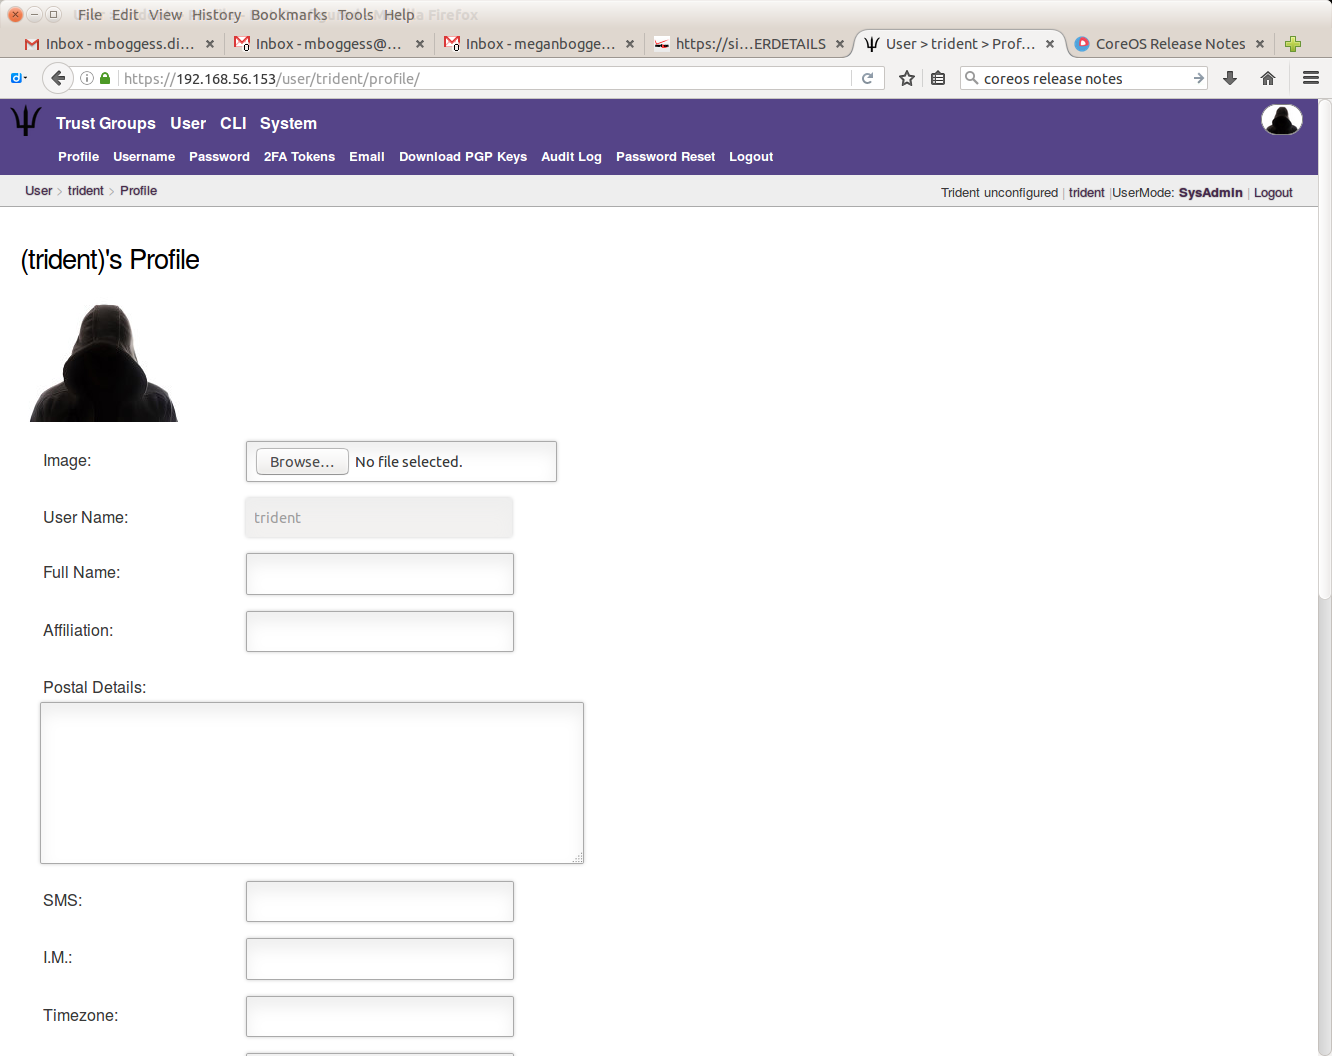
Profile options
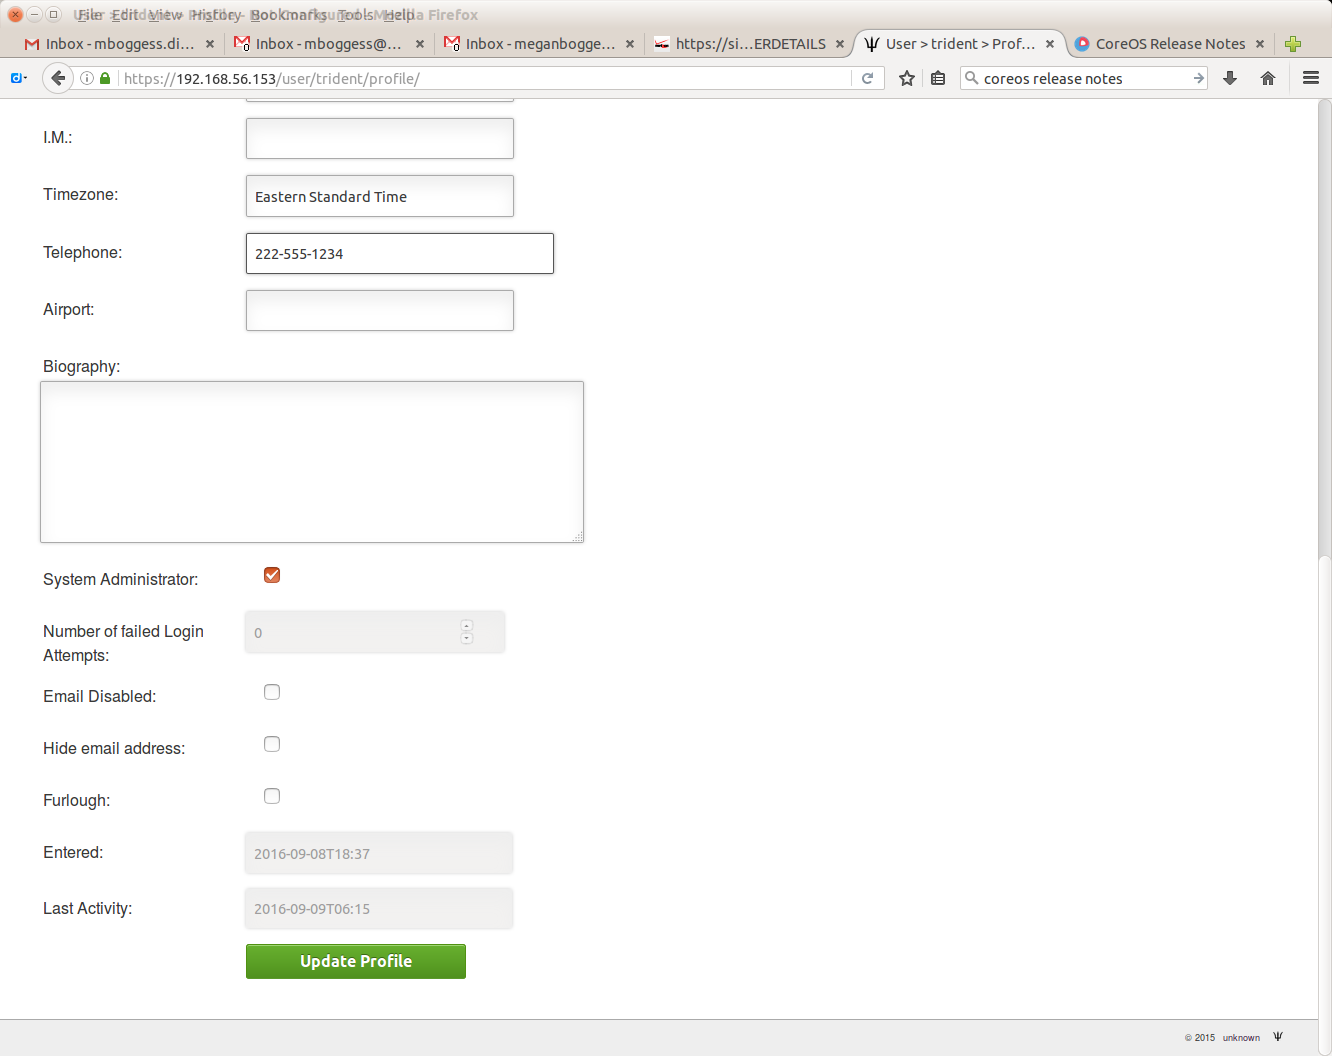
To update the profile, make sure to scroll all the way through all the options, and at the end of the page, there is the “Update Profile” button. This will leave you at the Profile page, but if you scroll all the way back down, you’ll see a notice about how many fields were update and how many were not modified.
Profile update
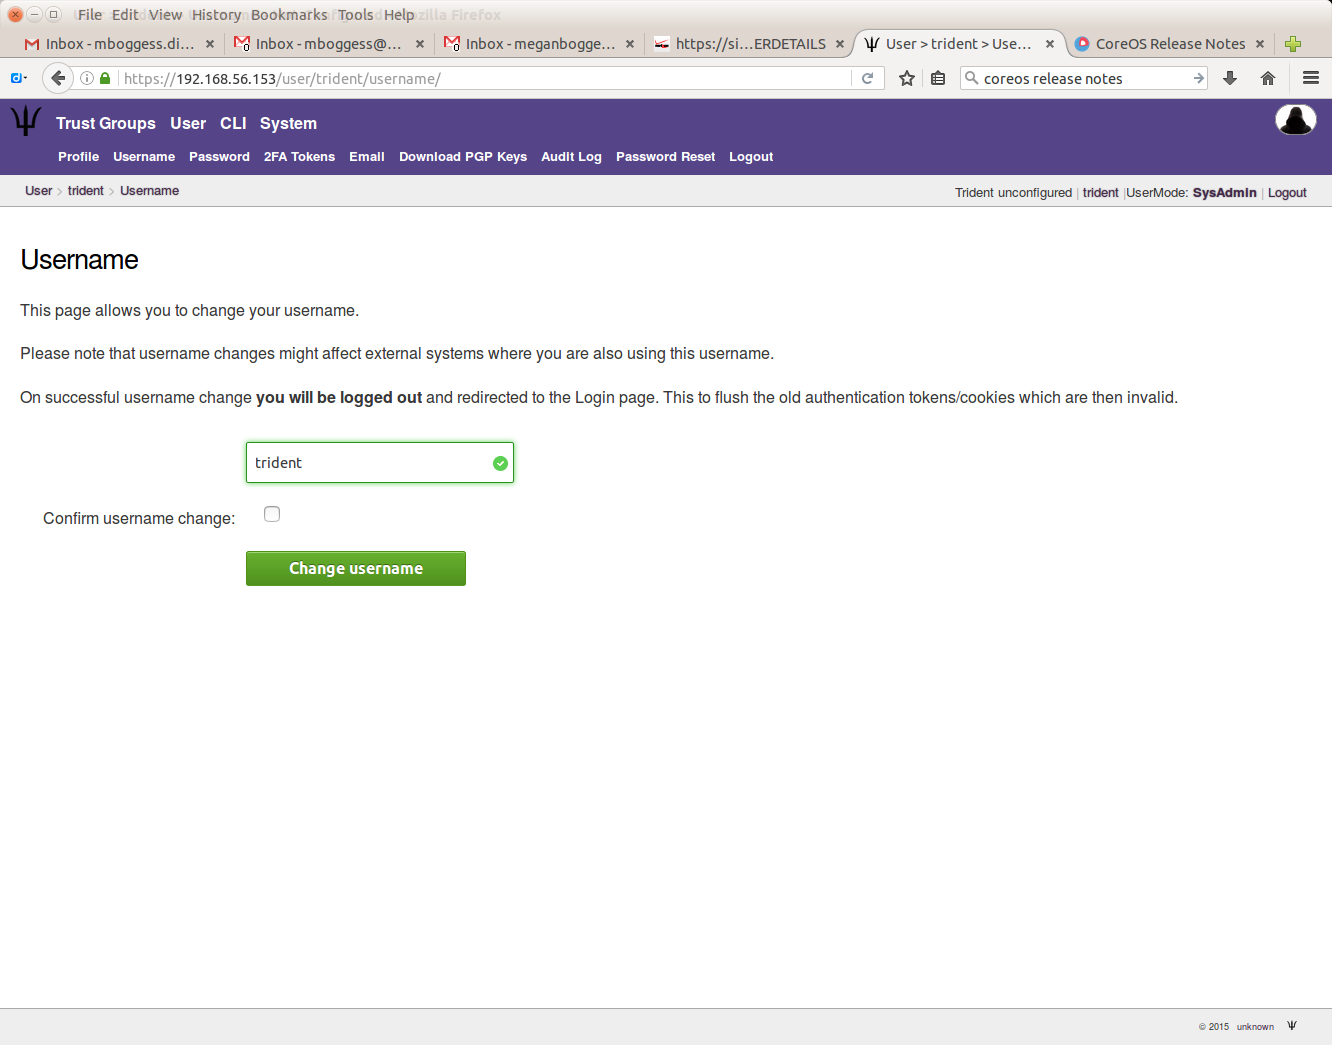
You can change your user’s username:
Change user’s username
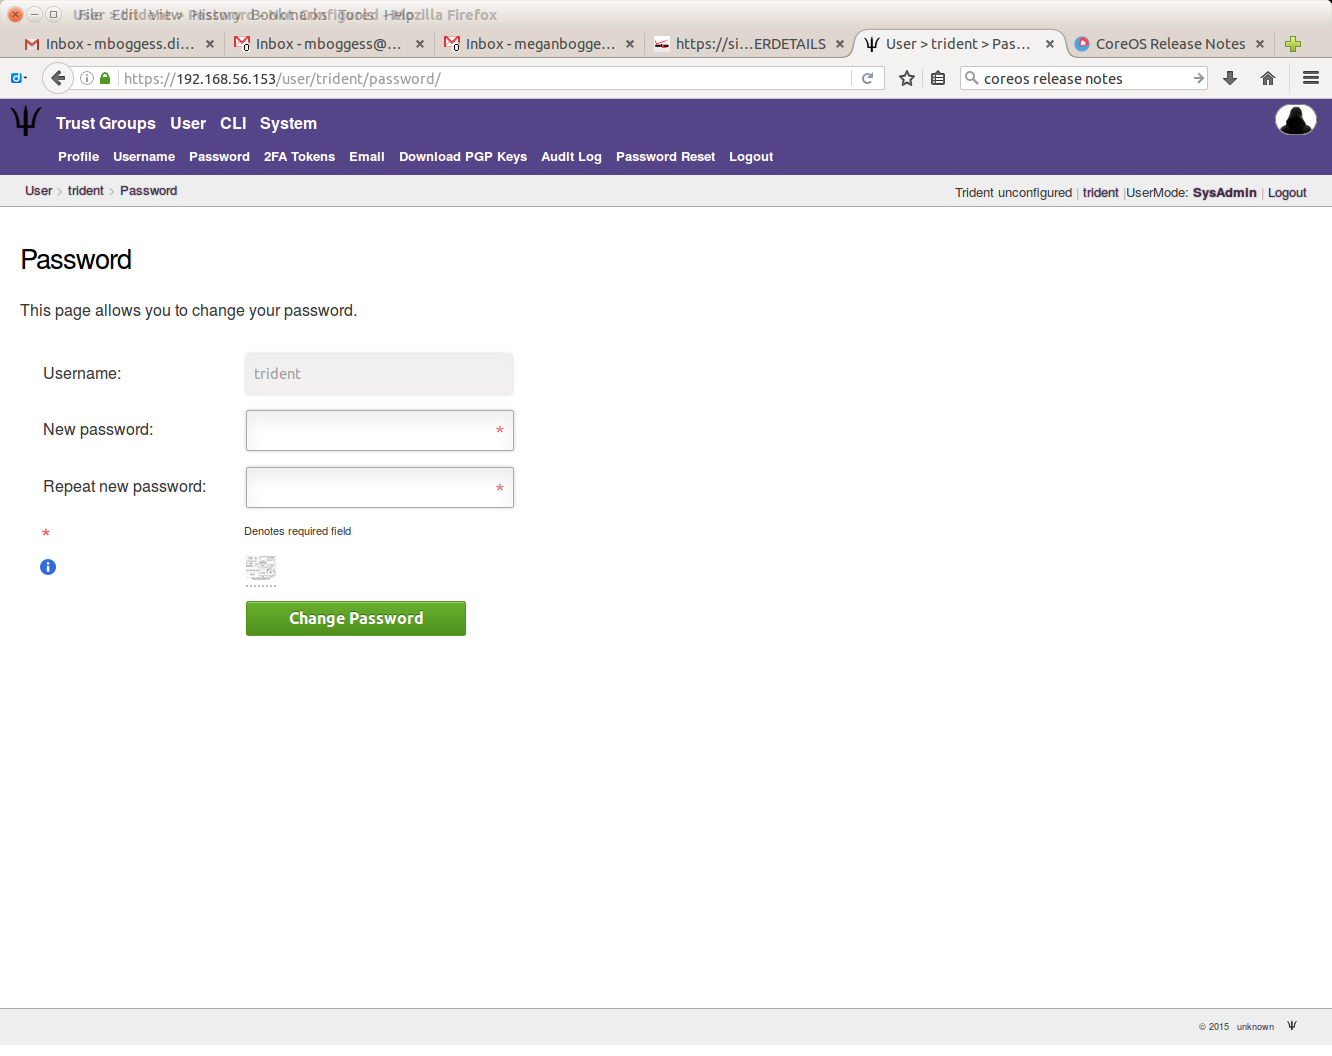
You can change your user’s password:
Change user’s password
You can set up two-factor authentication:

Setup two-factor authentication
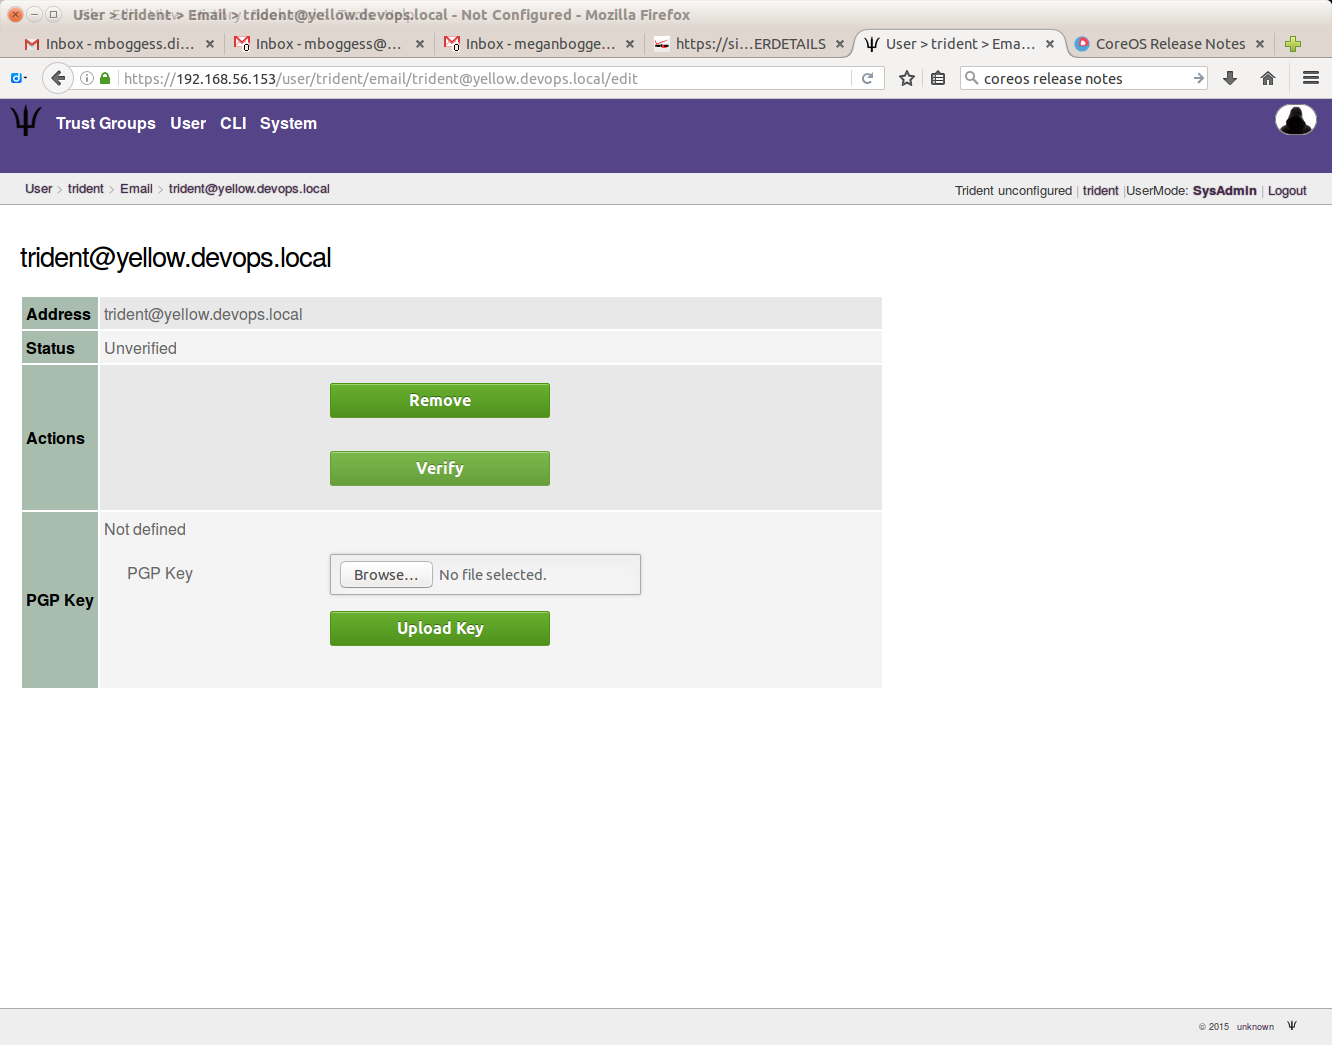
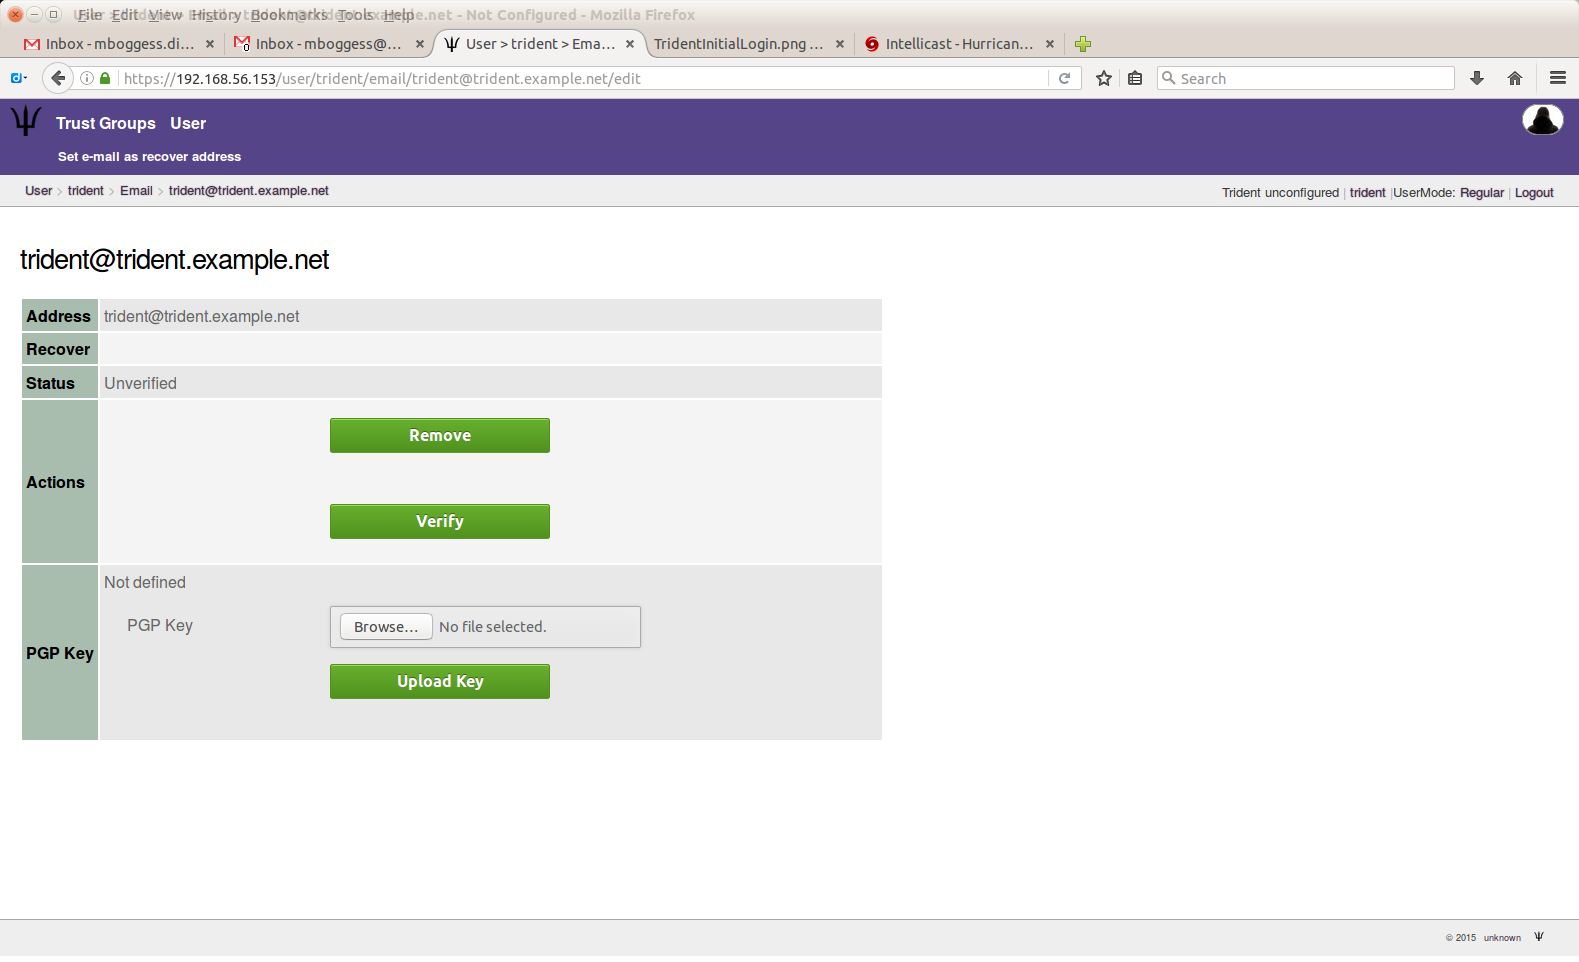
You must add and verify your email address to receive emails from trust groups to which you belong. First, “create” your email:

Create user email
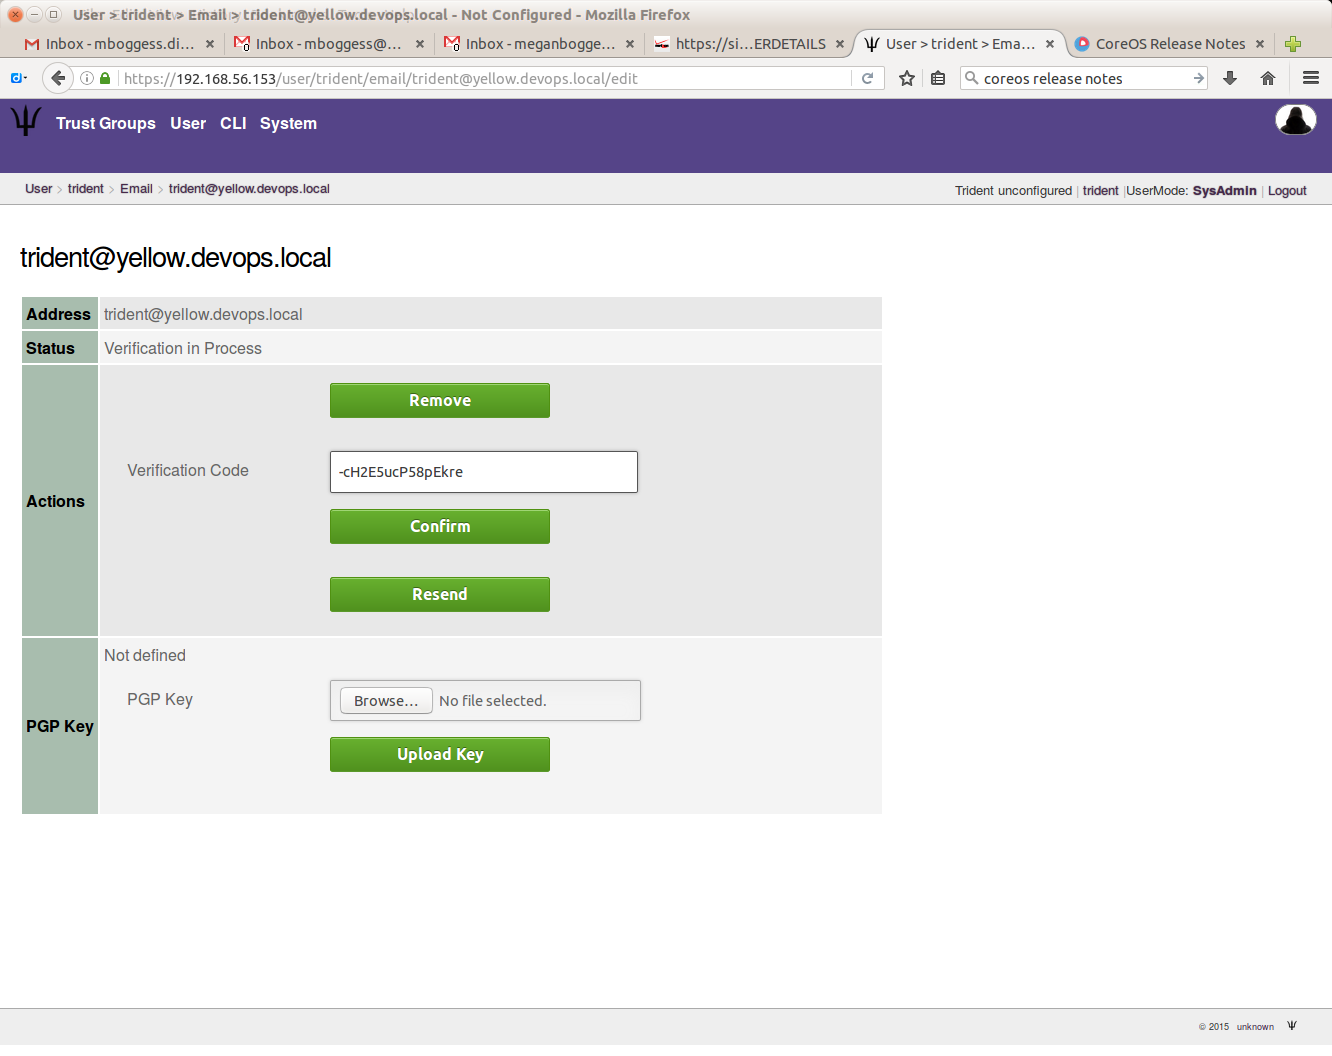
Once you submit your email address, you must get a verification code. Click the “Verify” button on this page to get the verification code sent to you via email:
Verify user email
Once you receive the email with the code, put the code in the “Verification Code” box on the following page:
Submit verification code
If it is a valid verification code, your email’s status will change from “Unverified” to “Verified”.
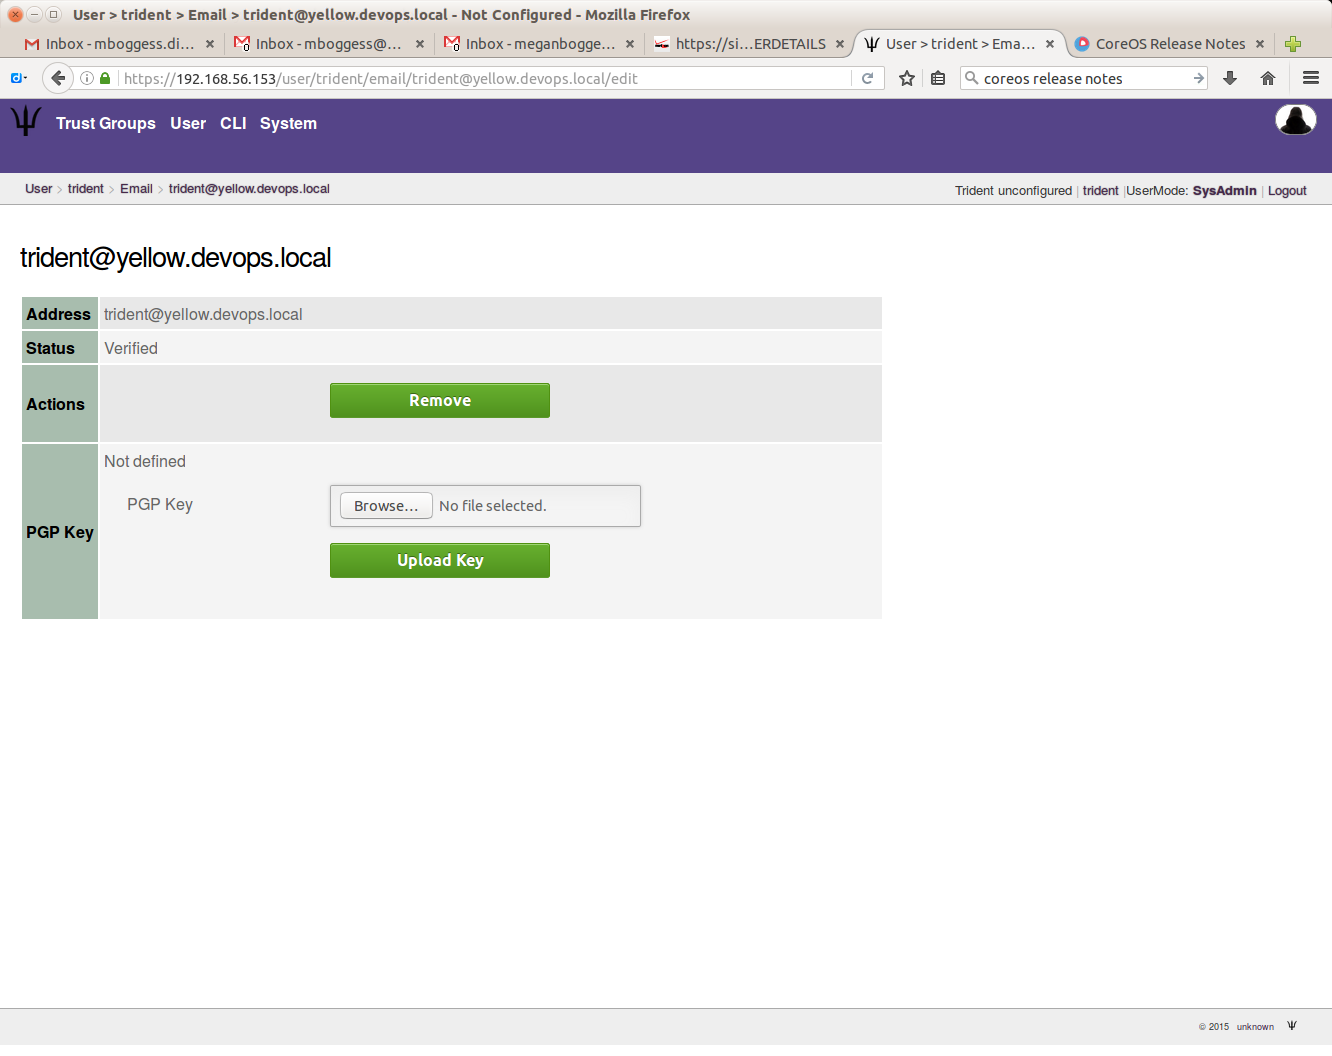
Verified email status
You can also download your user’s PGP keys:

Download PGP keys
You can also view an audit log for your user:
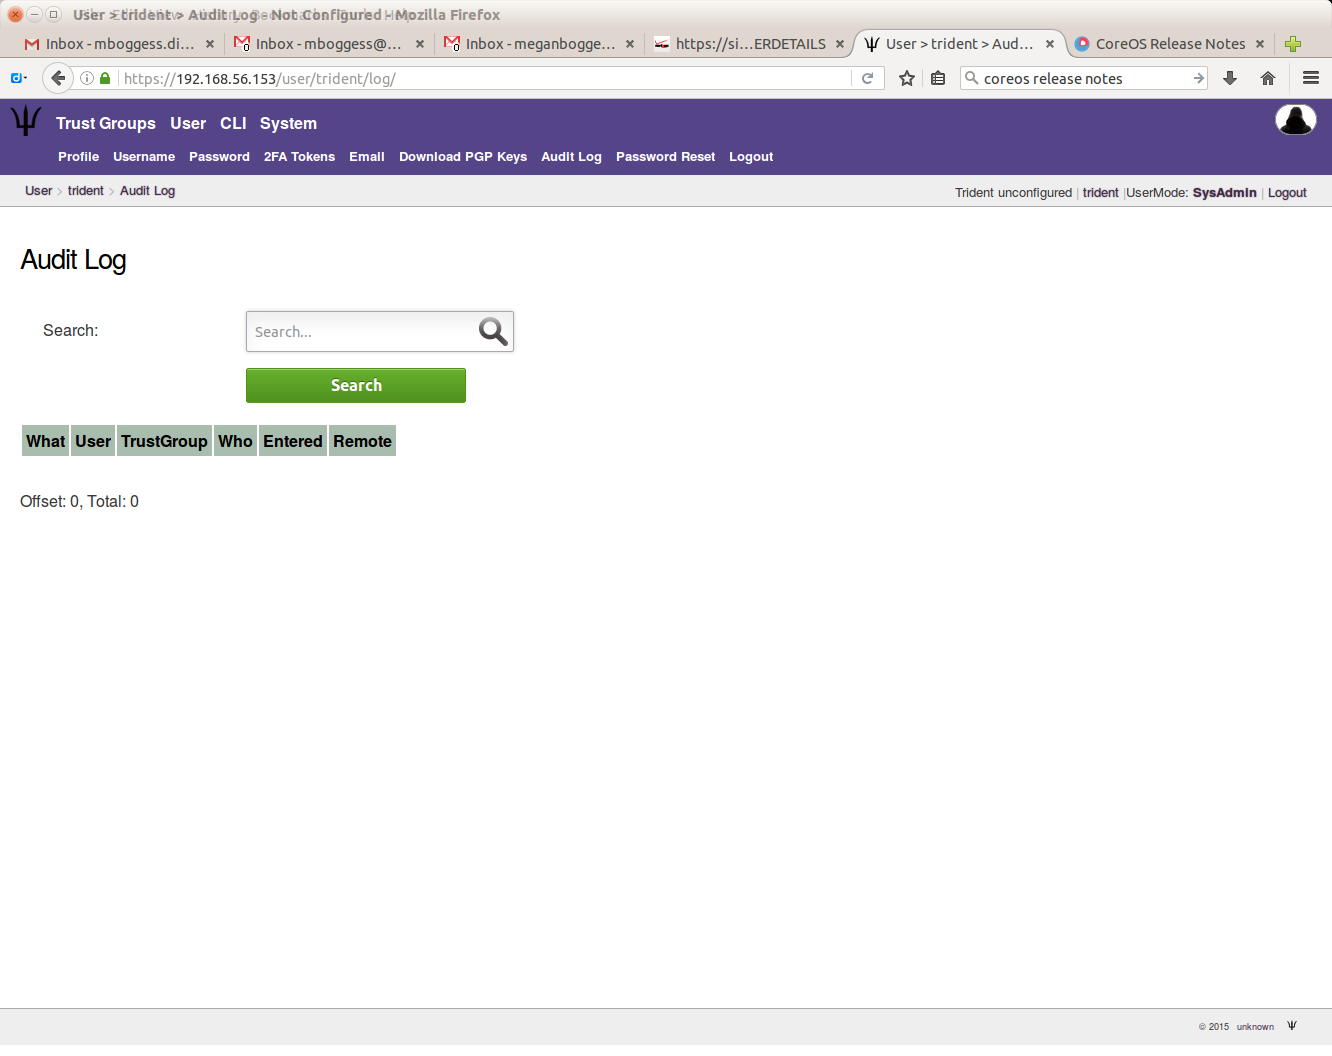
View user audit log
As a “sysadmin” user, you can do all of these things for all users under your administration. A list of these users can be found by clicking the “User” tab in the second row at the top of the page, when in “Sysadmin” UserMode.
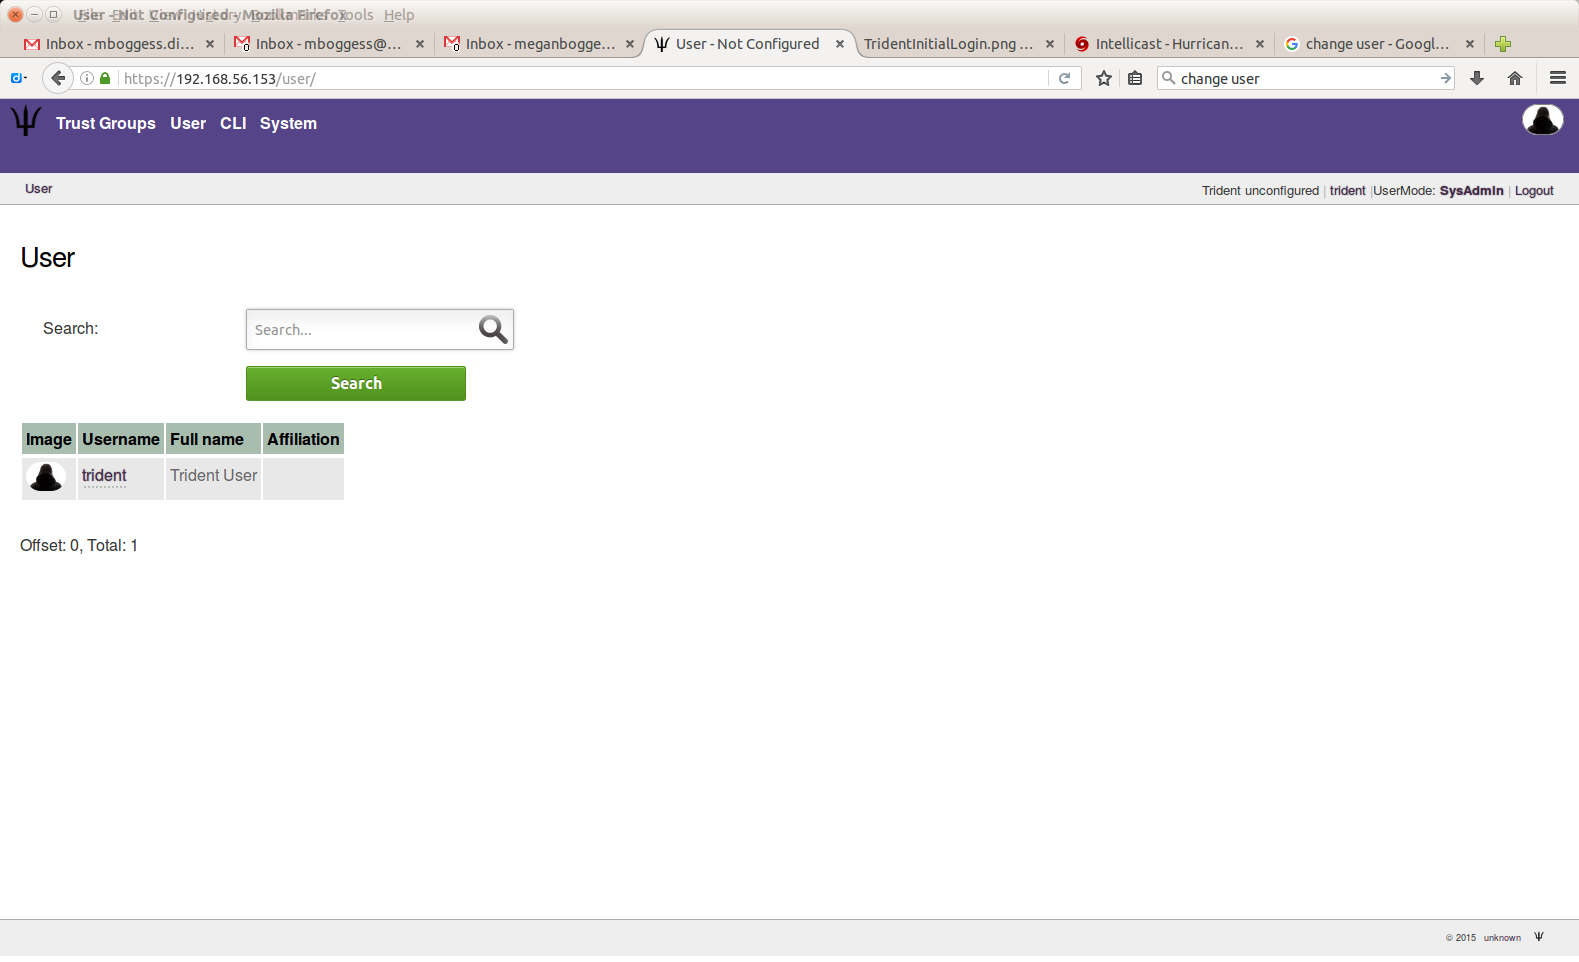
View user list as sysadmin
Additionally, only a sysadmin can reset another user’s password or remove an email address.
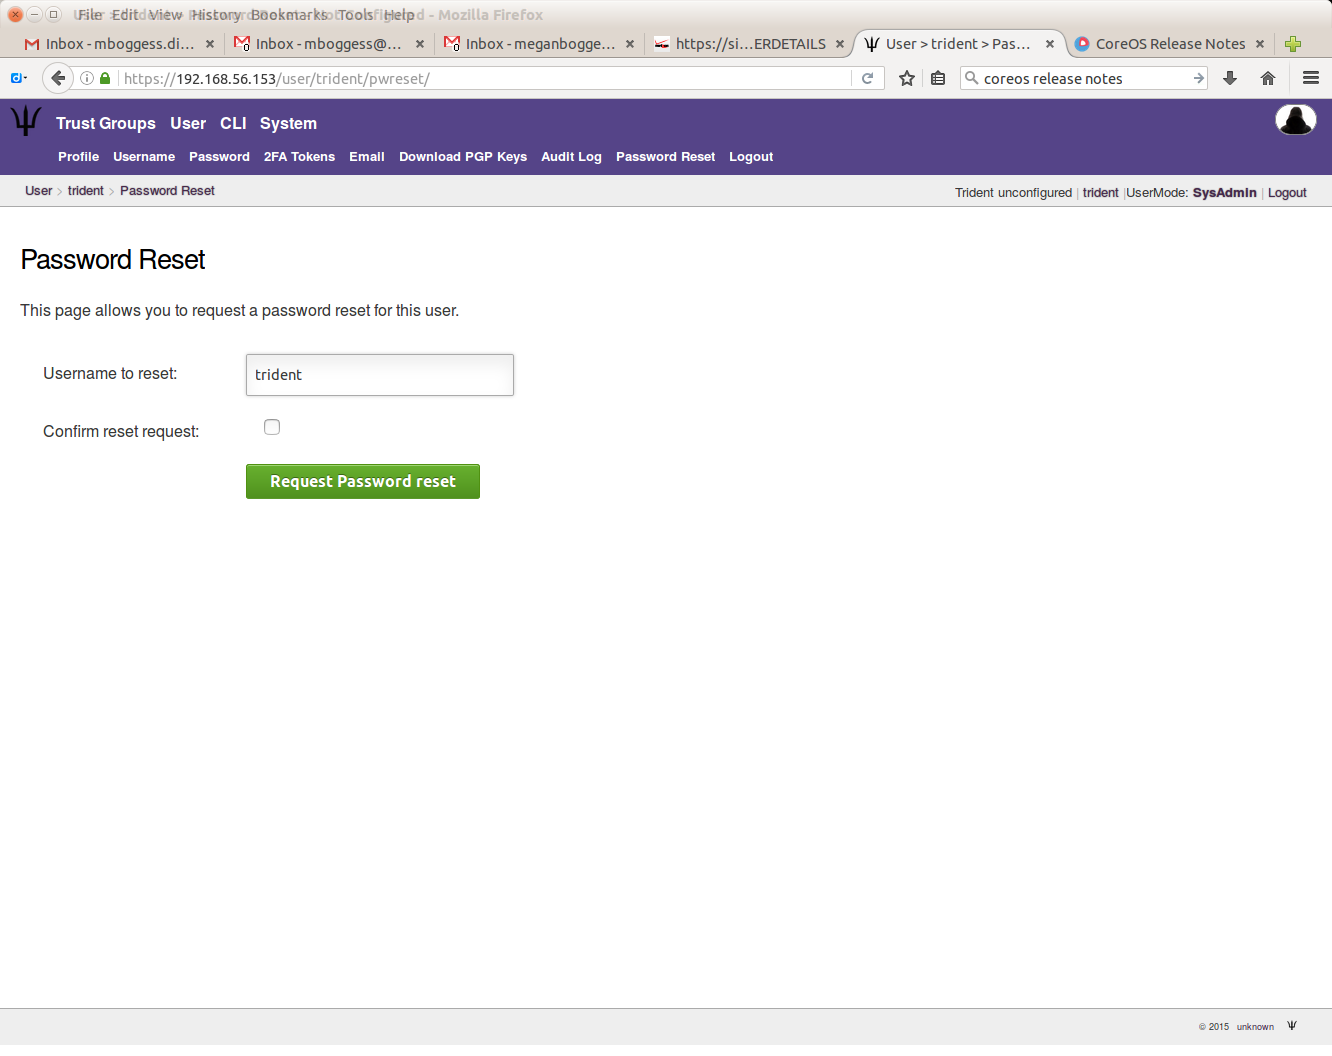
Reset a user’s password as sysadmin
Remove an email as sysadmin
7.7.2. Sysadmin configurations
Sysadmins can set up trust groups, view information about their system, and use the Trident command line interface, tcli (or “tickly”), through the web app. This section walks through these features.
7.7.2.1. Trust group configurations
The initial login page will list your trust groups. If you don’t have any, or to add new ones, click the “Add Trust Group” link in the second row at the top of the page.
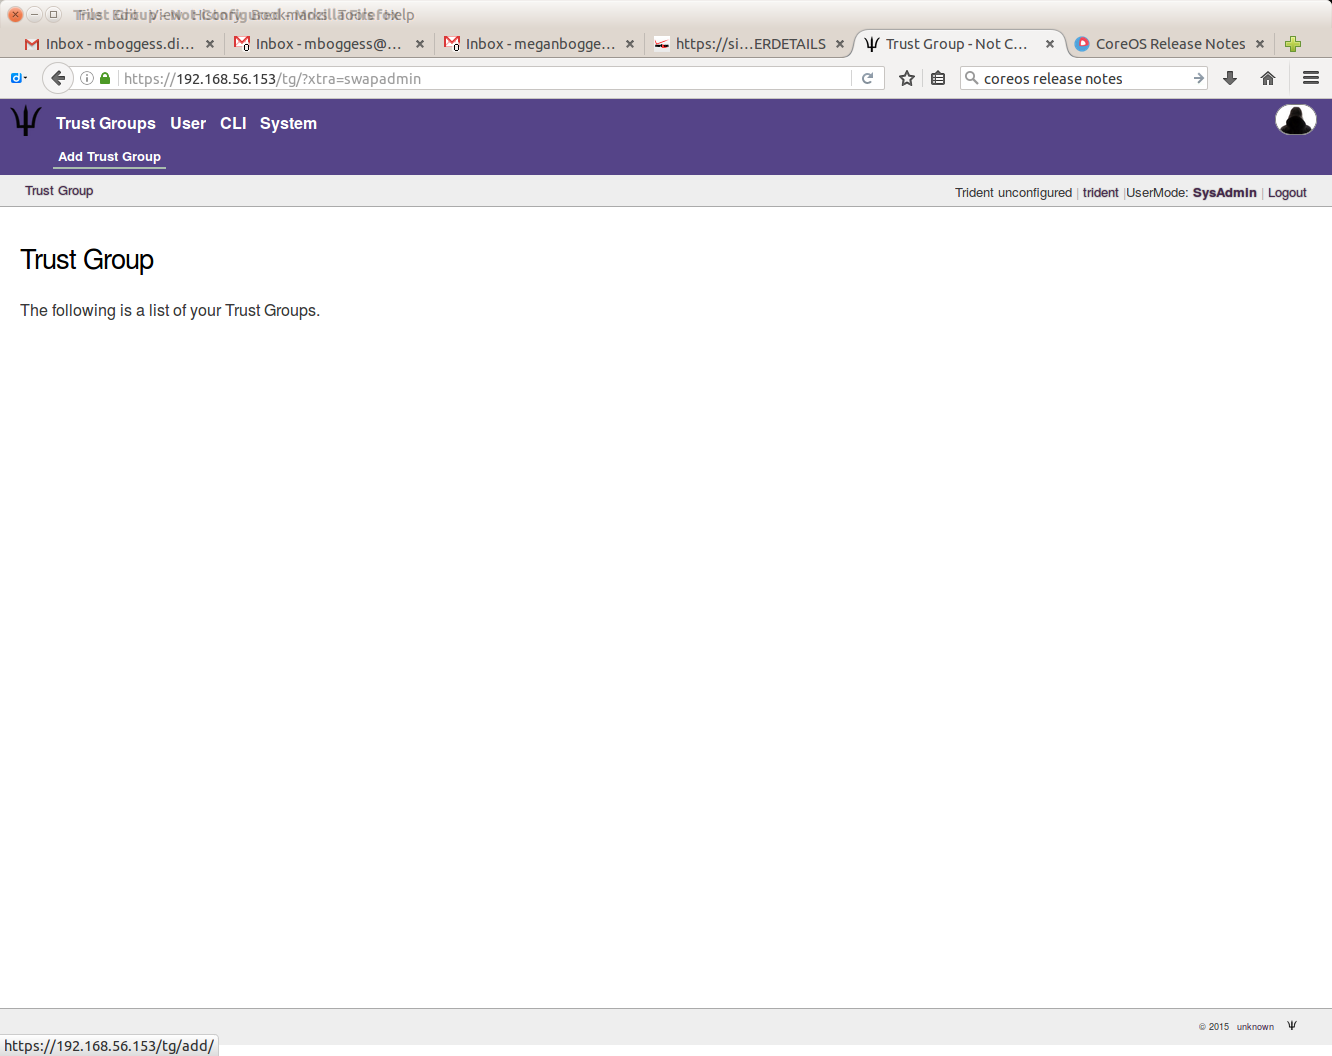
No trust groups, yet.
The following page will start the configuration of the trust group, starting with a name for the trust group.
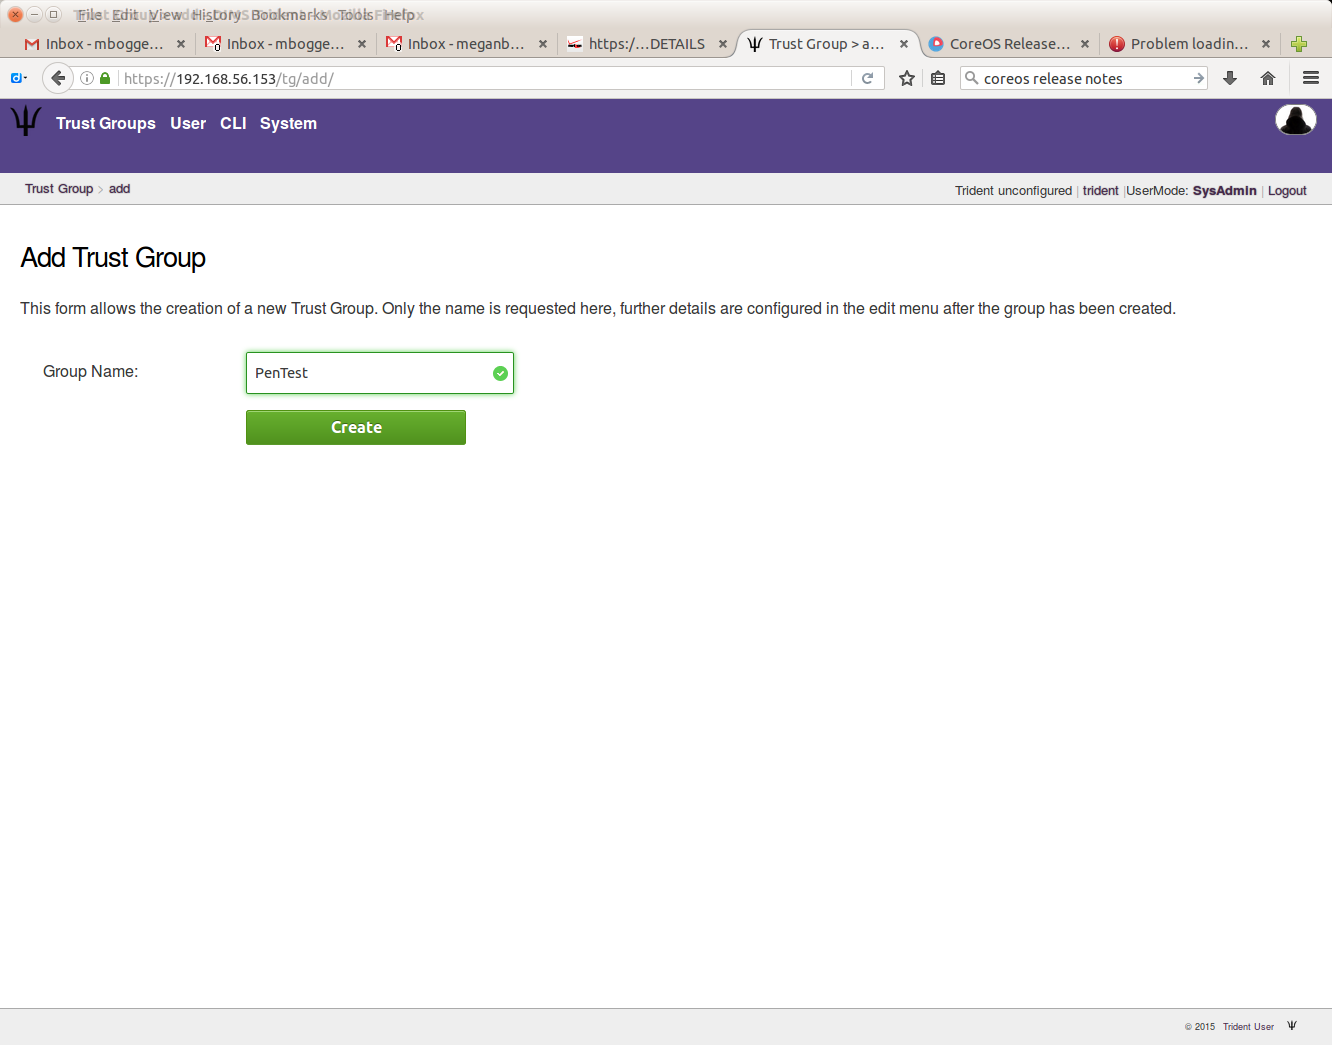
Add a trust group
Warning
If there isn’t at least one verified email address, this will fail.
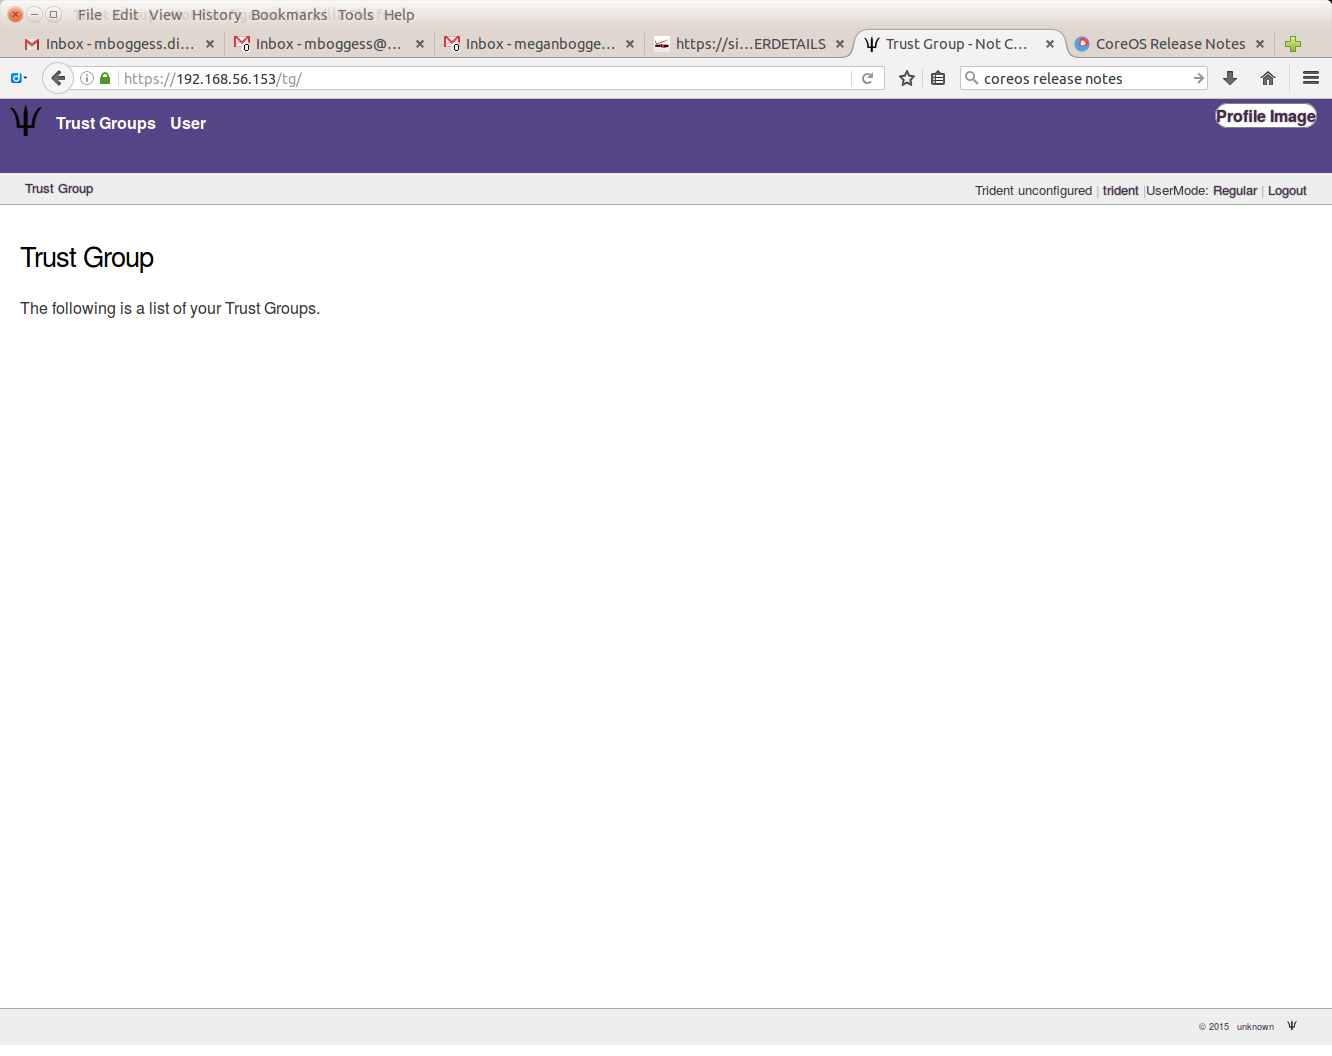
Once you have at least one trust group, clicking the “Trust Group” tab at the top of the page will give you an index of the trust groups you have access to. This list can be seen as a regular user or as a sysadmin user, as can be seen by this page (shown from the regular user perspective):
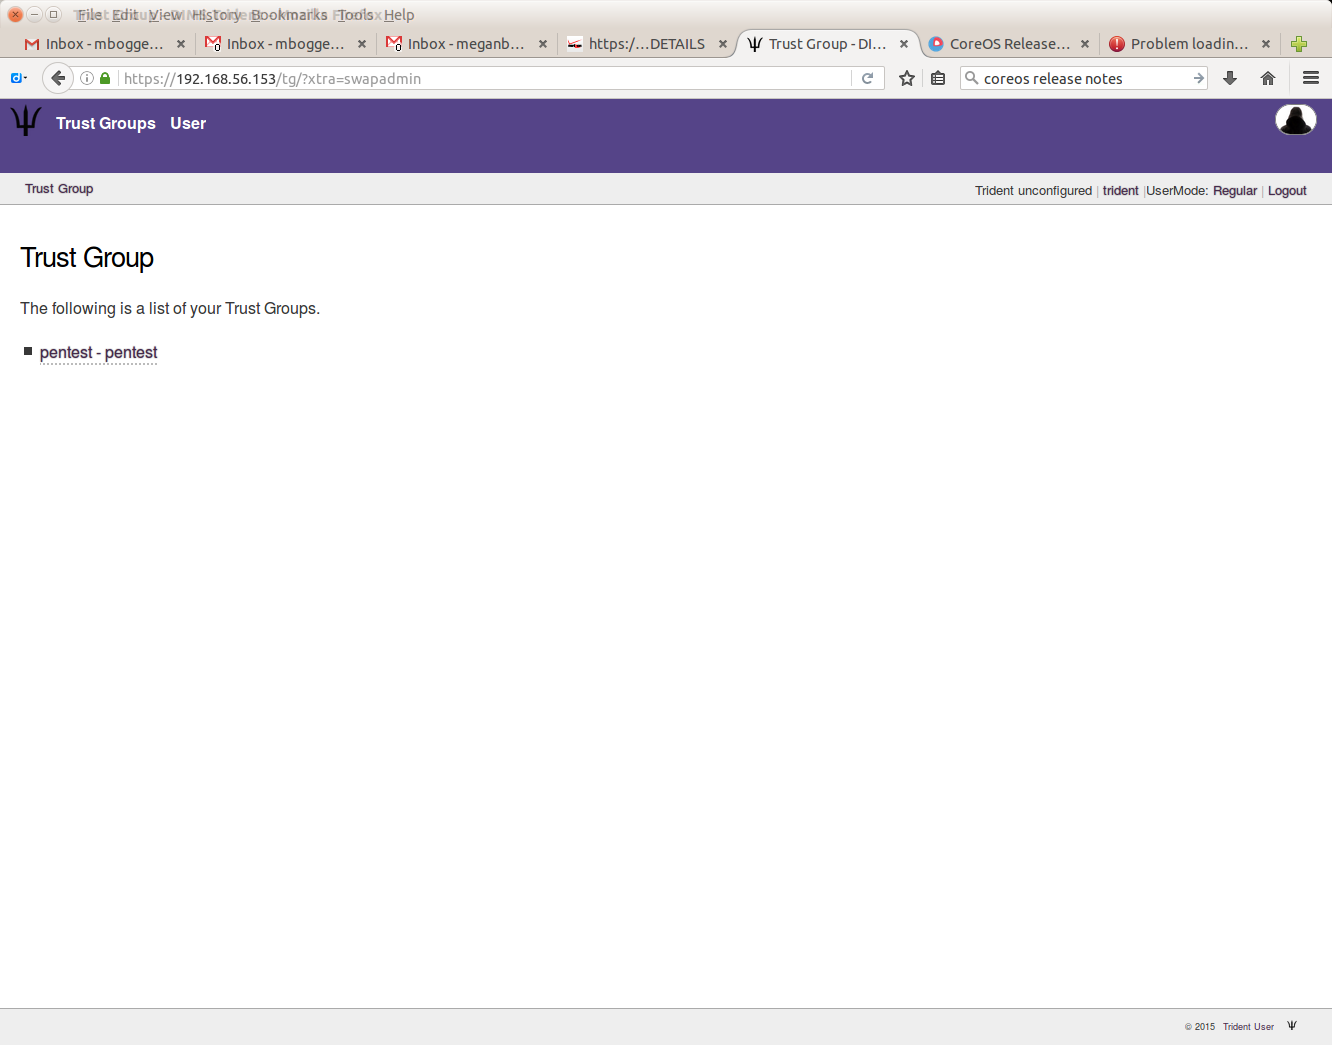
List of trust groups
As a sysadmin user, however, you can do much more than just view a list of trust groups. For all trust groups under your administration, you can manage users, set up mailing lists, view audit logs, set up and use wiki and file storage, as well as set other configurations and download PGP keys.
In order to have access to the wiki and file storage, you must set that up via the group settings:
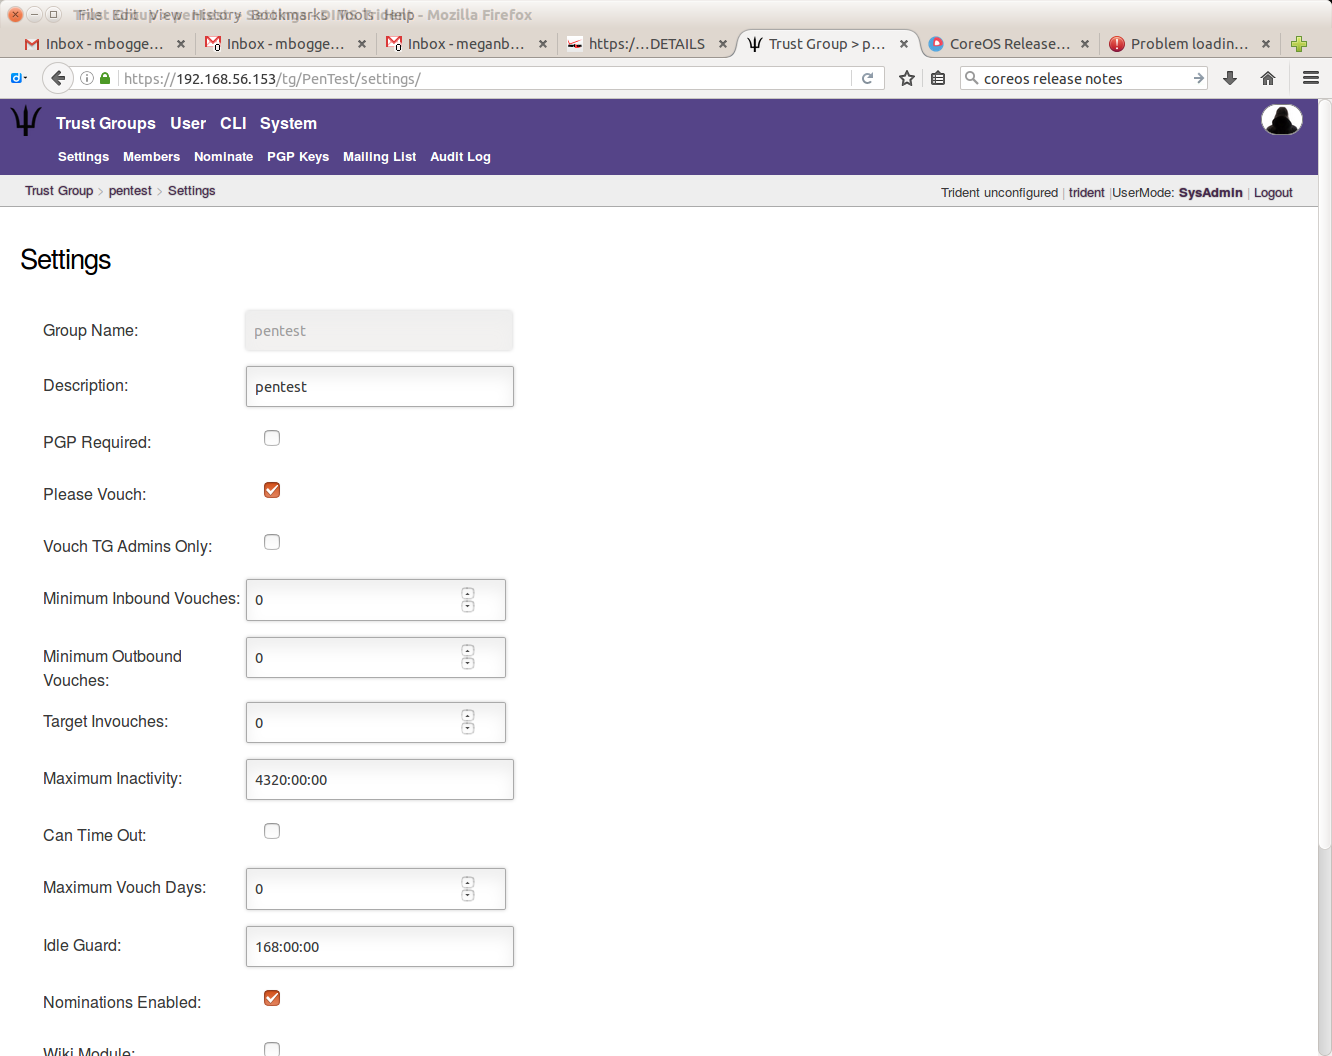
Some trust group settings
You must select the “Wiki Module” and “Files Module” if you want to use those features:
Some trust group settings
Trust group wiki:
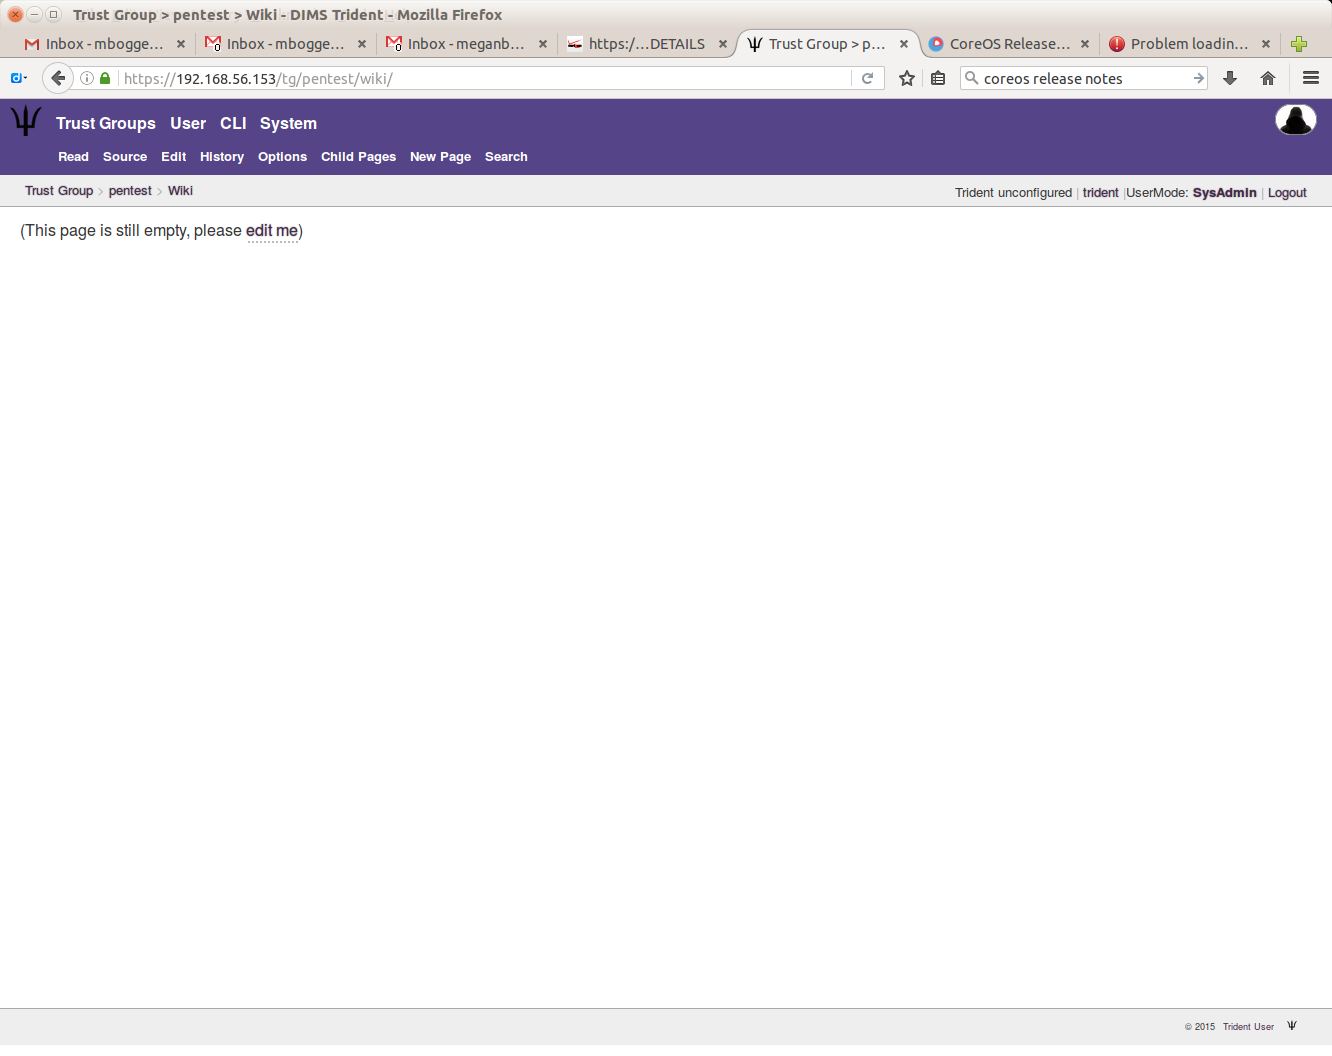
Empty trust group wiki
Trust group files:
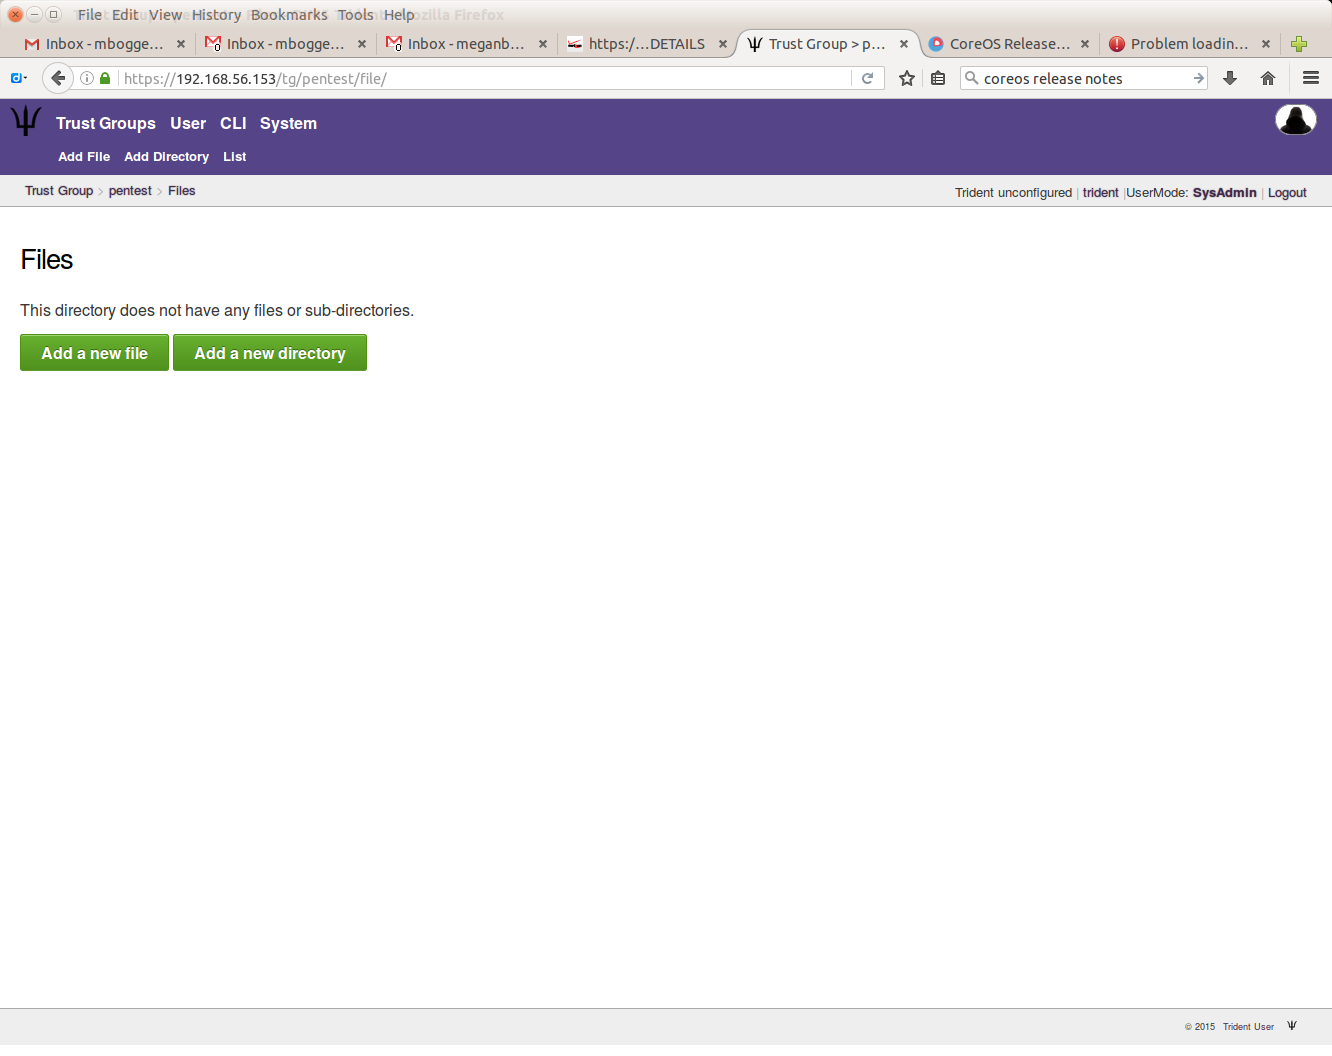
Empty trust group file storage
You can then click the tabs near the top of the page or the green buttons in the middle of the page to “Add” a file or directory or to list the files and directories.
Download PGP keys:
Download trust group PGP keys
See list of trust group members:
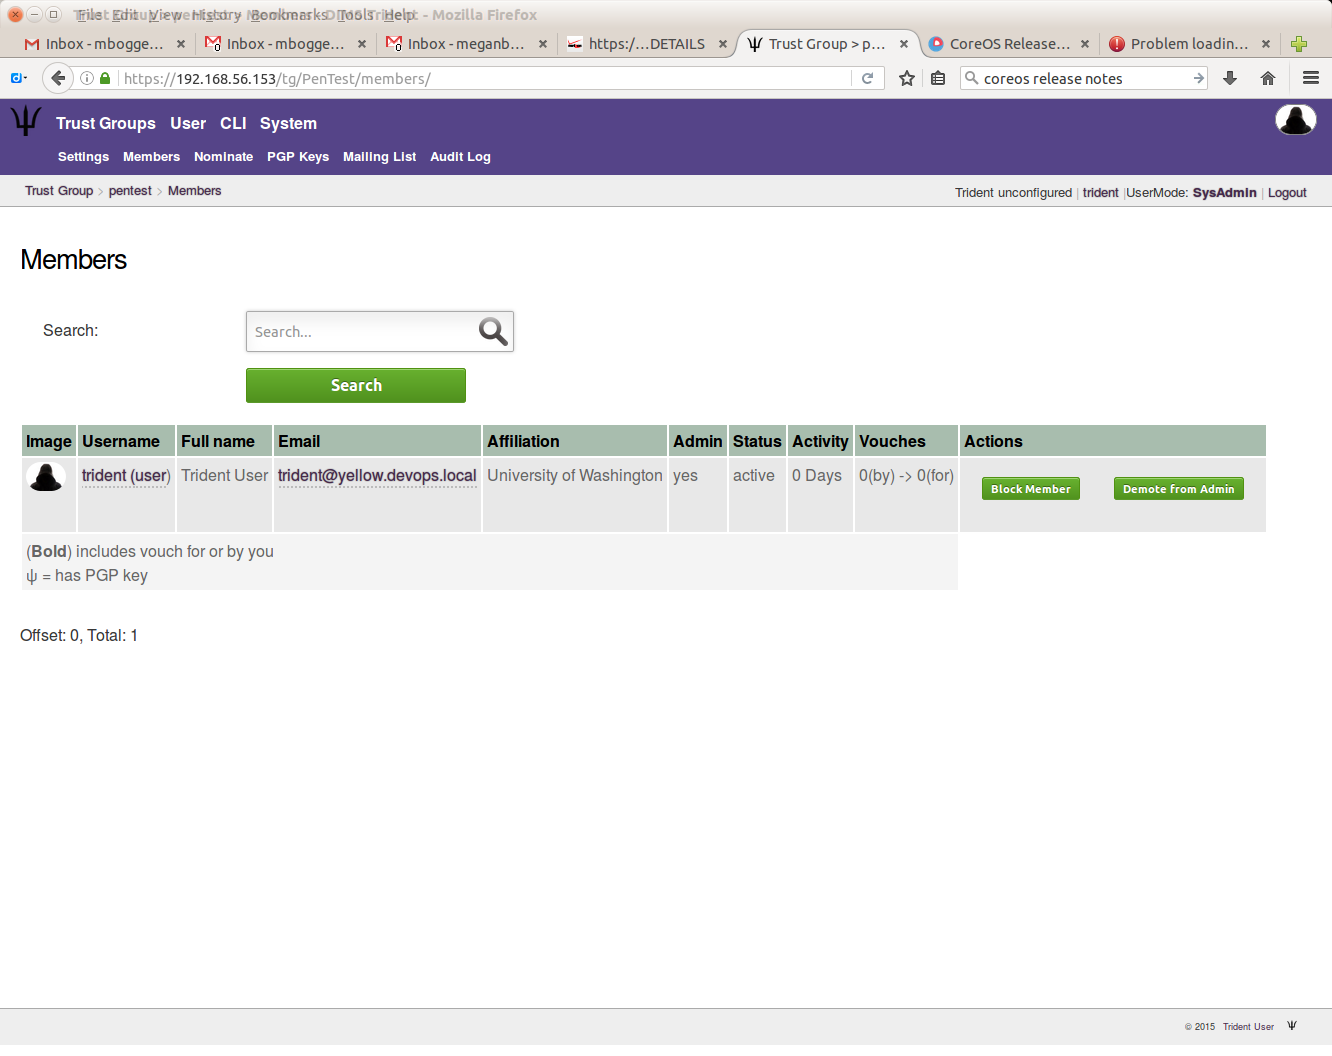
List of trust group members
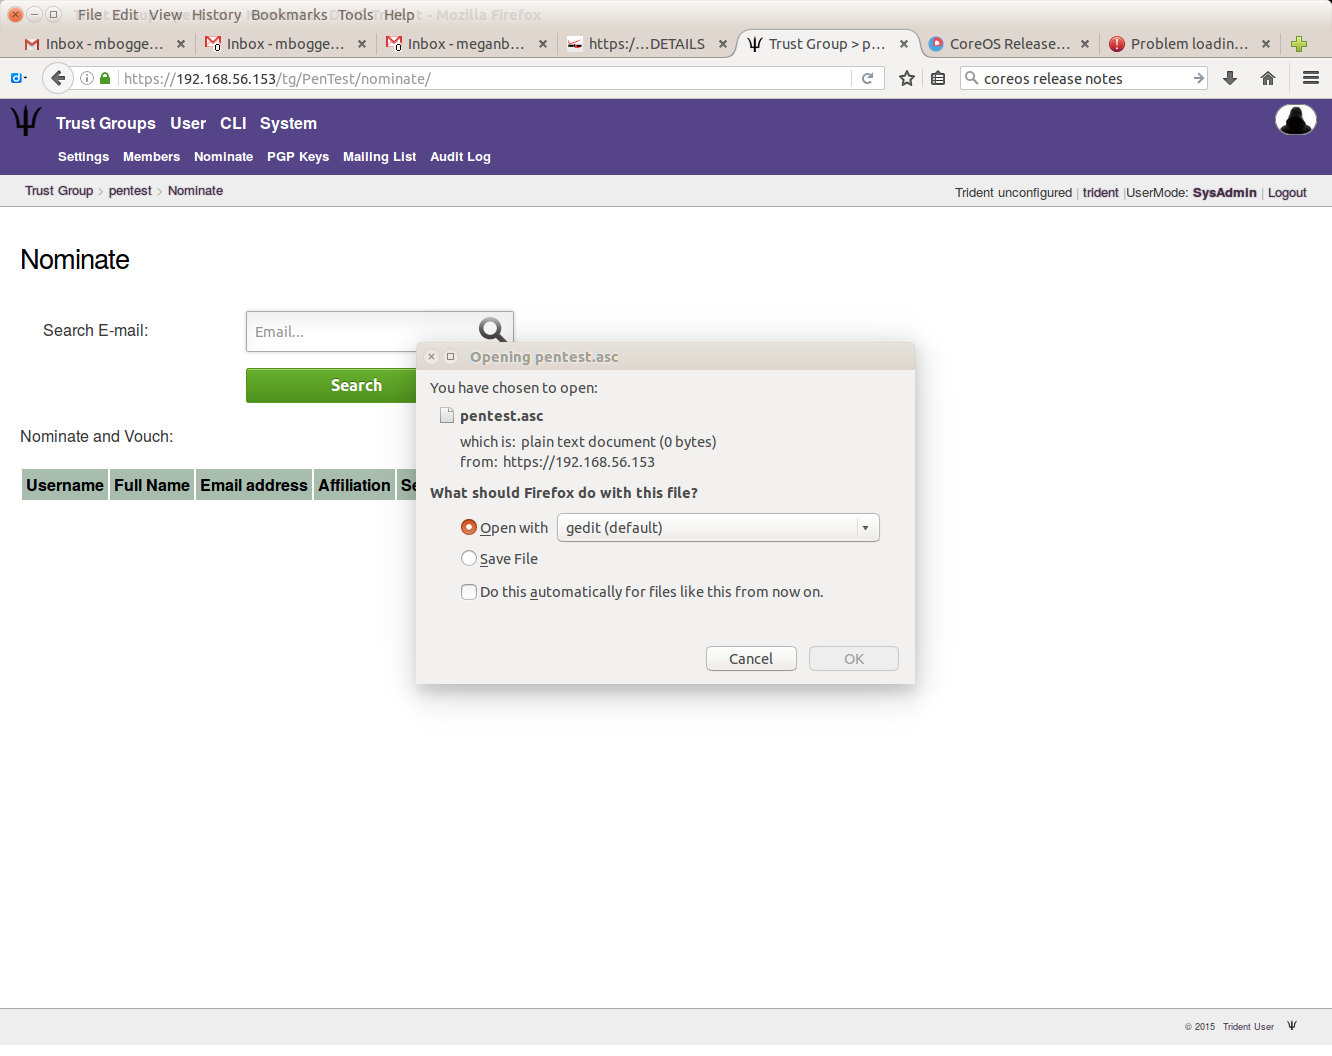
To nominate a user, you must search for them via their email address:
Search by email to nominate user
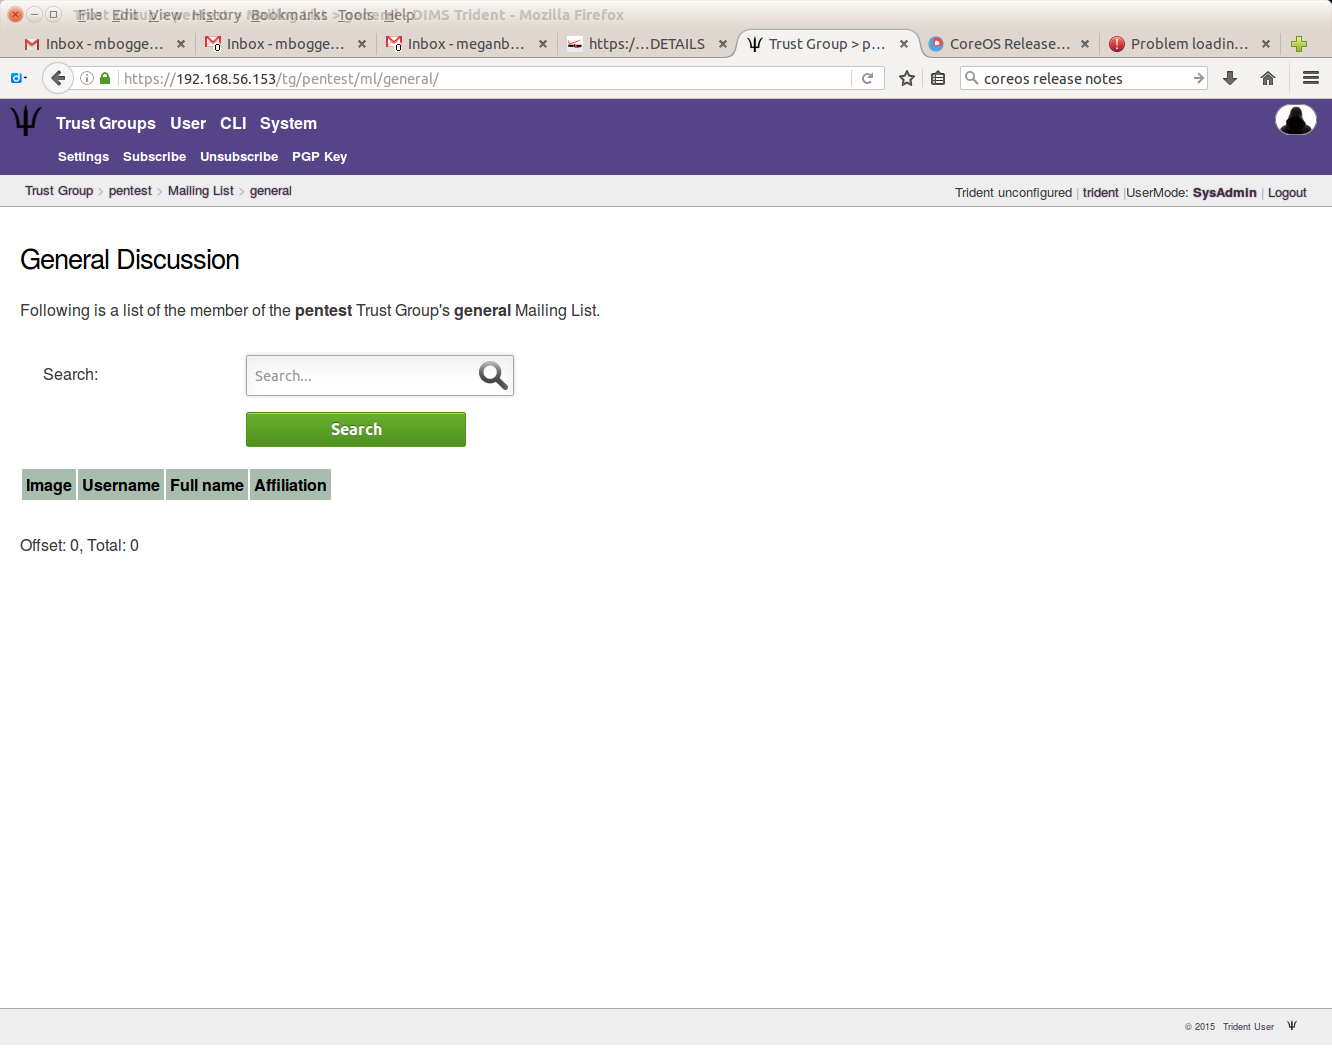
To add mailing lists, choose a trust group, then click the “Mailing List” tab in the second row at the top of the page. There are some default mailing lists when you add a trust group:
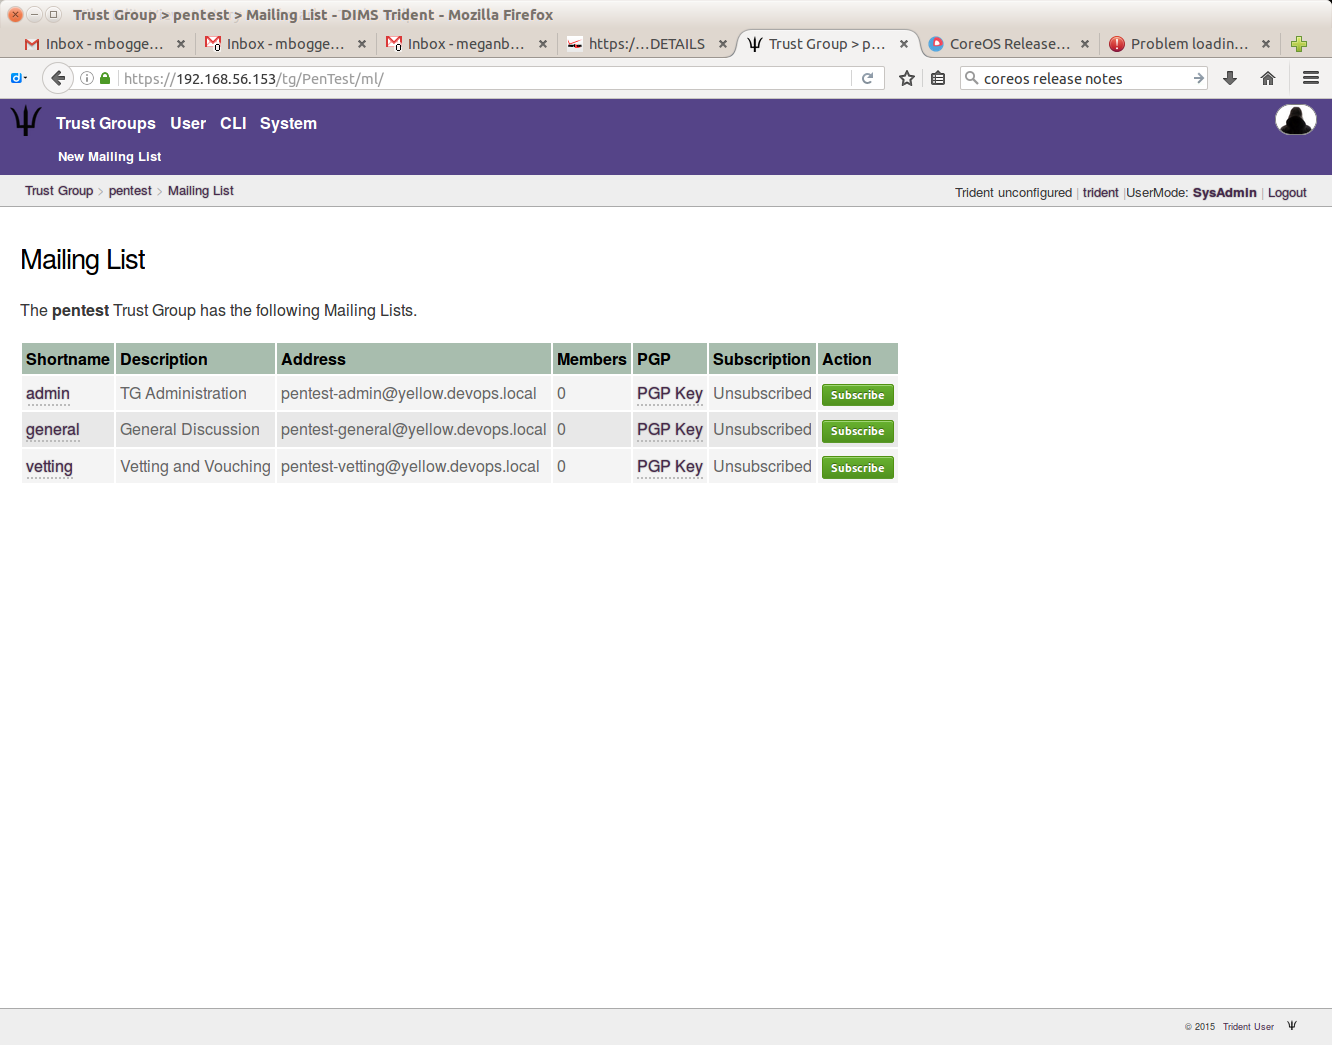
Default trust group mailing lists
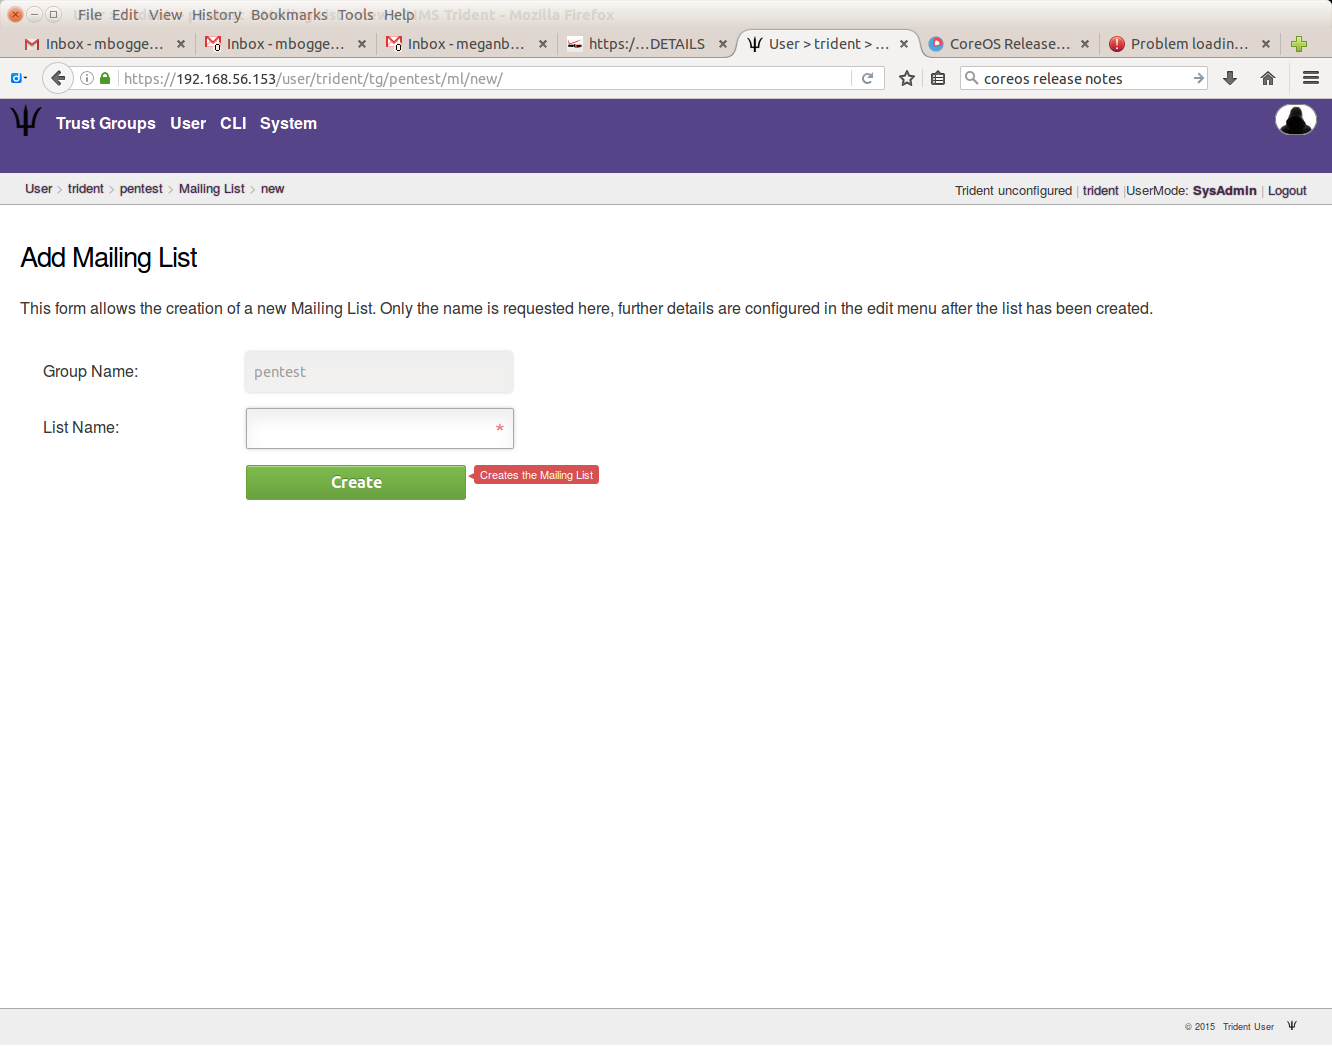
Click the “New Mailing List” in the second row at the top of the page. On the next page, give your mailing list a name:
Add trust group mailing list
You can then see the newly added mailing list:
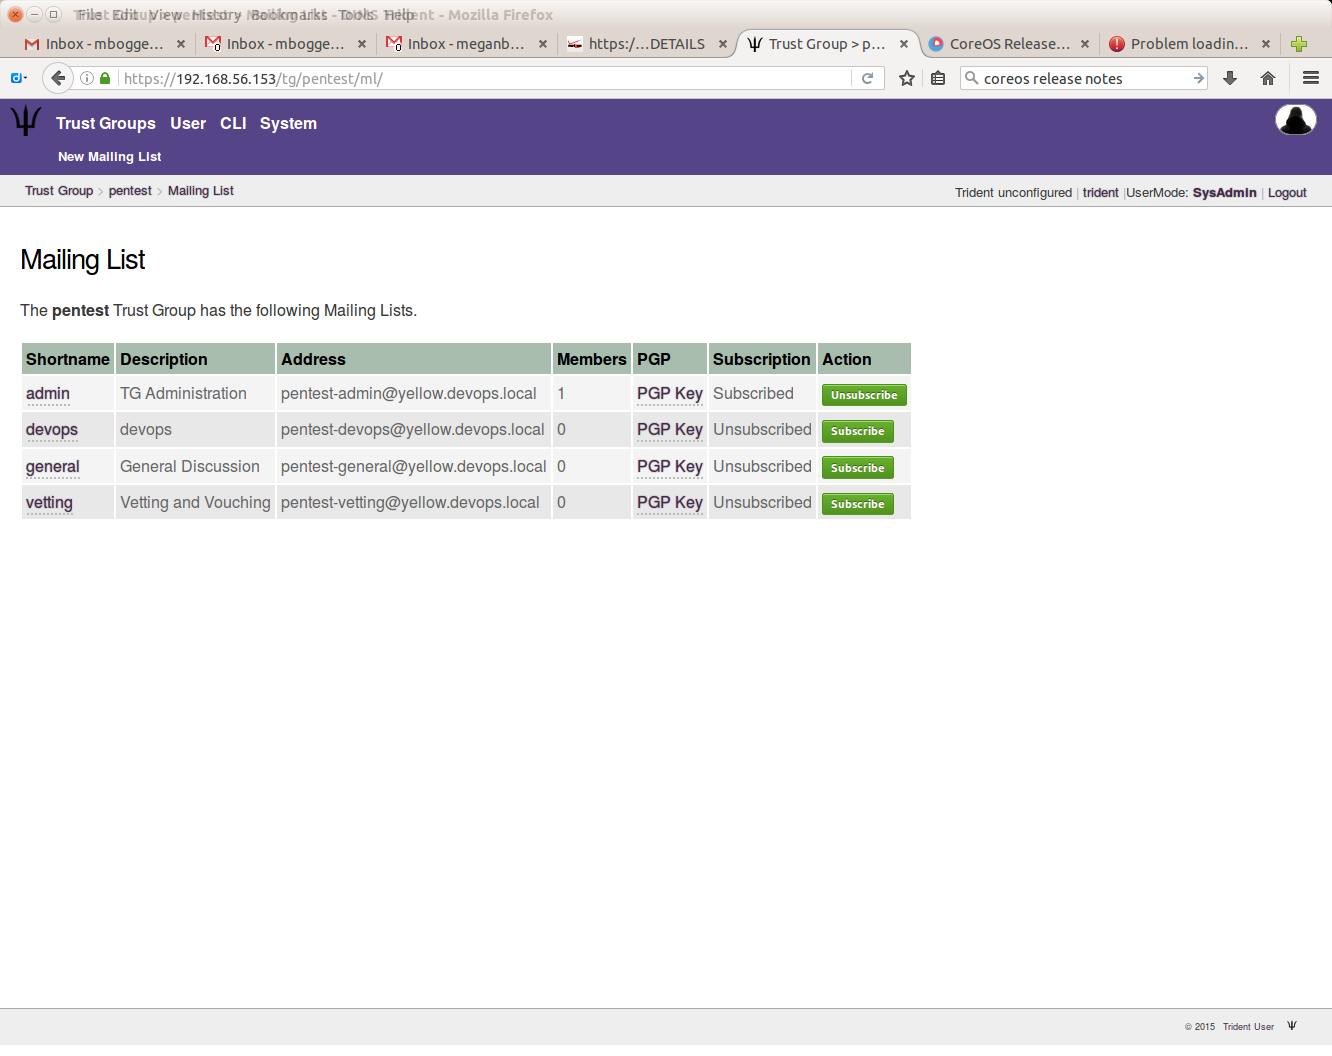
Default and added mailing list index
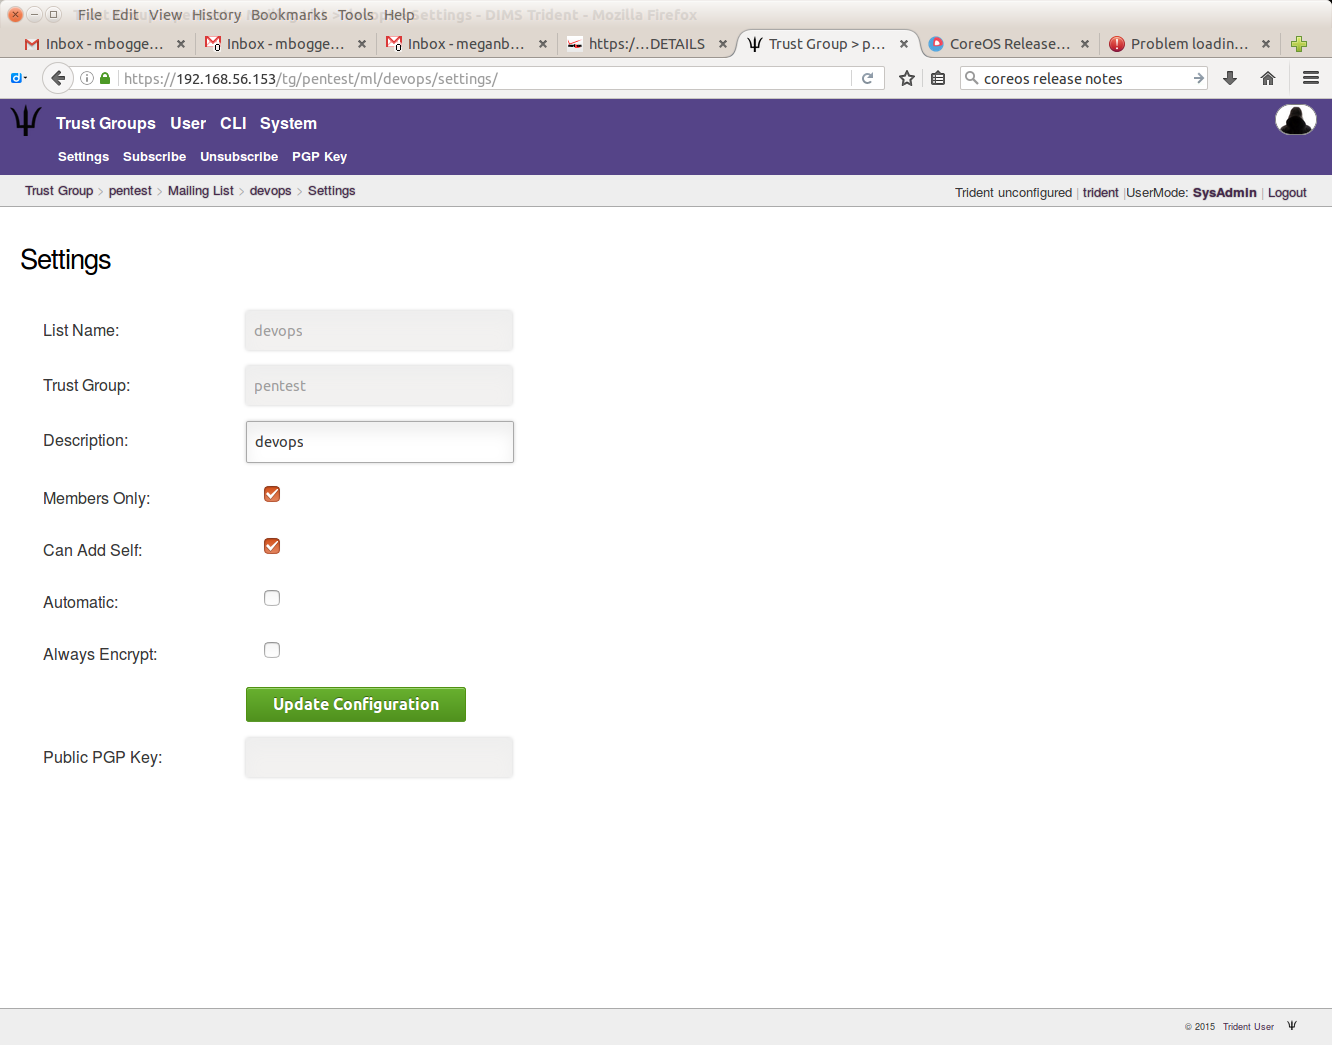
Once the mailing list is created, you can update its settings, subscribe or unsubscribe users, and view the PGP key.
To update a mailing list’s settings, choose a mailing list, then click the “Settings” tab in the second row at the top of the page.
Update mailing list settings
If no users have been subscribed to a mailing list, you’ll see the following page:
No members on mailing list
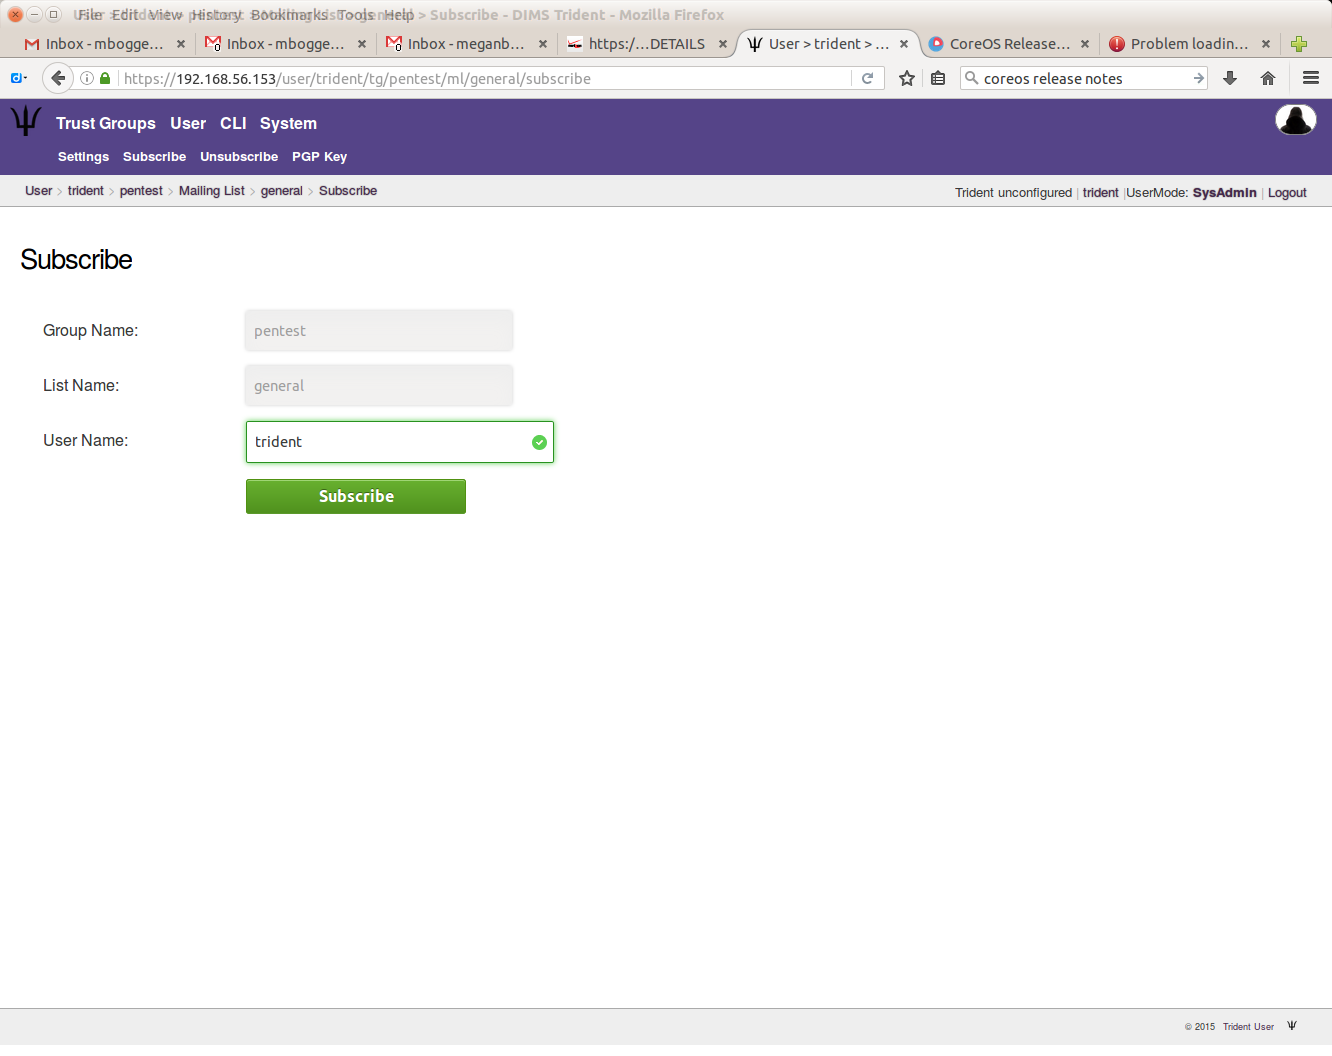
To add a user to a mailing list, choose a trust group and a mailing list, then click the “Subscribe” tab in the second row at the top of the page. Type in the username of the user you’d like to subscribe to the list.
Add member to mailing list
If the user already exists on a mailing list, you’ll see the following:
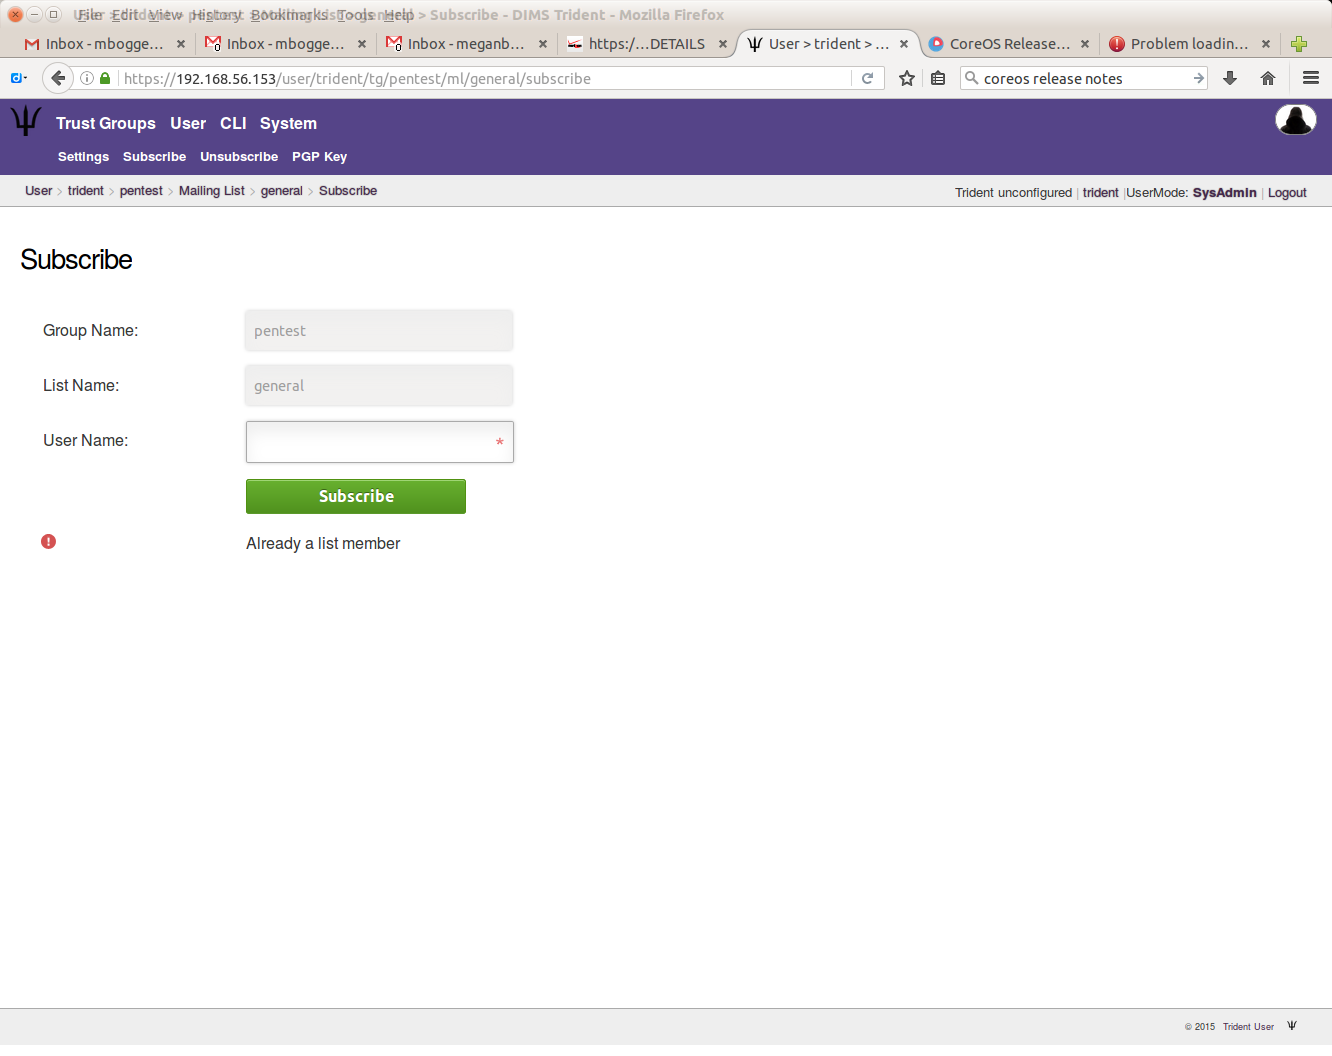
Already member on mailing list
To see the users on a mailing list, choose a trust group and a mailing list, and you’ll see a list of users and basic information about them:
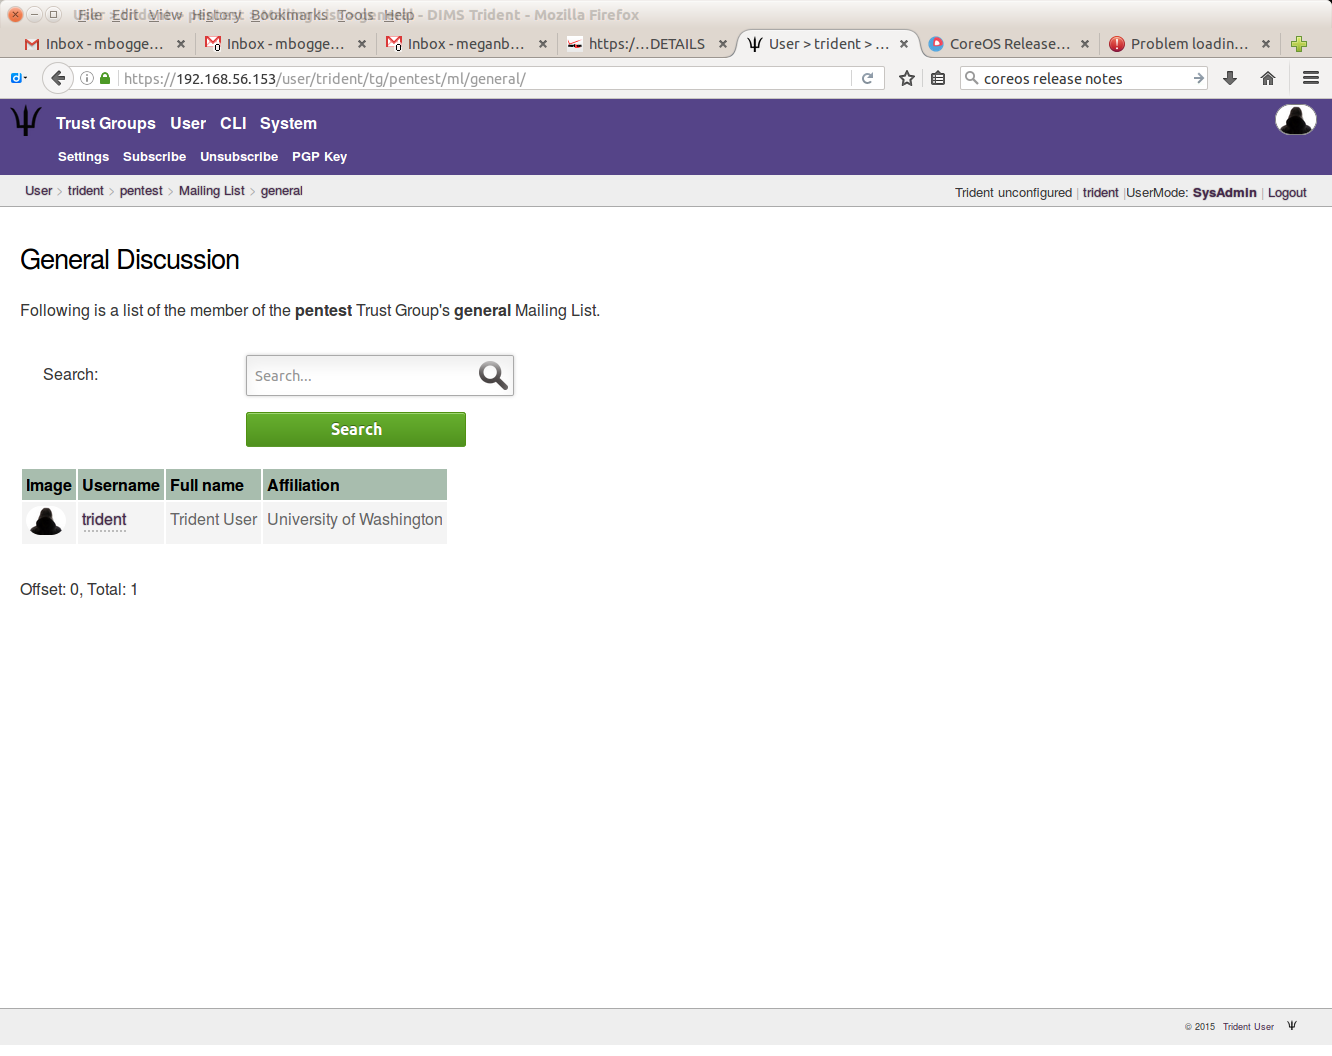
List of users on mailing list
As a user, you can see which mailing lists you are subscribed to by particular trust groups:

Mailing list subscription status
To unsubscribe a user, choose a trust group and a mailing list, then click the “Unsubscribe” tab in the second row at the top of the page. Then give the username you’d like to unsubscribe from the given mailing list, and click “Unsubscribe”.
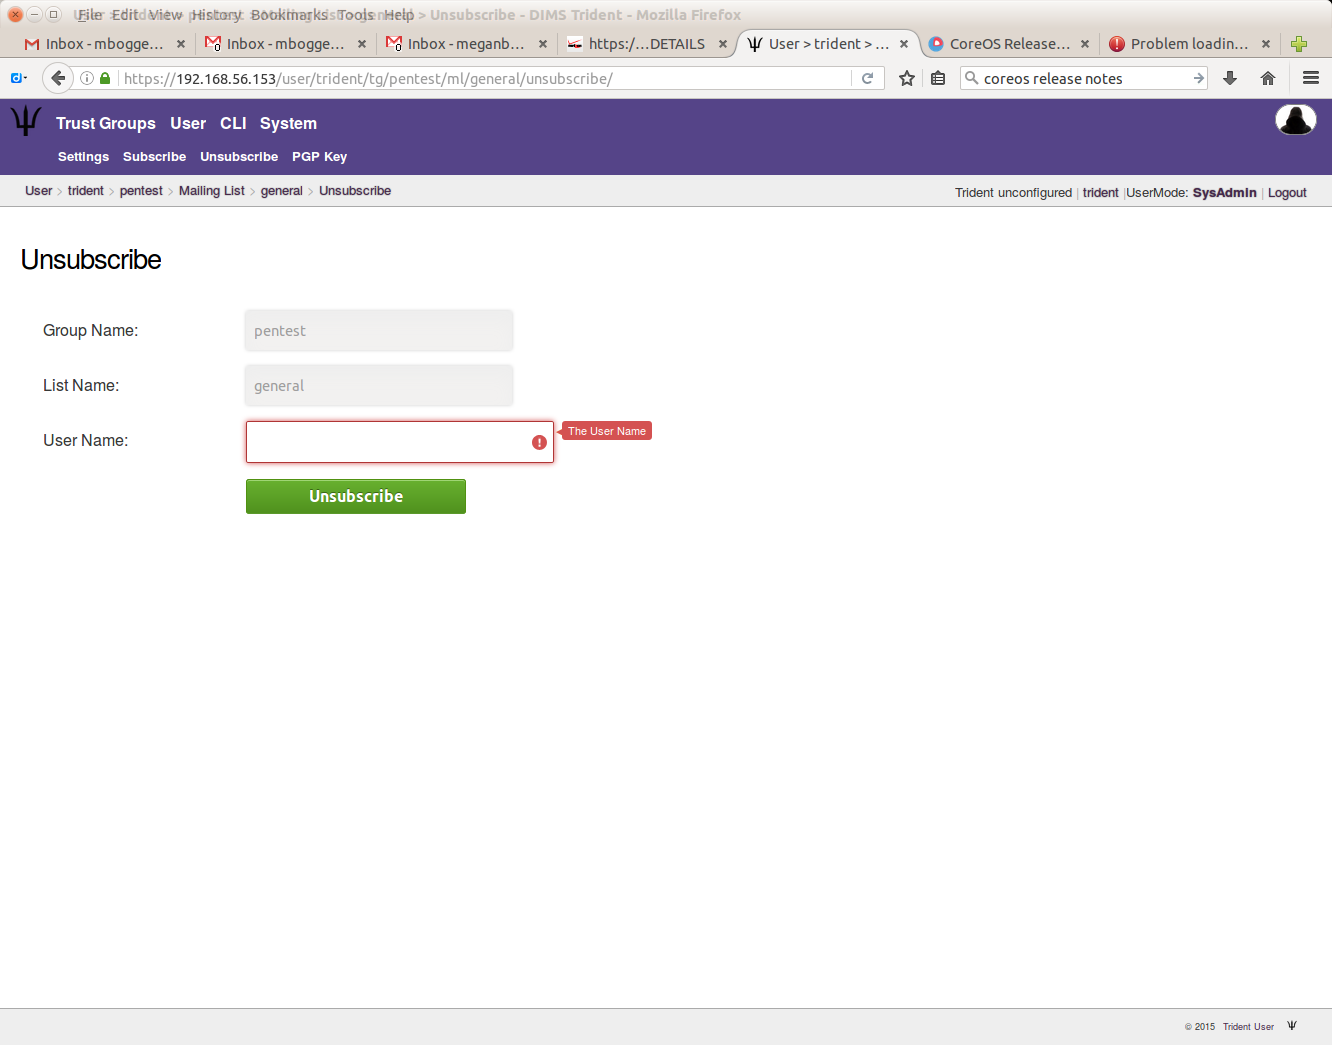
Unsubscribe a user
7.7.3. System information
To view the Trident System information, you must be a sysadmin. Click the “System” tab in the top row at the top of the page.

Trident system information options
To view the audit log, click the “Audit Log” link in the index, or click the “Audit Log” tab in the second row at the top of the page.

Trident system audit log
To view the report, click the “Report” link in the index, or click the “Report” tab in the second row at the top of the page.
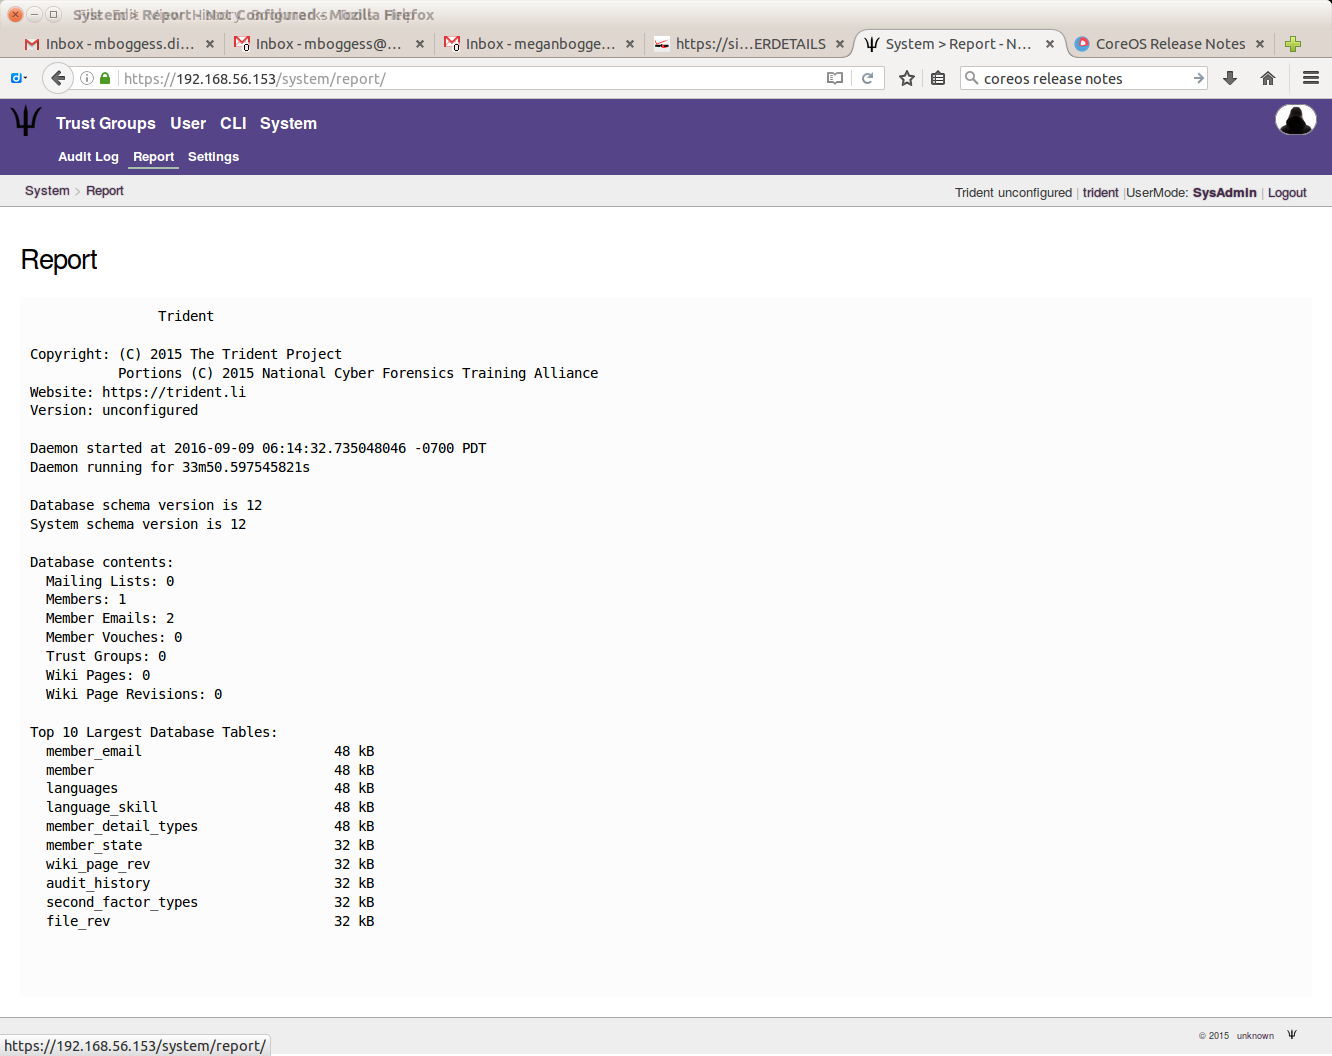
Trident system report
To change the system settings, click the “Settings” link in the index, or click the “Settings” tab in the second row at the top of the page.
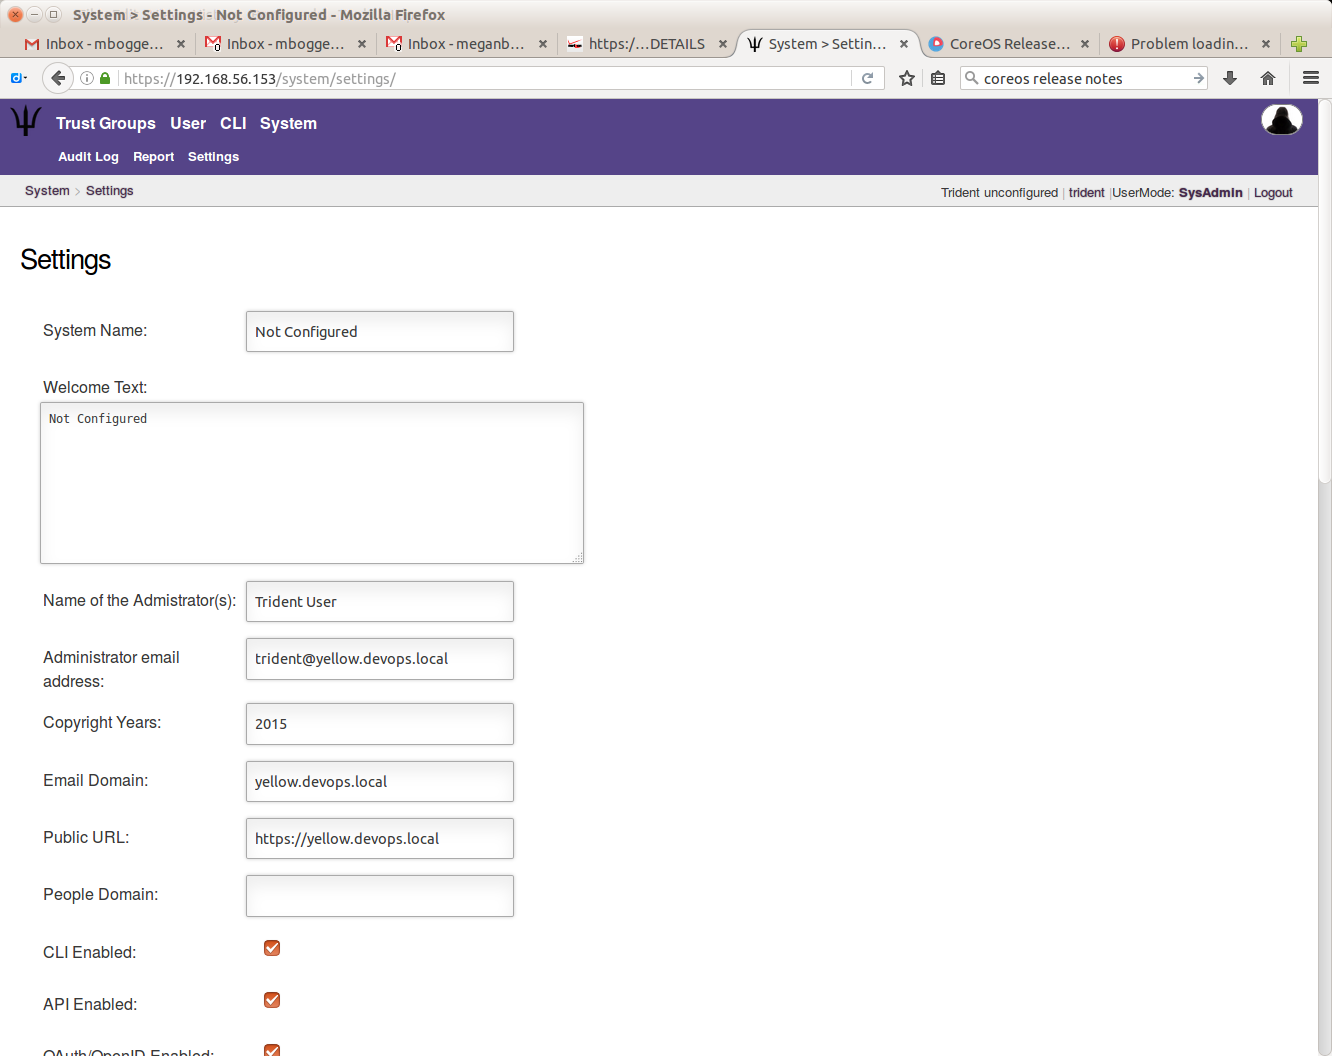
Trident system settings
Don’t forget to click the “Update Settings” button at the bottom of the page for the changes to take affect.
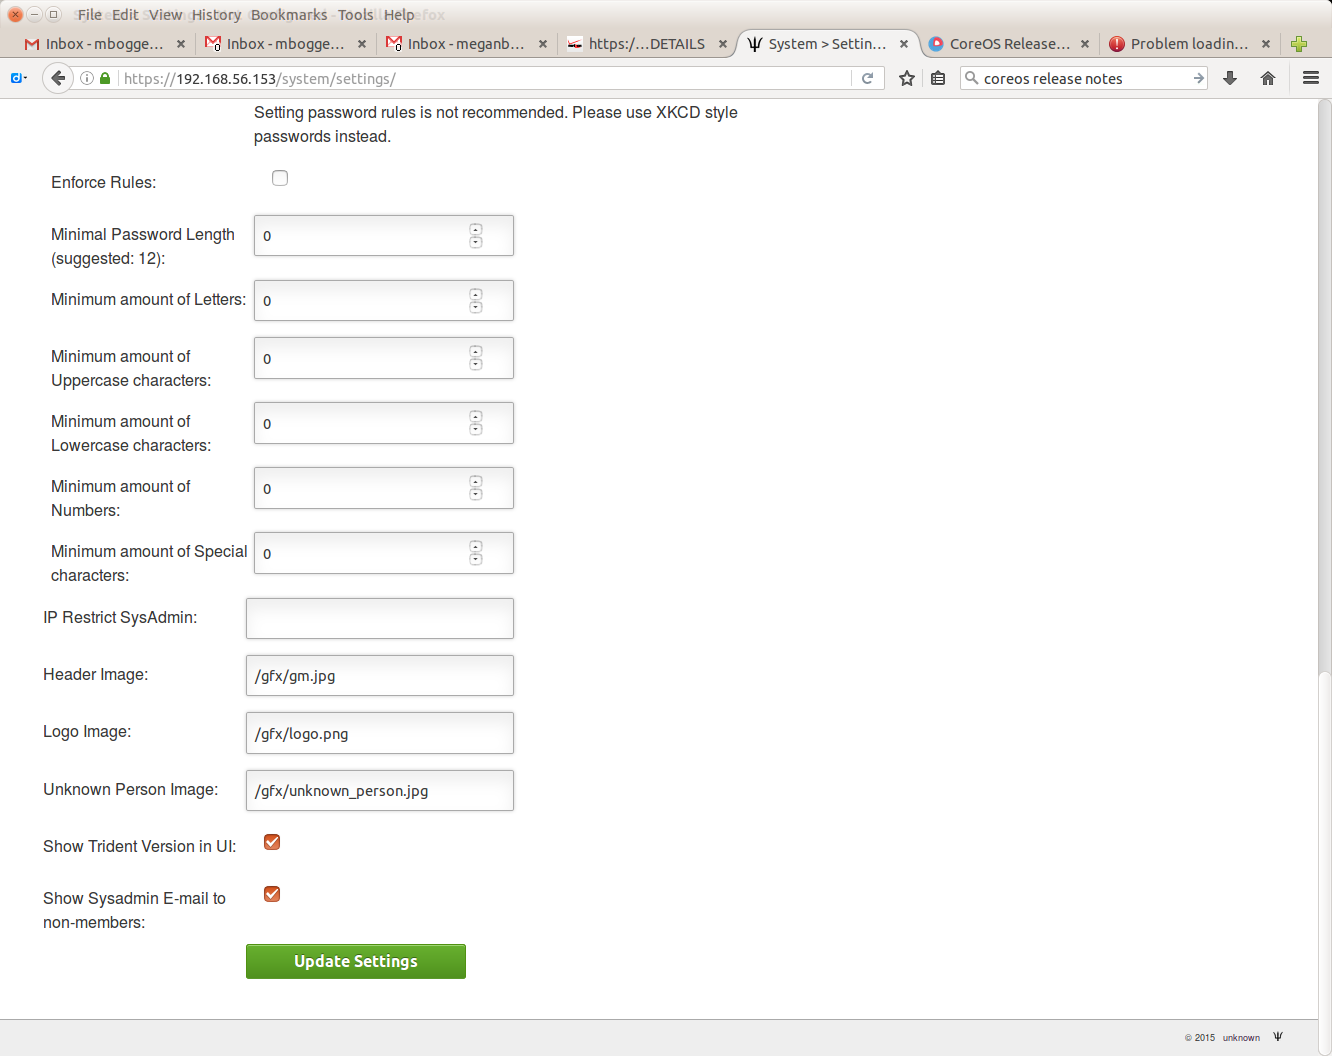
Update Trident system settings
7.7.4. Basic tcli use
To use tcli via the web app, you must be a sysadmin user. Click the “CLI” tab at the top of the page.
To get started, you can type the “help” command into the box, and you’ll get useful information on how to run tcli:

Get tcli help
Anything you can run on the command line using tcli, you can run via the web app.
7.8. Upgrading configuration across Trident versions
One of the challenges with integrating open source applications into a continuous delivery or automated deployment environment has to do with managing customizations across changes in ongoing releases. From one version of a program to another, the contents of congiruation files may change, they may be split into more configuration files, or merged from many into a smaller number, or their names and/or directory paths changed.
The first challenge with automating the configuration and installation of an open source application requires figuring out which files to put under Ansible control, and how to template those files so as to use variables in a way that supports customized deployments.
Each time a new release comes out, opportunities for things to break exist. Simply updating the version number and re-installing may work, but it may also break one or more things in the application. Some things that break will be easy to detect when starting a service, or running the application, but other problems may not be detected until long into the execution of some application or service that cause problems that are much harder to debug due to time between updating and encountering the problem.
To manage the upgrade process, one or more of the following tasks must be performed.
- Differencing the contents of files under Ansible control to determine when configuration customization changes are necessary, or whether it is safe to just update and move on.
- Differening the contents of the distribution archive, or resulting installed files, to detect file name changes, new configuration files, etc. Knowing when the contents of default files have changed in the face of continuous deployment of files that are under Ansible control, takes some getting used to. Having a development environment in which a default installation can be performed, or using a basic “vanilla” virtual machine to hand-install the new package to look at the resulting files, may be necessary.
- Chosing how to handle file name changes for possible
backward-compatibility or multi-version support. This may involve
complicated Ansible
whenconditionals, file names containing version numbers, or other mechanisms that prevent situations where a change results in a situation where the playbook only works with versions<= Nor>=Nin a mutually-exclusive exclusive way.
To see how these problems manifest themselves, and how to detect
and handle them, let’s take a look at two different releases of the
trident portal system. We will compare two releases, versions
1.3.8 and 1.4.2.
We start by extracting the contents of each release’s deb archive
file into a directory where we can examine and/or compare the files.
$ cd /tmp
$ dpkg -x /vm/cache/sources/trident-server_1.3.8_amd64.deb trident_1.3.8
$ dpkg -x /vm/cache/sources/trident-server_1.4.2_amd64.deb trident_1.4.2
We now have two parallel directories in /tmp. Using the Unix diff
program, we can see which files differ in content, or differ in existence
(i.e., occur in one directory, but not the other).
Here is an example of changes to file contents:
$ diff -r trident_1.3.8/ trident_1.4.2/
diff -r trident_1.3.8/etc/init.d/trident trident_1.4.2/etc/init.d/trident
109a110,113
>   rotate)
>       start-stop-daemon --stop --quiet --signal USR1 --exec ${DAEMON} --pidfile ${PIDFILE} --name ${DNAME}
>       ;;
>
116c120
<       log_action_msg "Usage: ${SCRIPTNAME} {start|stop|restart|status}" || true
---
>       log_action_msg "Usage: ${SCRIPTNAME} {start|stop|restart|status|rotate}" || true
diff -r trident_1.3.8/etc/trident/nginx/trident-server.inc trident_1.4.2/etc/trident/nginx/trident-server.inc
11,12d10
< #     include
< # ------------------>8
13a12,13
> #     ssl_certificate ...
> #     ...
15c15,17
<
---
> #     include /etc/trident/nginx/trident-server.inc
> # }
> # ------------------>8
23c25,28
<       location /css/ {
---
>       location ~ ^/(css|gfx|js)/ {
>               expires 7d;
>               root /usr/share/;
Here are examples of file system changes, specifically those files in the
webroot directory:
 $ diff -r trident_1.3.8/ trident_1.4.2/ | grep '^Only' | grep '/webroot'
 Only in trident_1.3.8/usr/share/trident/webroot/css: epiceditor
 Only in trident_1.3.8/usr/share/trident/webroot/css: form.css
 Only in trident_1.3.8/usr/share/trident/webroot/css: style.css
 Only in trident_1.4.2/usr/share/trident/webroot/css: trident.css
 Only in trident_1.3.8/usr/share/trident/webroot: favicon.ico
 Only in trident_1.3.8/usr/share/trident/webroot/gfx: gm.jpg
 Only in trident_1.3.8/usr/share/trident/webroot/gfx: info.png
 Only in trident_1.3.8/usr/share/trident/webroot/gfx: invalid.png
 Only in trident_1.3.8/usr/share/trident/webroot/gfx: logo.png
 Only in trident_1.3.8/usr/share/trident/webroot/gfx: red_asterisk.png
 Only in trident_1.3.8/usr/share/trident/webroot/gfx: search.png
 Only in trident_1.3.8/usr/share/trident/webroot/gfx: unknown_person.jpg
 Only in trident_1.3.8/usr/share/trident/webroot/gfx: valid.png
 Only in trident_1.3.8/usr/share/trident/webroot/gfx: warning.png
 Only in trident_1.3.8/usr/share/trident/webroot/gfx: xkcd_password_strength.png
 Only in trident_1.3.8/usr/share/trident/webroot: js
 Only in trident_1.3.8/usr/share/trident/webroot: robots-ok.txt
 Only in trident_1.3.8/usr/share/trident/webroot: robots.txt
We can see that one file (form.css) was removed between release
1.3.8 and 1.4.2, while one file (style.css) was renamed,
possibly including the now-absent form.css` file, to a new
file named ``trident.css. By looking at the contents of the
form.css file, it is clear that .styled_form is one of
the unique elements defined in this file. Looking at the contents
of the same directory from both versions seems to support the
hypothesis that this file was merged:
$ grep -r styled_form trident_1.3.8/usr/share/trident/webroot/css/
trident_1.3.8/usr/share/trident/webroot/css/style.css:form#wikiform.styled_form
trident_1.3.8/usr/share/trident/webroot/css/form.css:.styled_form .form_hint, .styled_form .required
trident_1.3.8/usr/share/trident/webroot/css/form.css:.styled_form ul
trident_1.3.8/usr/share/trident/webroot/css/form.css:.styled_form li
trident_1.3.8/usr/share/trident/webroot/css/form.css:.styled_form h2
trident_1.3.8/usr/share/trident/webroot/css/form.css:.styled_form label
trident_1.3.8/usr/share/trident/webroot/css/form.css:.styled_form input, .fakebutton
trident_1.3.8/usr/share/trident/webroot/css/form.css:.styled_form textarea
trident_1.3.8/usr/share/trident/webroot/css/form.css:.styled_form input[type=number]
trident_1.3.8/usr/share/trident/webroot/css/form.css:.styled_form input[type=radio]
trident_1.3.8/usr/share/trident/webroot/css/form.css:.styled_form input[type=submit], .fakebutton
trident_1.3.8/usr/share/trident/webroot/css/form.css:.styled_form input, .styled_form textarea, .fakebutton
trident_1.3.8/usr/share/trident/webroot/css/form.css:.styled_form input:focus, .styled_form textarea:focus, .fakebutton
trident_1.3.8/usr/share/trident/webroot/css/form.css:.styled_form input:required, .styled_form textarea:required
trident_1.3.8/usr/share/trident/webroot/css/form.css:.styled_form input:required:valid, .styled_form textarea:required:valid
trident_1.3.8/usr/share/trident/webroot/css/form.css:.styled_form input:focus:invalid, .styled_form textarea:focus:invalid
trident_1.3.8/usr/share/trident/webroot/css/form.css:form.styled_form li.info label, form.styled_form li.error label, form.styled_form li.okay label, form.styled_form li.warning label, form.styl
ed_form li.required label
trident_1.3.8/usr/share/trident/webroot/css/form.css:form.styled_form li.info label
trident_1.3.8/usr/share/trident/webroot/css/form.css:form.styled_form li.error label
trident_1.3.8/usr/share/trident/webroot/css/form.css:form.styled_form li.okay label
trident_1.3.8/usr/share/trident/webroot/css/form.css:form.styled_form li.warning label
trident_1.3.8/usr/share/trident/webroot/css/form.css:form.styled_form li.required label
trident_1.3.8/usr/share/trident/webroot/css/form.css:.styled_form input:hover + .form_hint, .styled_form textarea:hover + .form_hint
trident_1.3.8/usr/share/trident/webroot/css/form.css:.styled_form input:required:valid + .form_hint, .styled_form textarea:required:valid + .form_hint,
trident_1.3.8/usr/share/trident/webroot/css/form.css:.styled_form input:required:valid + .form_hint::before, .styled_form textarea:required:valid + .form_hint::before
trident_1.3.8/usr/share/trident/webroot/css/form.css:.styled_form input[type=submit], .fakebutton, .styled_button input
trident_1.3.8/usr/share/trident/webroot/css/form.css:.styled_form input[type=submit], .fakebutton, .styled_button input
trident_1.3.8/usr/share/trident/webroot/css/form.css:.styled_form input[type=submit]:disabled
trident_1.3.8/usr/share/trident/webroot/css/form.css:.styled_form input[type=submit].deny
trident_1.3.8/usr/share/trident/webroot/css/form.css:.styled_form input[type=checkbox], input[type=radio]
trident_1.3.8/usr/share/trident/webroot/css/form.css:.styled_form input[type=checkbox]:checked, input[type=radio]:checked
trident_1.3.8/usr/share/trident/webroot/css/form.css:.styled_form input[type=checkbox]:disabled, input[type=radio]:disabled
trident_1.3.8/usr/share/trident/webroot/css/form.css:.styled_form input[type=checkbox]:checked:disabled, input[type=radio]:checked:disabled
trident_1.3.8/usr/share/trident/webroot/css/form.css:.styled_form input[type=checkbox]:after, input[type=radio]:after
trident_1.3.8/usr/share/trident/webroot/css/form.css:.styled_form input[type=checkbox]:disabled:after, input[type=radio]:disabled:after
trident_1.3.8/usr/share/trident/webroot/css/form.css:.styled_form input[type="checkbox"]:checked:after,input[type="radio"]:checked:after
trident_1.3.8/usr/share/trident/webroot/css/form.css:.styled_form input[type="checkbox"]:focus
trident_1.3.8/usr/share/trident/webroot/css/form.css:.styled_form textarea.console
$ grep -r styled_form trident_1.4.2/usr/share/trident/webroot/css/
trident_1.4.2/usr/share/trident/webroot/css/trident.css:.login form.styled_form
trident_1.4.2/usr/share/trident/webroot/css/trident.css:.login .styled_form input
trident_1.4.2/usr/share/trident/webroot/css/trident.css:.login .styled_form input[type="submit"]
The problem now is how to support one CSS file named style.css for (at least)
version 1.3.8, but a file named trident.css for (at least) version
1.4.2. There still remains the question, “When did this change occur, and how
do we instruct Ansible which file to use?”
If, on the other hand, the file name has not changed but its contents vary
significantly (e.g., one uses a variable named file_root and the other
has changed to using a variable named file_roots), it becomes more complicated
in managing a file with one name, but two different contents. This requires
differentiating files by metadata (i.e., the name must include a version number
or some other unique string), or the use of Jinja conditionals must be done.
The latter mechanism of Jinja conditional inclusion, is a bit simpler and
is easiest to manage in terms of file differencing as the mechanism for
maintaining the contents of different versions of the file.
For example, here is how the difference between content in the file
trident.conf.j2 can be managed using Jinja conditionals:
# {{ ansible_managed }} [ansible-playbooks v{{ ansibleplaybooks_version }}]
#
#######################################################
# Trident Configuration
#######################################################
# Except for comment lines (anything starting with '#')
# this file is in the JSON format, thus mind the commas
# and quotes otherwise Trident can't properly use it.
#
# This file should only be readable by the Trident user
#######################################################

{
{% if trident.version in [ '1.3.8' ] %}
    "file_root": "/usr/share/trident/",
{% endif %}
{% if trident.version in [ '1.4.2' ] %}
    # Where the dbschemas, webroot and templates are located
    "file_roots": [ "/usr/share/trident/", "/usr/share/pitchfork/" ],
{% endif %}

    # Where variable files are stored
    "var_root": "/var/lib/trident/",

    # TODO(dittrich): Try to get this to rsyslog for sorting, not separate logging
    # Log File location (logrotate rotates it)
    "logfile": "/var/log/trident/trident.log",

    # Crypto Keys for JWT (in directory relative to config dir)
    "jwt_key_prv": "jwt.prv",
    "jwt_key_pub": "jwt.pub",

{% if trident.version in [ '1.4.2' ] %}
    # Content Security Policy
    "csp": "default-src 'self'",

    # CSS: Cascading Style Sheets
    "css": [ "trident", "blockquote", "code", "crumbs", "diff", "form", "loader", "messages", "search", "table", "wiki" ],

    # Javascript: global Javascript for every page
    # (Should actually always be empty)
    "javascript": [],

    # X-Forwarded-For Trusted IP list
    # CIDR prefixes from which we trust the XFF header
    "xff_trusted_cidr": [ "127.0.0.1/8" ],

    # Weak Password Dictionaries
    "pw_weakdicts": [ "10k_most_common.txt" ],
{% endif %}

{% if trident.version in [ '1.3.8' ] %}
    #########################################
    # PostgreSQL Database details
    #########################################
    # PSQL local unix socket
    # Uses PSQL peer authentication
    # This works out of the box on Debian
    #########################################
{% endif %}
{% if trident.version in [ '1.4.2' ] %}
    #########################################
    # PostgreSQL Database details
    #########################################
    # Requires configuration of pg_hba.conf!
    #
    # local unix socket (Debian):
    #   "db_host": "/var/run/postgresql/",
    #   "db_port": "5432",
    #
    # remote:
    #   "db_host": "db.example.org",
    #   "db_port": "5432",
    #########################################
{% endif %}
7.9. Emails and other non-official documentation
- Email from Linda in response to Megan asking for any additional documentation.
To: Megan Boggess <mboggess@uw.edu>
From: Linda Parsons <linda.parsons@nextcentury.com>
Date: April 13, 2016
Subject: Trident emails and any other documentation

Hi Megan,

Yes, the new project is fun, and I hope things are going well for you too...
There isn't any documentation on Trident other than what they provide at
trident.li and on their github pages - have Dave get you access to their repo.
I relied on that documentation to do all the Docker and Ansible stuff.


The README in the dims-dockerfiles repo is the one that describes what I did.
I may have comments in Ansible files as well that are descriptive - I don't
have access to the code at the moment. I had the deployment done (or at least
a working version to get you started) from build through Ansible deployment of
two docker containers... but there is still work to be done and you will need
to make the Ansible deployment fit with how you guys are doing things now.

the Postgresql container, and one to actually create the .deb build files to
install Trident. The "build-trident" (or "trident-build" - not sure but it has
"build" in the name of the directory) has a script that will pull the current
source in our git repo (which in turn is from their trident repo - someone needs
to keep that synchronized) and will create the .deb files and push them to our
sources repo. That is so the actual Docker images can be created using them.
I made a change to the file that controls the packaging so that it didn't require
additional software like nginx, postfix, etc. - this is better for docker since
we may not want all the services on all the containers that need this software.
For example, to create the database on the postgresql container, you need trident
installed as well just so you can run their scripts.  Anyway, the .deb packages
don't force the user to install those services, but of course you will install
them if you need them. So, I've got nginx and trident on the main trident image.
The one thing that needs to be done is to also install and configure postfix on
that image. I had been hoping we could use a separate docker container for that,
but it would require changes to their source code. So you will need to modify that
Dockerfile to install and configure postfix.

Maybe you could look through the dims-dockerfile stuff and the Ansible playbooks
and then get back to me if you have questions. I could do a quick hangout to answer
them.  Also note there are two docker images for the postgresql container - one for
the default one that is installed in a new environment, and one to install a copy of
our ops-trust database. The second was used to get the trident system up and running
on hub.prisem.washington.edu so we could use it and have the Dashboard be able to
get data from that database. It was also necessary at the time since there apparently
is a bug in a new install and the sysadmin can't create trust groups from within the
UI (I have an issue in github for that but no one has responded). However, it cannot
be used for new systems.

Another thing that needs to be worked out is how to do the certificates for the
machine running the trident docker containers. Also, if you look at the Ansible
playbooks, there are commands to start the containers in a development mode and in
secure (production) mode.  We are currently using development mode since we don't have
the certs - production mode for the docker containers hasn't been tested.

I don't really have any emails to the trident guys... we had talked about emailing
Vixie about the bug I mentioned above but I had to leave before that was done.
I'm not sure why they haven't responded to the bug report on github.  Anyway, what
I knew was from reading through their docs many times and also from what I knew about
Postgres databases in general, and then from actually building the system. So I think
from reading the Dockerfiles and the Ansible playbooks you will get a good brain dump.

You should be able to build and deploy the trident system locally as long as you
have a VM to install it on and a consul cluster running as well (need the consul
stuff so the docker containers can talk to each other on the overlay network).
Its better to use just the regular postgres-trident docker container for postgres
(which creates a new database) - then you'll see the bug I mentioned. It is
imperitive that they fix that or let us know what we're doing wrong if anything
(I posted a log to the github issue that shows the database errors that are
being produced). It will also allow you to be able to test adding postfix to the mix.

Last I looked to they had not fixed the firewall issue that was preventing us from
accessing the old ops-trust machines - not sure if that has been fixed yet.

Linda
There is an Ansible role called
trident-docker-deploylocated in$GIT/ansible-playbooks/roles. This roles creates a volume container to be paired with a DIMS postgres container (if it doesn’t already exist), and a DIMS postgres container and DIMS Trident container.The Dockerfiles and related files and scripts for these containers can be viewed at:
- Postgres:
$GIT/dims-dockerfiles/dockerfiles/postgres-trident - Trident:
$GIT/dims-dockerfiles/dockerfiles/trident
- Postgres:
Additionally, Linda created a couple “helper” containers. One container updates
source.prisem.washington.eduand another builds off the “fresh-install” DIMS postgres container to install a copy of the DIMS OPS-Trust database.These can be viewed at:
- Build:
$GIT/dims-dockerfiles/dockerfiles/trident-build - Original Database:
$GIT/dims-dockerfiles/dockerfiles/postgres-trident-clone
- Build: