3. Onboarding Developers
This chapter covers the process for onboarding new developers to provide them access to DevOps components necessary to work on elements of a DIMS deployment. In short, developers (and system administrators) will need the following:
- An account in the Trident portal system for access to email lists, etc.
- A GPG/PGP key pair. The public key will be loaded into the Trident portal so others can access the key and so it can be used for encrypted email.
- A Google account for OpenID Connect authentication used for single-signon access to internal resources, along with an LDAP database entry that links to this Google account.
- SSH public/private key pairs allowing access to Git repositories, Ansible control host, DIMS system components, etc.
- Initial copies of Git repositories used to develop and build a DIMS deployment instance.
Once all of these resources have been procured, developers or system administrators are ready to work on a DIMS instance.
3.1. Initial Account Setup
The first step in adding a new DIMS developer is getting them set up
with an account on our internal ops-trust portal instance.
Note
We will transition to using Trident, rather than the old Ops-Trust portal code base initially set up for this project, as soon as we are able. Trident has an internal wiki, so the FosWiki server mentioned here will also be retired.
Our FosWiki server has a page that was dedicated to the steps necessary for Provisioning New DIMS Users.
Caution
The FosWiki page Provisioning New DIMS Users looks like it may be out of
date, or include steps that may not be necessary for just adding a new
user. It has a huge number of steps that should be made more streamlined
or added to the DIMS web app to simplify the process of adding and removing
DIMS users in concert with the ops-trust portal at the center of DIMS.
Once the user has been given their password to the ops-trust portal,
they need to change their MemberID to match the account name that
should be used within DIMS. (E.g., Dave Dittrich may be given the
MemberID of davedittrich2475 by the portal, but the desired
account name within DIMS subsystems should be dittrich.)
3.2. GPG Encryption Keys for Email, etc.
Each ops-trust portal account holder needs a GPG key to be able to
send/receive encrypted emails. In normal operation, one’s ops-trust
portal account is not fully enabled until the user has uploaded their
GPG key.
One of the easiest ways to process GPG-encrypted email is using Enigmail with the The GNU Privacy Guard from the Thunderbird email client. Follow the Enigmail Quick Start Guide to install, configure, and generate a GPG key for use with Thunderbird (which is supported on Mac, Linux, and Windows, and is installed by default on the DIMS Ubuntu developer laptops).
After you have set up The GNU Privacy Guard and uploaded your key,
log in to the ops-trust portal and select PGP Keys from the menu
on the left of the screen to download all GPG keys for other portal
users and all email lists to which you subscribe.
Note
This step will only download keys that are in the system at the time you press the link, which means they will get out-of-date with respect to new users, regenerated keys, and/or new email lists that may be created over time. Get in the habit of updating your GPG key ring regularly, or at least remember that failure to encrypt/decrypt and email may be due to your keyring being out of date and needing a refresh.
3.3. Creating accounts
After a new user has successfully set up their ops-trust portal
account and modified their MemberID to align with their desired DIMS
account name, they must be added to the dims_users array in
the $GIT/ansible-playbooks/group_vars/all file. Once added,
the Ansible playbook roles that generate DIMS user accounts
(e.g., dims-users-create) can be played to create accounts
as needed.
3.4. Installing initial SSH key(s)
Before someone can clone Git repositories, or use SSH to log in to DIMS
systems for interactive shell access, they must (a) have a DIMS SSH key,
and (b) have the public key and authorized_keys file(s) on target
systems set up properly.
Create the user’s DIMS SSH key pair...
Generate accounts using Ansible playbook ($whatever), which creates the accounts and installs their public key.
Copy their key pair into the account on the system where they will be doing their development (i.e., a DIMS developer laptop, Vagrant virtual machine, or bare-metal workstation.) Also make sure their key is included in the
authorized_keysfile in thegitaccount ongit.devops.developin order for them to be able to read/write source code using Git.Trigger a Jenkins build job for public-keys-configure to push the new user’s key to all DIMS-DevOps and DIMS-OPS systems.
Set the password on the account they are supposed to use so they can log in to it, and/or securely transfer their public SSH key to them so they can use it to access the account without needing a password.
Note
They will need a password on the account for
sudoon commands likedims-ci-utils.install.userthat ask for thesudopassword in order to pass it to Ansible.
Use command
passwd <username>.[dimsenv] mboggess@b52:~ () $ passwd mboggess Changing password for mboggess. (current) UNIX password: Enter new UNIX password: Retype new UNIX password: passwd: password updated successfully
3.5. Remote Account Setup
This section details how to set up a new account for a current developer on a remote machine, after being logged in to the remote machine.
3.5.1. Change password
Use command passwd <username>.
[dimsenv] mboggess@b52:~ () $ passwd mboggess
Changing password for mboggess.
(current) UNIX password:
Enter new UNIX password:
Retype new UNIX password:
passwd: password updated successfully
3.5.2. Transfer SSH Keys to Remote Machine
Once logged in to remote machine, check ~/.ssh/authorized_keys file for public key:
[dimsenv] mboggess@b52:~ () $ cd .ssh
[dimsenv] mboggess@b52:~/.ssh () $ ls
authorized_keys  config  known_hosts
[dimsenv] mboggess@b52:~/.ssh () $ vim authorized_keys
Securely transfer DIMS RSA keys from local machine to remote machine
Keys are located in
~/.ssh/and should be named:dims_${dimsusername}_rsafor private keydims_${dimsusername}rsa.pubfor public keydims_${dimsusername}_rsa.sigfor signature
Copy all three files from local machine with DIMS RSA keys:
[dimsenv] mboggess@dimsdev2:~ () $ cd .ssh
[dimsenv] mboggess@dimsdev2:~/.ssh () $ scp dims_mboggess_rsa* mboggess@b52.tacoma.uw.edu:/home/mboggess/.ssh/
dims_mboggess_rsa                                     100% 1675     1.6KB/s   00:00
dims_mboggess_rsa.pub                                 100%  403     0.4KB/s   00:00
dims_mboggess_rsa.sig                                 100%   82     0.1KB/s   00:00
Check on remote machine:
[dimsenv] mboggess@b52:~/.ssh () $ ls
authorized_keys  dims_mboggess_rsa      dims_mboggess_rsa.sig
config           dims_mboggess_rsa.pub  known_hosts
Note
This solves the “second hop issue”: a user can access machines one hop
away because the necessary keys are available on their local machine,
but when trying to go one hop further, keys are not available. For
example, I can log in to b52 just fine, but when I try to run
dims.git.syncrepos, which requires access to
git.devops.develop, I ran into trouble because my keys
were not on b52.
3.5.3. Sync Repos on Remote Machine
There probably will not be a .mrconfig file on the remote machine, so you must create an empty file with that name before you sync repos or the command will fail.
Failure when running dims.git.syncrepos because no .mrconfig:
<snip>

[+++] Adding Repo[49] umich-botnets to /home/mboggess/dims/.mrconfig and checking it out.
cp: cannot stat ‘/home/mboggess/dims/.mrconfig’: No such file or directory

[+++] Updated 49 of 49 available repos.
[+++] Summary of actions for repos that were updated:
- Any changes to branches at origin have been downloaded to your local repository
- Any branches that have been deleted at origin have also been deleted from your local repository
- Any changes from origin/master have been merged into branch 'master'
- Any changes from origin/develop have been merged into branch 'develop'
- Any resolved merge conflicts have been pushed back to origin
[+++] Added 49 new repos: ansible-inventory ansible-playbooks cif-client cif-java configs dims dims-ad dims-adminguide dims-asbuilt dims-ci-utils dims-dashboard dims-db-recovery dims-devguide dims-dockerfiles dims-dsdd dims-jds dims-keys dims-ocd dims-packer dims-parselogs dims-sample-data dims-sr dims-supervisor dims-svd dimssysconfig dims-test-repo dims-tp dims-tr dims-vagrant ELK fuse4j ipgrep java-native-loader java-stix-v1.1.1 mal4s MozDef ops-trust-openid ops-trust-portal poster-deck-2014-noflow prisem prisem-replacement pygraph rwfind sphinx-autobuild stix-java ticketing-redis tsk4j tupelo umich-botnets
[+++] Updating repos took 00:00:00
Looking in ~/dims/ for .mrconfig:
[dimsenv] mboggess@b52:~ () $ cd dims
[dimsenv] mboggess@b52:~/dims () $ ls -a
.  ..  git
Create .mrconfig
[dimsenv] mboggess@b52:~/dims () $ touch .mrconfig
[dimsenv] mboggess@b52:~/dims () $ ls -a
.  ..  git  .mrconfig
Run dims.git.syncrepos
[dimsenv] mboggess@b52:~/dims () $ cd ..
[dimsenv] mboggess@b52:~ () $ dims.git.syncrepos
[+++] Found 49 available repos at git@git.devops.develop
[+++] Adding Repo[1] ansible-inventory to /home/mboggess/dims/.mrconfig and checking it out.
mr checkout: /home/mboggess/dims/git/ansible-inventory
Cloning into 'ansible-inventory'...
remote: Counting objects: 481, done.
remote: Compressing objects: 100% (387/387), done.
remote: Total 481 (delta 237), reused 122 (delta 65)
Receiving objects: 100% (481/481), 62.36 KiB | 0 bytes/s, done.
Resolving deltas: 100% (237/237), done.
Checking connectivity... done.
Using default branch names.

Which branch should be used for tracking production releases?
   - master
Branch name for production releases: [master]
Branch name for "next release" development: [develop]

How to name your supporting branch prefixes?
Feature branches? [feature/]
Release branches? [release/]
Hotfix branches? [hotfix/]
Support branches? [support/]
Version tag prefix? []

mr checkout: finished (1 ok)

<snip>

[+++] Updated 49 of 49 available repos.
[+++] Summary of actions for repos that were updated:
- Any changes to branches at origin have been downloaded to your local repository
- Any branches that have been deleted at origin have also been deleted from your local repository
- Any changes from origin/master have been merged into branch 'master'
- Any changes from origin/develop have been merged into branch 'develop'
- Any resolved merge conflicts have been pushed back to origin
[+++] Added 49 new repos: ansible-inventory ansible-playbooks cif-client cif-java configs dims dims-ad dims-adminguide dims-asbuilt dims-ci-utils dims-dashboard dims-db-recovery dims-devguide dims-dockerfiles dims-dsdd dims-jds dims-keys dims-ocd dims-packer dims-parselogs dims-sample-data dims-sr dims-supervisor dims-svd dimssysconfig dims-test-repo dims-tp dims-tr dims-vagrant ELK fuse4j ipgrep java-native-loader java-stix-v1.1.1 mal4s MozDef ops-trust-openid ops-trust-portal poster-deck-2014-noflow prisem prisem-replacement pygraph rwfind sphinx-autobuild stix-java ticketing-redis tsk4j tupelo umich-botnets
[+++] Updating repos took 00:07:19
3.5.4. Build Python Virtual Environment on Remote Machine
When logged in to remote machine, change directories to location of virtual environment build scripts:
[dimsenv] mboggess@b52:~ () $ cd $GIT/ansible-playbooks
- Run the DIMS command to build the system virtualenv for access to
system DIMS commands:
[dimsenv] mboggess@b52:~/dims/git/ansible-playbooks (develop) $ ./dimsenv.install.system
Run
exec bashto refresh:[dimsenv] mboggess@b52:~/dims/git/ansible-playbooks (develop) $ exec bash [+++] DIMS shell initialization [ansible-playbooks v1.2.107] [+++] Sourcing /opt/dims/etc/bashrc.dims.d/bashrc.dims.network ... [+++] OpenVPN status: * VPN '01_uwapl_daveb52' is running * VPN '02_prsm_dave-prisem-2' is running [+++] Sourcing /opt/dims/etc/bashrc.dims.d/bashrc.dims.virtualenv ... [+++] Activating virtual environment (/home/mboggess/dims/envs/dimsenv) [ansible-playbooks v1.2.107] [+++] (Create file /home/mboggess/.DIMS_NO_DIMSENV_ACTIVATE to disable) [+++] Virtual environment 'dimsenv' activated [ansible-playbooks v1.2.107] [+++] Installed /home/mboggess/dims/envs/dimsenv/bin/dimsenv.install.user [+++] Installed /home/mboggess/dims/envs/dimsenv/bin/dimsenv.install.system [+++] Sourcing /opt/dims/etc/bashrc.dims.d/git-prompt.sh ... [+++] Sourcing /opt/dims/etc/bashrc.dims.d/hub.bash_completion.sh ...
Line “Activating virtual environment” should have path to dimsenv/ via $HOME/dims.
Run DIMS command to build user virtualenv:
[dimsenv] mboggess@b52:~/dims/git/ansible-playbooks (develop) $ ./dimsenv.install.user
Run
exec bashto refresh again.Check $HOME/dims/envs/ for dimsenv/ and activation scripts:
[dimsenv] mboggess@b52:~/dims/git/ansible-playbooks (develop) $ ls $HOME/dims/envs
dimsenv          initialize    postdeactivate  postmkvirtualenv  preactivate    premkproject     prermvirtualenv
get_env_details  postactivate  postmkproject   postrmvirtualenv  predeactivate  premkvirtualenv
3.5.5. Transfer Config Files
Your account personalization files need to be transferred to the remote machine as well, including .gitconfig, .vimrc, and .bash_aliases.
From the local machine:
[dimsenv] mboggess@dimsdev2:~ () $ scp .bash_aliases mboggess@b52.tacoma.uw.edu:/home/mboggess/
.bash_aliases                                 100%  510     0.5KB/s   00:00
[dimsenv] mboggess@dimsdev2:~ () $ scp .gitconfig mboggess@b52.tacoma.uw.edu:/home/mboggess/
.gitconfig                                    100%  847     0.8KB/s   00:00
[dimsenv] mboggess@dimsdev2:~ () $ scp .vimrc mboggess@b52.tacoma.uw.edu:/home/mboggess/
.vimrc                                        100%  314     0.3KB/s   00:00
On the remote machine, check for files and refresh bash:
[dimsenv] mboggess@b52:~ () $ ls -a
.   .ansible       .bash_history  .bashrc  dims              .gitconfig  .profile      .ssh      .vimrc
..  .bash_aliases  .bash_logout   .cache   examples.desktop  .mrtrust    .python-eggs  .viminfo
[dimsenv] mboggess@b52:~ () $ exec bash
3.6. JIRA Onboarding
3.6.1. Adding LDAP Entries for Users
We have an OpenLDAP server which serves as an authorization backend for our LemonLDAP SSO. Authentication is provided by OpenID Connect. It also serves as the user directory for JIRA.
Note
You will need an application to be able to edit/add directory information. Apache Directory Studio is cross platform and recommended. Ideally, the Trident portal would directly feed these records, rather than requiring someone follow the lengthly steps outlined below using a more laborious graphical user interface.
An Ansible role apache-directory-studio is used to install this
application. Once this role has been applied, you can start the
GUI with the following command:
$ apache-directory-studio &
The first time the program is run, a connection must be configured for the project LDAP server. Follow the instructions in Add New Connection to Apache Directory Studio to create the initial connection.
Attention
When starting Adobe Directory Studio from the command line, you must add the&to run the program in the background. Since this is not a terminal program that takes input at the command line, failing to background the process will result in the shell not returning to a command prompt until after you quit the application, which novice Linux users unfamiliar with command shells and background processes will interpret as the terminal window being “hung” or “frozen”.
After Adobe Directory Studio has been installed and configured, start the application. You should see the initial connection in the list:
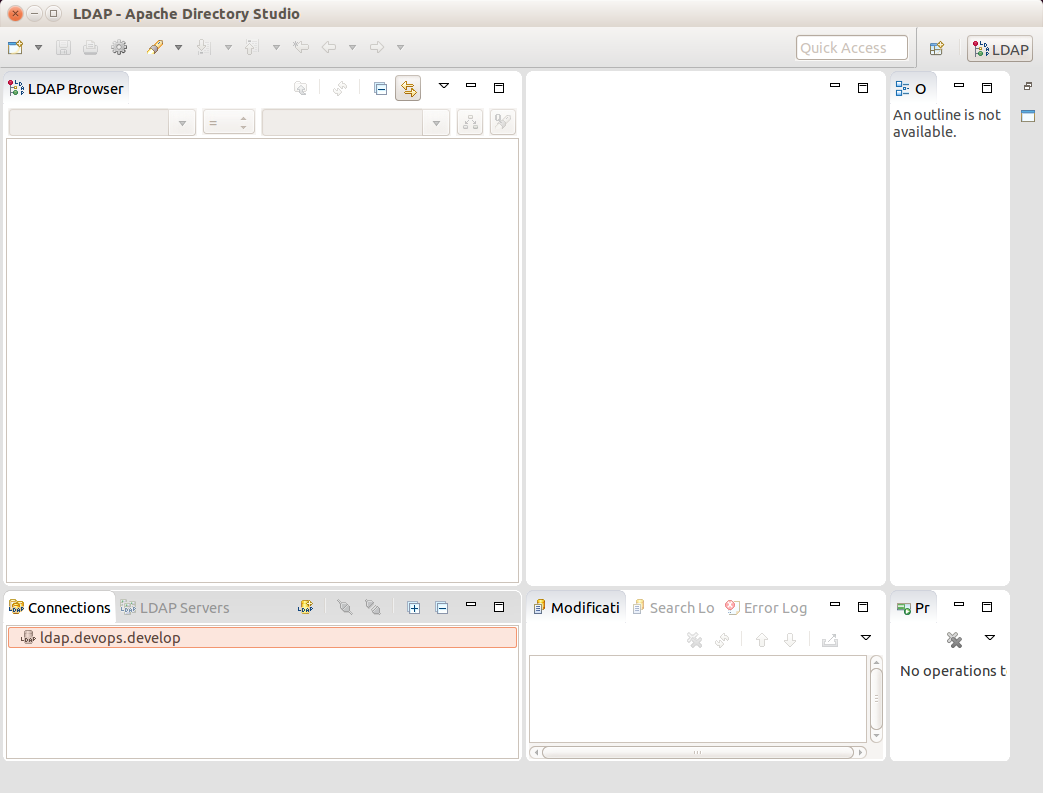
Initial LDAP Browser Connection list
Click on the connection in the Connections list. (If you followed the instructions in Add New Connection to Apache Directory Studio, the connection you want is labelled
ldap.devops.develop.Click to open DIT in the tree.
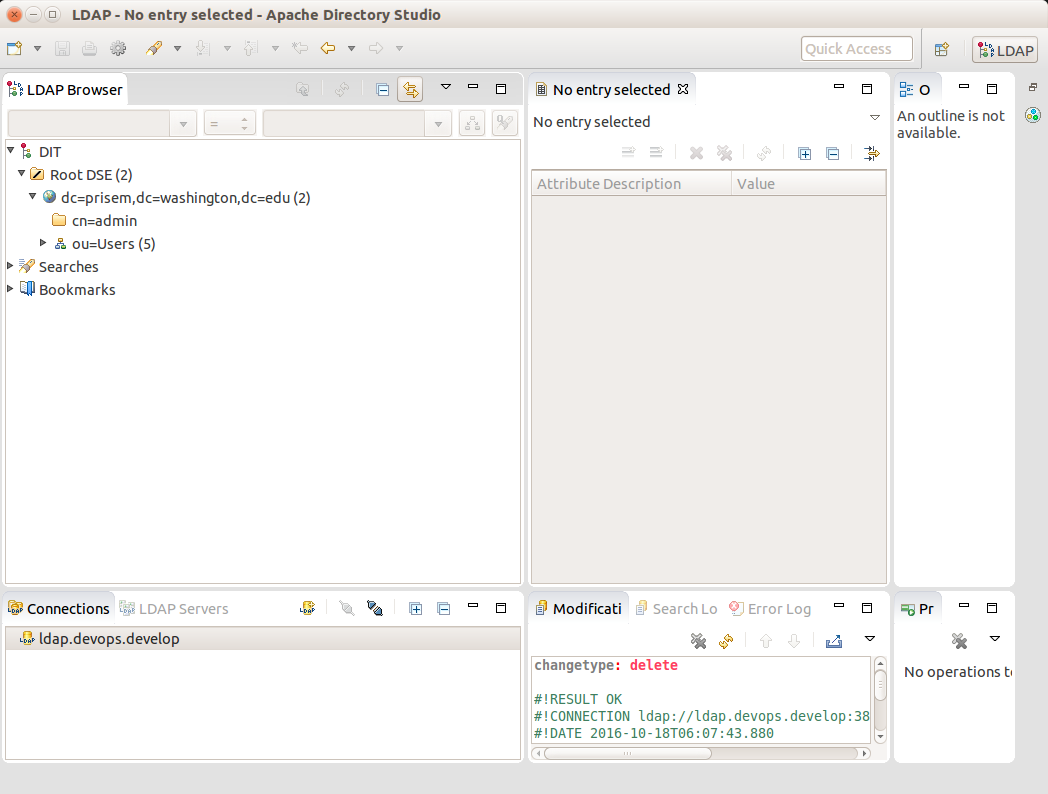
DIT for connection
ldap.devops.developClick to open dc=prisem,dc=washington,dc=edu in the tree.
Click to open ou=Users in the tree. The current users will display.
Right-click ou=Users to open context menu and click New -> New Entry.
Select Use existing entry as template. Click Browse button to open the ou and select a member.
Click Next.
In the Object Classes dialog, do not add any more object classes. Just click Next.
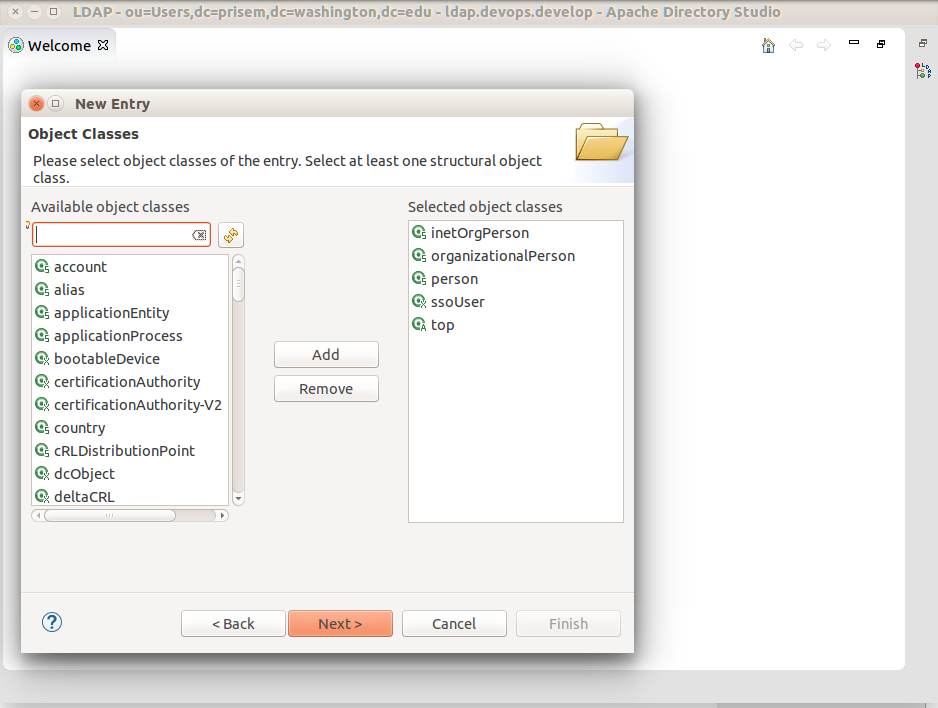
Object Classes (skip)
In the Distinguished Name dialog, replace the template user’s name you selected with the new user’s name. The DN preview should then look like cn=new_user_name,ou=Users,dc=prisem,dc=washington,dc=edu.
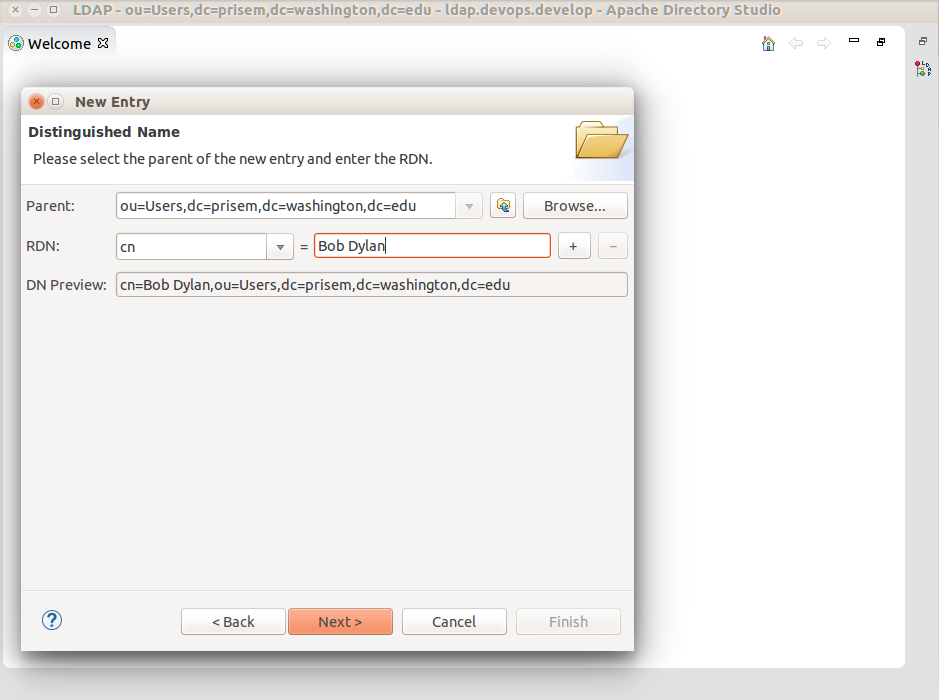
Distinguished Name dialog
Click Next.
In the Attribute Description dialog (center panel), replace the template values with the values for your new user. Double click each Valuefield to edit.
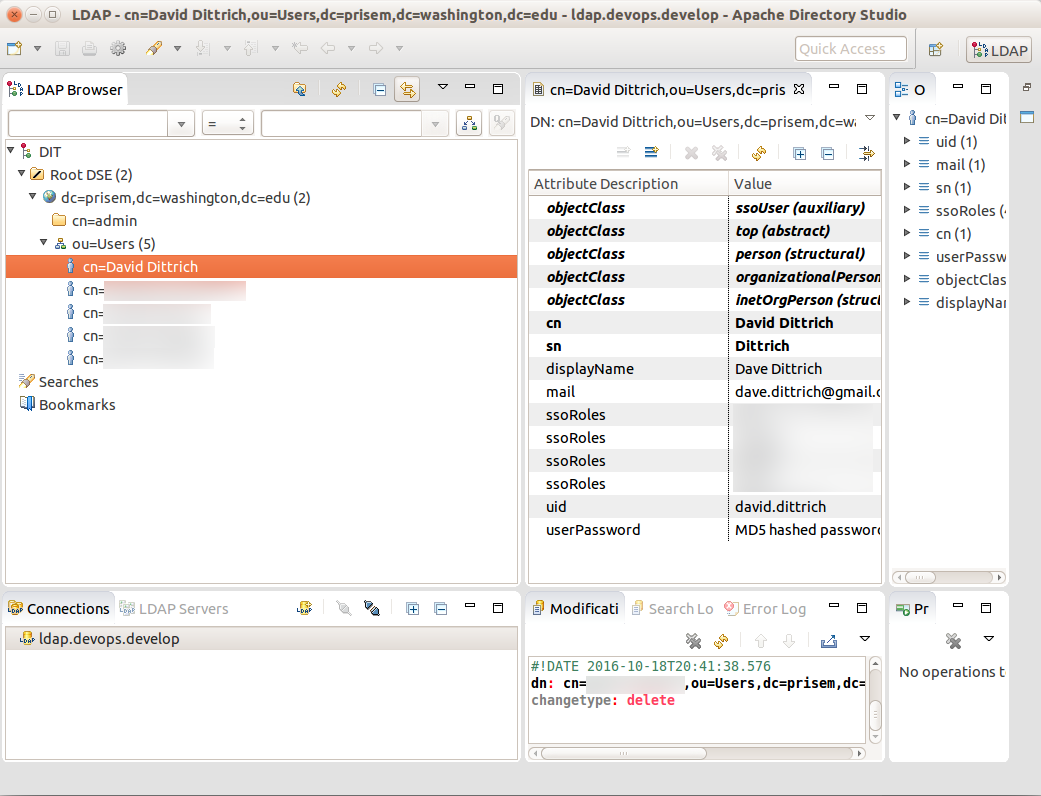
Attribute Description dialog
Note
Tab to the next field or the value you entered might not be saved.
- sn - Enter the user’s Last name
- displayName - Enter the user’s First and Last name
- mail - Enter the user’s Gmail address using for authenticating with OpenID Connect authentication.
- ssoRoles - These are used for testing right now (you can leave them as is.)
- uid - enter the uid in the form firstname.lastname
- userPassword - enter a password. It will be hashed.
Click Finish.
Click on the new member and verify the fields. Edit any that were not entered correctly.
Exit the application when your are done and have the user test the authentication
by going to http://jira.prisem.washington.edu/ and select Google in the
the OpenID Login dialog:
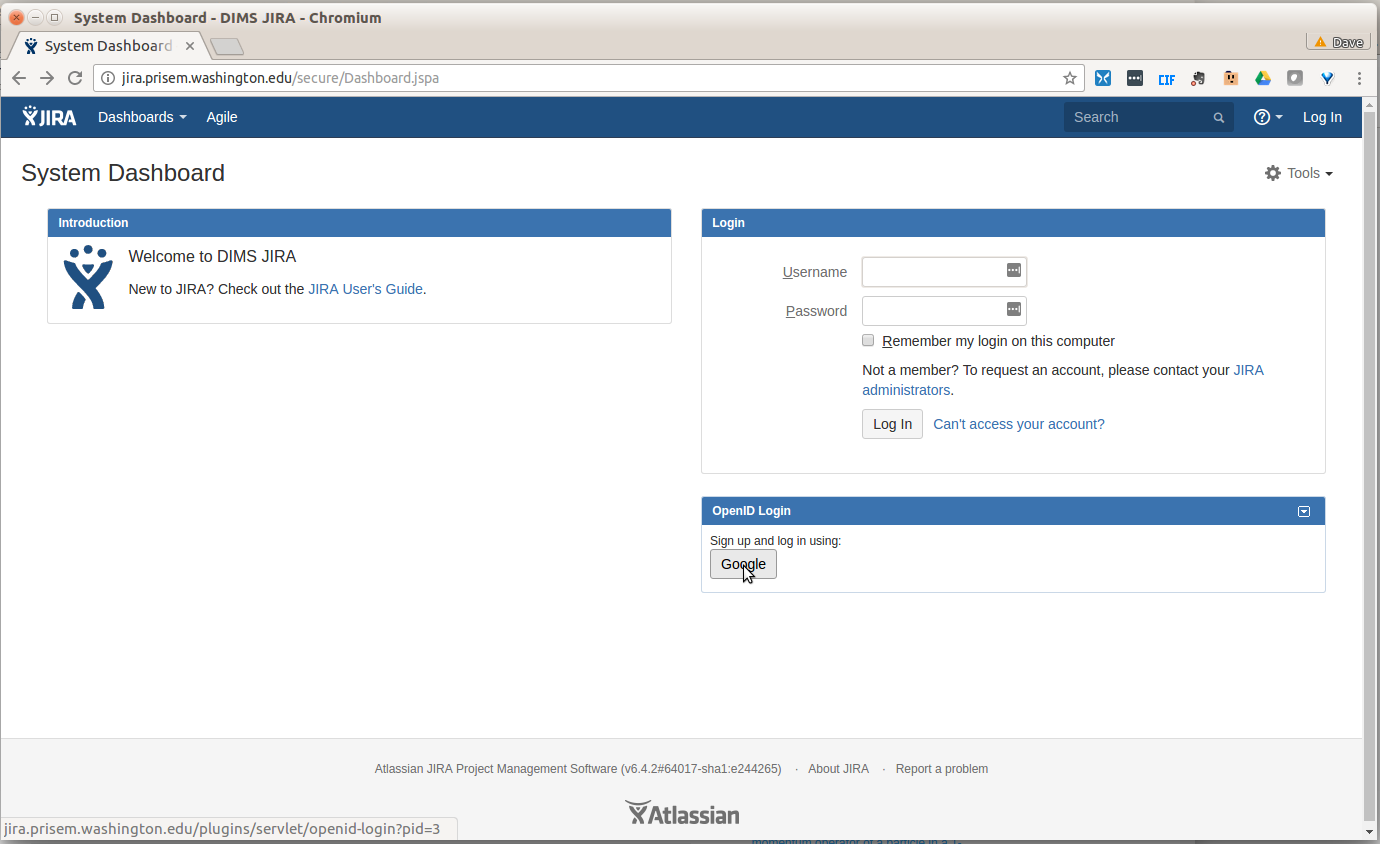
JIRA Dashboard Login screen
Note
Google OpenID requires that the domain name of the system requesting authentication
have a valid public DNS name. Even though you can connect to the system from within the
VPN/VLAN via a non-public DNS name lookup, the authentication will not work. For this
reason, the name jira.prisem.washington.edu is mapped in the split-horizon DNS
mappings.
If the user has not recently authenticated to Google, they will be prompted for their password and/or second-factor authentication information. Once authenticated, the JIRA Dashboard will pop up.
3.6.2. Adding Users to JIRA Groups
After adding the user to JDAP, JIRA will show them as a valid user, but they will have no access once logged in.
To anable access to JIRA necessary to add and modify tickets, an administrator needs to grant access. Figure adminpanel shows the Administration panel where these changes will be made.
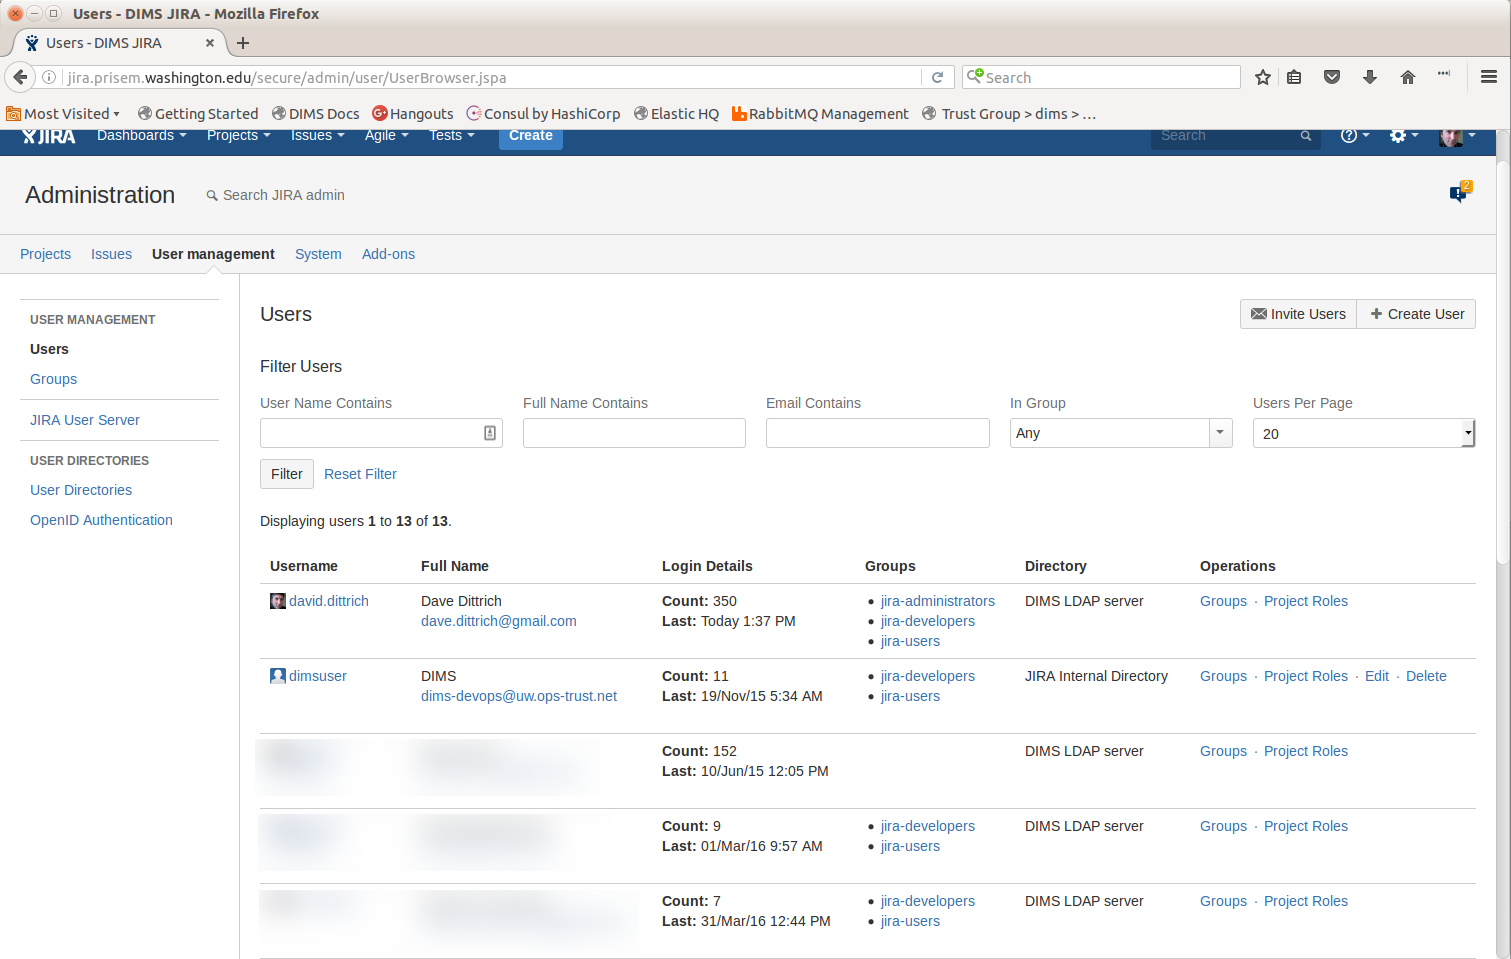
JIRA Administration Panel
To grant a user “read-only” access, they need to be a member of the jira-users
group. To grant “read/write” access, they need to also be a member of the
jira-developers group. Only users with jira-adminisatrators action
can make these changes.
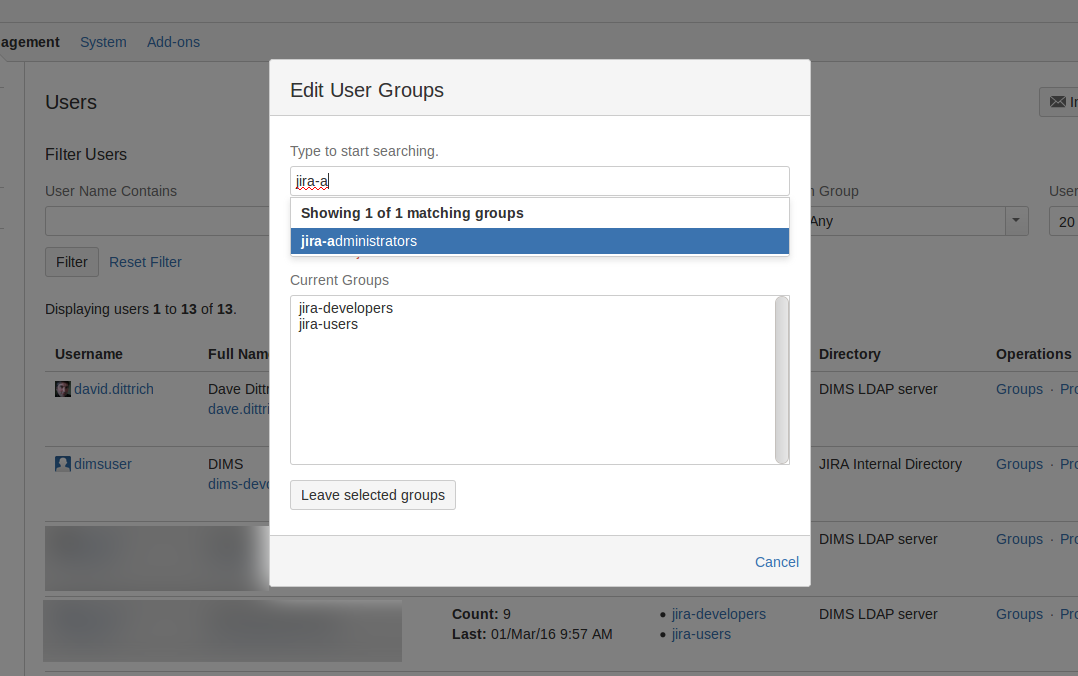
To change access, select Groups under the Operations column of the user table. The Edit User Groups dialog will pop up as shown in Figure adminpanel. Type into the search box to find options, then select the group from the list to add that group to the user’s permission.
JIRA Edit User Groups dialog